Tag: asphalt installation

  • What’s Included in a Driveway Paving Quote?

    What’s Included in a Driveway Paving Quote?

    A driveway paving quote should tell you much more than the final price. It should explain what the contractor plans to do, what materials will be used, what prep work is included, and what is not covered. If the quote is vague, you may be comparing numbers that do not mean the same thing.

    This guide breaks down the common pieces of a paving quote so you know what to look for before saying yes. A clear quote should line up with the contractor’s asphalt paving services and the actual needs of your residential driveway.

    What's Included in a Driveway Paving Quote?
    A good paving quote should read like a clear scope of work, not just a price.

    Key Takeaways

    A strong driveway paving quote should be specific enough to show the scope, materials, prep work, exclusions, and payment terms.

    Quick answer

    • Look for scope, materials, thickness, and prep work.
    • Make sure exclusions, cleanup, and disposal are listed.
    • Confirm payment terms and warranty details.
    • Ask for a revised written quote if anything important is vague.
    • Read the quote like a scope of work, not just a number.

    The basic parts of a paving quote

    Project description

    This should explain what area is being paved, how large it is, and whether the contractor is replacing, resurfacing, repairing, or installing a new driveway.
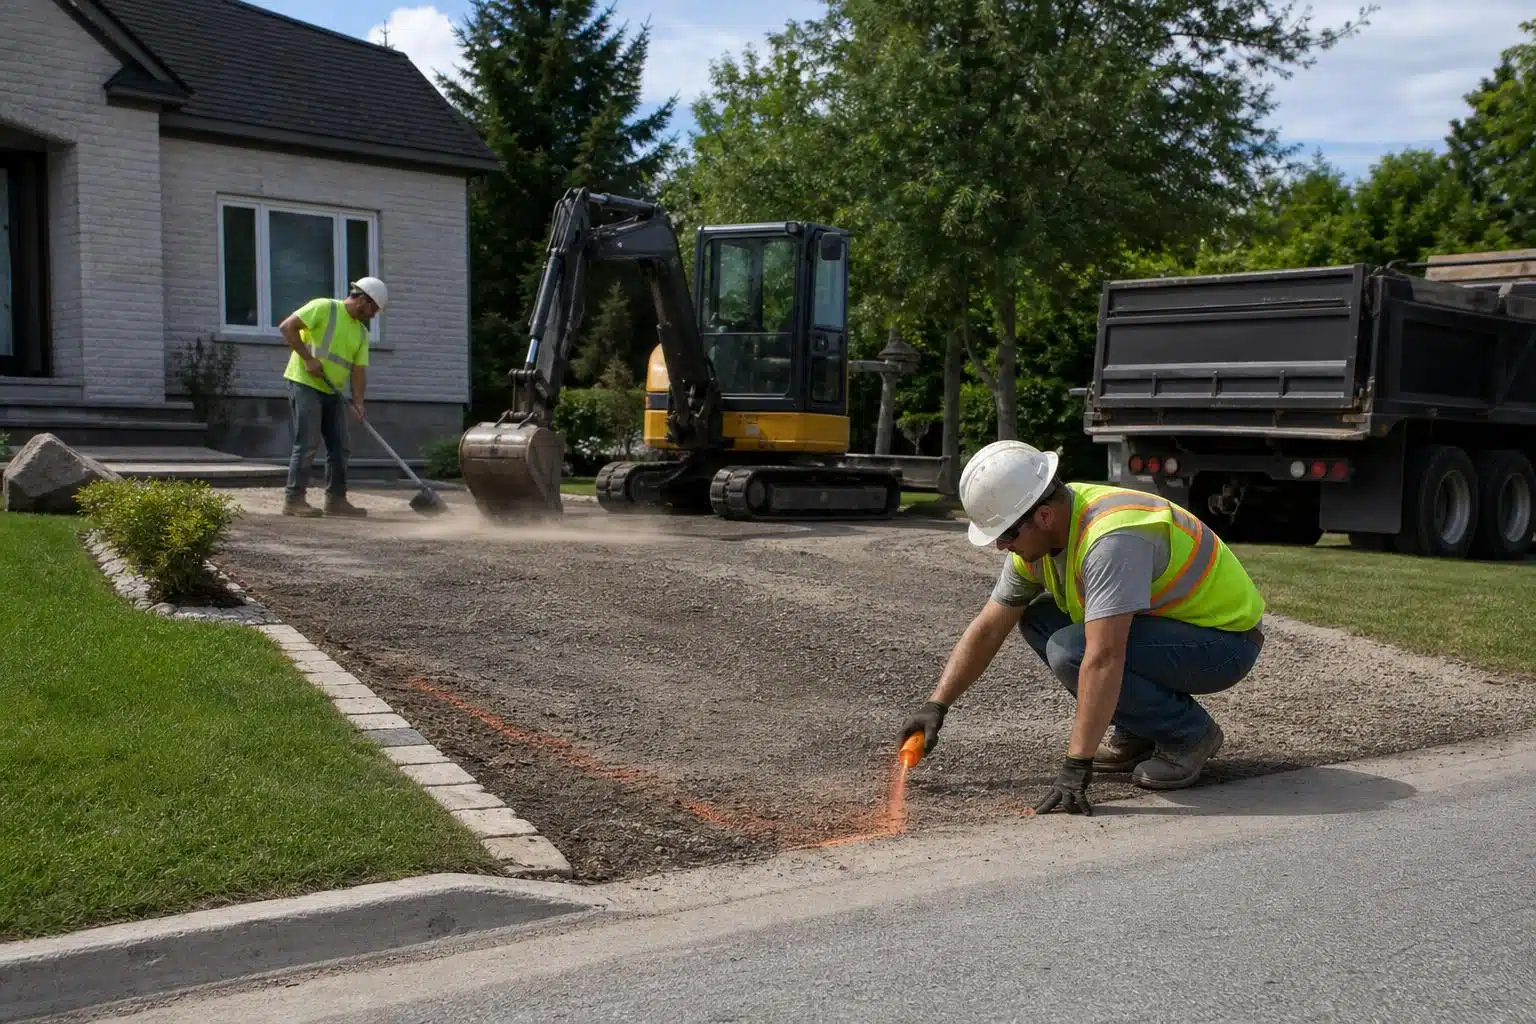
    Site preparation

    Prep work may include excavation, base repair, stone placement, compaction, and asphalt grading. This is one of the most important sections of the quote because it affects how long the driveway lasts.

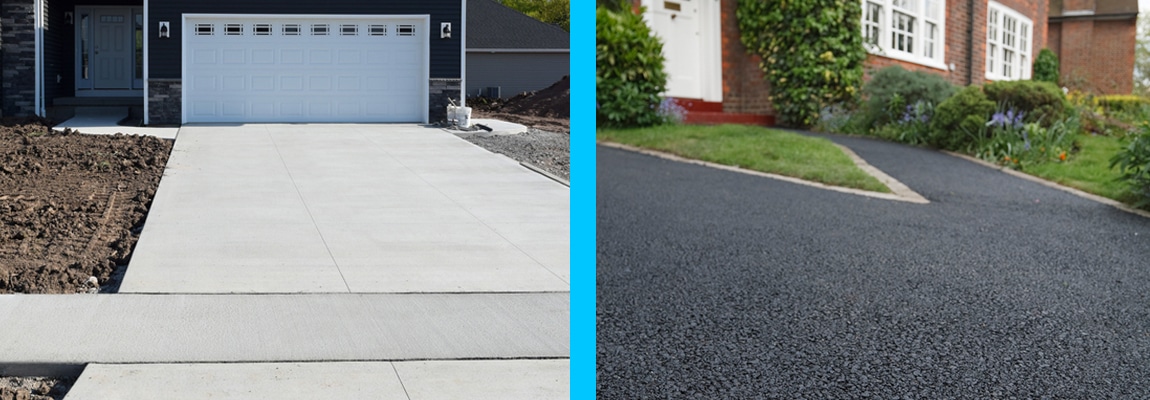
    Asphalt or material specs

    The quote should identify the material type and any thickness details that matter to the job. If it is tied to new asphalt driveway installation, the written scope should make that clear.

    Labor and equipment

    A quote should reflect the crew, machinery, and time required to complete the work correctly.

    Cleanup and disposal

    Old asphalt, excess dirt, and job debris should either be included or clearly excluded.

    HomeGuide notes that paving estimates should list base prep, installation, and cleanup so homeowners can compare offers more accurately: HomeGuide driveway cost guide.

    Common items that may be excluded

    Unseen base problems

    If the contractor finds soft spots or hidden drainage issues during excavation, those repairs may not be included in the original quote.

    Permit fees

    Some jobs need permits depending on local rules and driveway location.

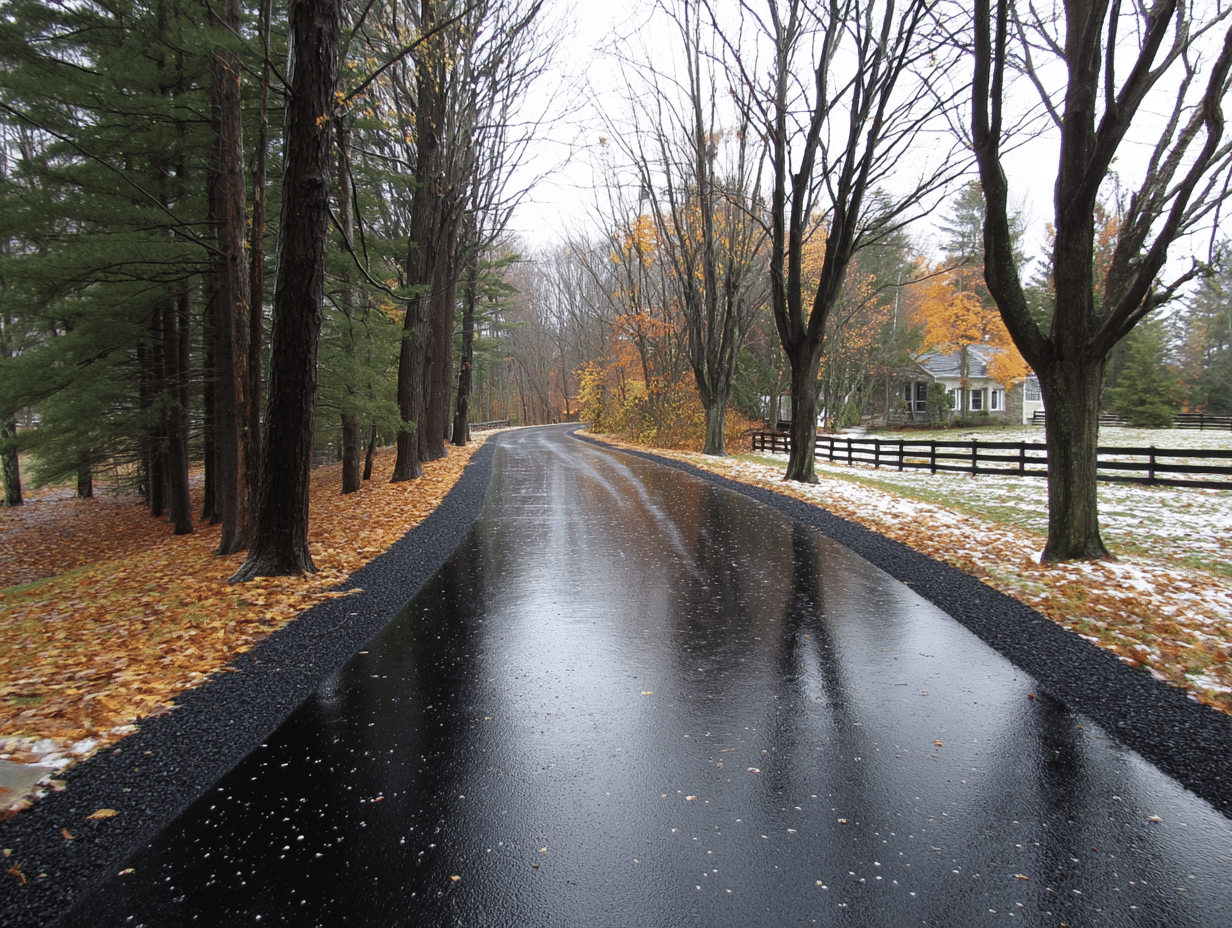
    Drainage corrections

    If the slope needs to be changed or water needs to be redirected, that work may be separate.

    Extra haul-off or disposal

    Unexpected debris can raise the total cost if disposal is not included.

    Sidewalk, apron, or transition work

    The quote should say whether aprons, transitions, edging, or nearby repairs are part of the job.

    Why details matter so much

    Two quotes can look similar and still describe very different jobs. One may include a deeper base and proper cleanup. Another may be a bare minimum surface install. That is why a quote should be read like a scope document.

    The FTC recommends getting key promises in writing so homeowners can compare offers and avoid misunderstandings: FTC home improvement guidance.

    What to ask if the quote is vague

    • Is excavation included?
    • What thickness will be installed?
    • How is the base being prepared?
    • Is cleanup part of the price?
    • Are there any likely extra charges?
    • What happens if hidden site issues are found?

    Typical quote formats you may see

    Some contractors use a short estimate with a few line items. Others provide a more detailed scope sheet. The format matters less than the clarity. A useful quote should still show the project area, prep work, materials, exclusions, and any conditions that could change the final price.

    If drainage is part of the concern, the guide to driveway drainage solutions can help explain why slope and runoff deserve attention before the quote is approved.

    When a revised quote is the right move

    Ask for a revised quote if the contractor leaves out excavation, cleanup, thickness, drainage, or any condition that clearly affects the scope. You should also ask for a revision if the quote makes promises that are hard to measure.

    A better quote makes the job easier to approve, schedule, and compare.

    Signs the quote is detailed enough

    A solid quote usually reads like a mini project plan. You should be able to tell what area is being paved, how the crew will prepare it, what material is going down, what cleanup is included, and what happens if a hidden issue appears.

    Common mistakes homeowners make

    The biggest mistake is assuming every quote means the same thing. Another is focusing only on the final number and ignoring exclusions. Homeowners also forget to ask whether the quote is based on a site visit, when payment is due, and who handles cleanup.

    Those small details can make a big difference once work begins.

    FAQs

    Is a cheap quote always missing something?

    Not always, but it often is. The only way to know is to compare the line items.

    Should cleanup be included?

    Usually yes, or it should be clearly listed as excluded.

    Do I need the quote in writing?

    Yes. Written quotes are easier to compare and safer to approve.

    What if the contractor says the details are obvious?

    They are not obvious if you are the one paying for the work. Ask for the details anyway.

    Can I negotiate the quote?

    You can ask questions, but first make sure you understand exactly what is being priced.

    Read the quote like a scope of work

    A good quote tells you what is included, what is excluded, and what kind of driveway you will actually get. If you want a clear written quote for your property, contact Maisano Brothers Inc. or request an estimate.

  • How to Prepare Your Property Before Asphalt Paving

    How to Prepare Your Property Before Asphalt Paving

    If you’re planning a new driveway, resurfacing an older surface, or paving a parking area, the work starts before the asphalt truck arrives. In this guide, you’ll learn the seven prep steps that make a paving job go smoother: clearing access, confirming scope, handling drainage, marking utilities, protecting nearby surfaces, coordinating timing, and checking the site one last time before work begins.

    Good prep does more than save time. It helps the crew set the right elevations, avoid conflicts with buried or fragile fixtures, and finish a cleaner, more durable surface.

    Why prep matters before the first load arrives

    Asphalt paving is a construction project, not just a material drop. The better the site is prepared, the easier it is for the contractor to grade the surface correctly, complete any needed base repair, and place a smooth overlay when that is the right solution.

    Preparation also helps reduce delays, vehicle conflicts, utility problems, cleanup issues, and confusion about what is included in the job. A few hours of planning can save a lot of backtracking later.

    1. Clear the work area

    Remove anything that could block equipment or slow the crew down.

    That usually includes:

    • cars and trucks
    • basketball hoops
    • planters
    • patio furniture
    • trailers
    • storage items
    • trash cans

    If the crew cannot reach the paving area cleanly, the project can stall before it starts. Clearing the site also gives the contractor room to work edges, transitions, and corners without damage.

    2. Confirm the scope before paving day

    The most common project problems start with assumptions. Before the crew arrives, make sure everyone agrees on what is being done and what is not.

    Ask:

    • Is this a new install, an overlay, or a repair?
    • Are base repairs included?
    • Will old material be removed?
    • Is cleanup included?
    • Who handles striping or markings on a commercial site?

    This conversation matters because the right prep depends on the project type. A simple residential driveway needs a different setup than a commercial lot with traffic control, multiple users, or phased work.

    3. Pay attention to grading and drainage

    Water is one of asphalt’s biggest enemies, so the site needs to shed it correctly. When the surface holds water, the pavement wears faster and weak spots show up sooner.

    Walk the property and point out:

    • low spots
    • soft spots
    • areas that already collect water
    • edge breakdown
    • runoff paths
    • places where a slope feels wrong

    If you’re dealing with a problem area, ask whether grading or additional base repair should be included before paving. Even a great asphalt surface will struggle if the water has nowhere to go.

    4. Mark utilities and protect fixtures

    If the work involves digging, edge work, or any kind of deeper prep, utility markings matter.

    Before paving day:

    • call 811 if digging is part of the job
    • identify sprinkler heads, drain covers, or landscape lighting
    • point out buried service lines if you know their location
    • mark anything fragile or hidden near the work zone

    The official 811 Before You Dig guidance exists for a reason: buried lines are easy to miss and expensive to hit. If the site also has drains, lights, or decorative edges, flag those too so the crew can protect them.

    5. Make access and staging easy

    The crew needs a clear path for trucks, rollers, and handwork.

    Check for:

    • locked gates
    • low branches
    • narrow entrances
    • parked vehicles nearby
    • obstacles along the route in and out
    • areas where material or equipment can be staged

    If access is tight, tell the contractor ahead of time so they can plan for truck position, equipment layout, and turning room. Small access problems can slow a job down fast.

    6. Coordinate people, timing, and weather

    If the property is shared or busy, timing matters almost as much as the paving itself.

    For example:

    • tell tenants when vehicles must be moved
    • notify employees or customers about closure windows
    • keep deliveries away from paving time
    • make sure someone is available onsite to answer questions
    • watch the forecast and build in flexibility for weather delays

    The best paving crews can work efficiently, but they still need the site to be ready. Coordination keeps the job from turning into a stop-and-start mess.

    7. Protect landscaping and nearby surfaces

    If the paving area sits near grass, beds, fencing, or finished concrete, protect those areas before work starts.

    Good paving crews are careful, but it helps to point out:

    • fresh landscaping
    • fragile edging
    • sprinkler heads
    • decorative stone
    • garage aprons
    • walkways

    A quick walk-through before work starts is usually enough to catch trouble spots. For a public utility-focused reference, 811 Before You Dig explains why buried-line marking matters before excavation starts.

    Residential vs. commercial prep

    Residential prep is usually simpler: clear the driveway, move vehicles, and give the crew access. If this is a home project, residential paving is a good place to see how that work fits into the bigger project.

    Commercial prep usually needs more coordination:

    • traffic control
    • tenant notices
    • staging areas
    • reopening plans
    • after-hours scheduling
    • signage or striping coordination

    For larger sites, commercial paving is the better fit.

    The bigger the site, the more important the prep plan becomes.

    Common mistakes to avoid

    • leaving vehicles in the work area
    • assuming the contractor knows where everything is buried
    • forgetting to plan for rain or weather delays
    • not telling occupants when the site will be unavailable
    • failing to ask what prep work is included in the estimate
    • skipping a final walk-through before the crew starts

    FAQs

    How far in advance should I prepare my property?

    For most residential projects, a day or two is enough. Larger commercial jobs may need more lead time because of traffic control, tenant coordination, or phased access.

    Do I need to remove everything from the driveway or parking area?

    Yes. Anything inside the work zone should be moved before the crew arrives so equipment, material, and handwork can move without interruption.

    Should I warn my neighbors?

    If access, noise, or temporary parking changes may affect them, yes. A quick heads-up can prevent complaints and confusion, especially in tight neighborhoods or shared lots.

    What if I find a drainage issue before paving?

    Bring it up before the job starts. Drainage problems are much easier to correct during prep than after asphalt is already in place, and the contractor can decide whether grading or repair is needed.

    Does prep differ for resurfacing and new paving?

    Yes. New paving usually needs more site preparation than a simple overlay because the crew may need to adjust elevations, fix the base, or correct drainage before the new surface goes down.

    What should I ask the contractor before paving day?

    Ask what prep work they expect from you, what they will handle, and whether any site issues could change the scope. That short conversation often prevents the biggest surprises.

    Sources

    Are you ready for paving day?

    If you want a paving project to go smoothly, the prep matters. Maisano Brothers Inc. can review the site, confirm the scope, and help you plan the work the right way. If you’re ready to move forward, contact us and we’ll take it from there.

  • How Much Does It Cost to Pave a Driveway in 2026?

    How Much Does It Cost to Pave a Driveway in 2026?

    Key Takeaways
    • Average asphalt driveway cost in 2026: $4–$10 per sq ft
    • Total cost depends heavily on site prep and base condition
    • Asphalt is more cost-effective than concrete upfront
    • Repairs and resurfacing can reduce costs if the base is stable
    • Proper installation matters more than choosing the lowest price

    The cost to pave a driveway in 2026 depends on several factors, including size, site conditions, materials, and the amount of preparation required. While many homeowners look for a quick price per square foot, the reality is that no two driveways are exactly the same.

    Understanding what goes into driveway pricing can help you budget accurately and avoid costly surprises during your project. If you’re planning a new installation, explore our full range of asphalt paving services.

    Average Cost to Pave a Driveway in 2026

    In 2026, the average cost to pave an asphalt driveway typically ranges between $4 to $10 per square foot, depending on the complexity of the job.

    Driveway Cost Breakdown (2026)

    Project Type Cost Per Sq Ft Typical Total Cost
    Basic Installation $4 – $6 $3,000 – $5,000
    Standard Residential $6 – $8 $4,000 – $7,000
    Premium / Complex $8 – $10+ $6,000 – $10,000+

    For an approximate estimate based on your property, use our asphalt cost calculator.

    What Affects the Cost of Paving a Driveway?

    1. Site Preparation and Excavation

    Removing old pavement, grading, and preparing the base are some of the biggest cost drivers. Proper asphalt grading ensures long-term durability.

    2. Drainage and Base Condition

    Poor drainage leads to early failure. Many issues stem from improper installation, which is a leading cause of asphalt deterioration.

    3. Asphalt Thickness

    Thicker asphalt increases durability but also cost. This is especially important for high-use driveways.

    4. Accessibility and Layout

    Steep slopes, tight access, or complex layouts can increase labor and equipment costs.

    5. Climate and Location

    Regional conditions like the Connecticut climate affect both installation methods and long-term performance.

    Asphalt vs Concrete Driveway Costs

    Asphalt is generally more affordable upfront, while concrete offers different long-term benefits. Learn more in our guide to asphalt vs concrete driveways.

    Asphalt vs Concrete Comparison

    Feature Asphalt Concrete
    Cost $4 – $10 / sq ft $8 – $15+ / sq ft
    Lifespan 15–25 years 25–40 years
    Maintenance Moderate Low
    Best Climate Cold climates Warm climates
    [elementor-template id=”4630″]

    Repair vs Replacement Costs

    Not every driveway needs full replacement. Some can be repaired or resurfaced depending on the condition. Learn more about resurfacing vs replacement.

    Repair vs Replacement Cost Comparison

    Service Cost Best For
    Crack Filling $1 – $3 / linear ft Minor damage
    Pothole Repair $150 – $600+ Localized damage
    Resurfacing $3 – $7 / sq ft Solid base
    Full Replacement $4 – $10+ / sq ft Severe damage

    If you’re dealing with damage, check out our guide on pothole repair and patching.

    How Maintenance Impacts Cost

    Preventative maintenance is the easiest way to reduce long-term costs. Regular sealcoating protects your investment and delays replacement.

    Winter conditions also play a major role. Learn how to protect your driveway with proper snow removal techniques and safe salting practices.

    Choosing the Right Contractor

    The contractor you hire has a major impact on cost and longevity. Learn how to choose a reputable asphalt paving contractor before starting your project.

    Conclusion

    The cost to pave a driveway in 2026 typically ranges from $4 to $10 per square foot, but the final price depends on preparation, materials, and site conditions.

    Getting the right estimate is the best way to plan your project. Request a free estimate or use our asphalt cost calculator to get started.

    [elementor-template id=”4630″]

    Frequently Asked Questions

    How much does a driveway cost in 2026?

    Most asphalt driveways cost between $4 and $10 per square foot depending on site conditions and scope.

    What is the cheapest way to pave a driveway?

    Resurfacing is typically cheaper than full replacement if the base is still stable.

    How long does an asphalt driveway last?

    20–30 years with proper maintenance like sealcoating and crack repair.

    Is asphalt cheaper than concrete?

    Yes, asphalt typically costs less upfront but may require more maintenance.

    What increases driveway paving cost the most?

    Excavation, poor soil conditions, drainage issues, and base repair are the biggest cost drivers.

  • The Asphalt Paving Process: 9 Steps to Proper Asphalt Installation

    The Asphalt Paving Process: 9 Steps to Proper Asphalt Installation

    Key Takeaways
    • The asphalt paving process includes 9 critical steps from evaluation to final inspection
    • Proper grading, base preparation, and compaction are essential for long-term durability
    • The base and subgrade determine how well the pavement performs over time
    • Skipping steps or cutting corners leads to early failure and costly repairs
    • Regular maintenance after installation extends the life of asphalt significantly

    Installing asphalt is more than just laying down blacktop. A properly paved driveway or parking lot depends on preparation, grading, base construction, and precise installation techniques. When done correctly, asphalt pavement can last 20 years or more. When shortcuts are taken, problems like cracking, potholes, and drainage issues can appear much sooner.

    Whether you’re planning a new asphalt driveway or a commercial paving project, understanding the process helps you recognize quality workmanship and make informed decisions.

    Why the Asphalt Paving Process Matters

    Every step in the paving process plays a role in the long-term performance of your pavement. The surface layer may look smooth and finished, but what’s underneath determines how well it holds up over time.

    Proper asphalt installation ensures strength, drainage, durability, and resistance to wear from traffic and weather conditions.

    Step 1: Site Evaluation and Planning

    Before any work begins, the area is evaluated to determine soil conditions, drainage needs, and the scope of the project. This step identifies potential issues such as poor drainage, unstable subgrade, or grading challenges.

    Step 2: Demolition and Removal

    If replacing an existing driveway or parking lot, the old asphalt is removed. This may involve milling or full excavation depending on the condition of the pavement and base.

    Step 3: Grading and Slope Preparation

    Proper grading and slope preparation is critical to ensure water drains away from the surface. Without correct elevation and pitch, water can pool and lead to premature deterioration.

    This step sets the foundation for long-term performance and prevents future structural issues.

    Step 4: Subgrade Preparation

    The subgrade is the native soil beneath the pavement. It must be properly compacted and stabilized to support the layers above. Weak or soft subgrade conditions can lead to failure regardless of how well the asphalt is installed.

    Step 5: Installing the Base Course

    The base layer provides structural support for the asphalt surface. Typically made of crushed stone or aggregate, it is spread and compacted to create a stable foundation.

    A properly installed base ensures load distribution and prevents shifting or settling over time.

    Step 6: Binder Layer Installation

    The binder layer is a strong asphalt layer that adds structural integrity. It contains larger aggregate and acts as a bridge between the base and the surface layer.

    This layer is especially important in areas with heavier traffic loads.

    Step 7: Surface Course Installation

    The surface course is the top layer of asphalt. It provides a smooth, finished appearance and protects the underlying structure from water and environmental exposure.

    This layer is designed for durability, flexibility, and long-term performance.

    Step 8: Compaction

    Compaction is one of the most critical steps in the entire process. Rollers are used to compress the asphalt, eliminate air voids, and ensure proper density.

    Without proper compaction, the pavement may fail prematurely, leading to cracking and deformation.

    Step 9: Final Inspection and Finishing

    After installation, the surface is inspected to ensure proper grading, smoothness, and compaction. Edges are finished, transitions are cleaned up, and the pavement is prepared for use.

    Once cooled and cured, the asphalt is ready for traffic.

    How Long Does Asphalt Installation Take?

    Most residential driveways can be completed within one to two days, depending on size and site conditions. Larger commercial paving projects may take longer due to additional preparation and structural requirements.

    Common Mistakes That Lead to Early Failure

    • Poor base preparation
    • Improper grading or drainage
    • Insufficient compaction
    • Thin asphalt layers
    • Skipping critical steps in the process

    These issues can lead to cracking, potholes, rutting, and costly repairs.

    How to Extend the Life of Your Asphalt

    After installation, proper maintenance is essential to maximize lifespan.

    • Sealcoat every 2–3 years
    • Fill cracks early
    • Keep water draining away from the surface
    • Avoid heavy loads during early curing

    Routine maintenance protects your investment and delays the need for repairs or replacement.

    Conclusion

    The asphalt paving process is a step-by-step system designed to create a durable, long-lasting surface. Each phase—from site preparation to final compaction—plays a critical role in performance.

    Understanding these steps helps ensure your driveway or parking lot is built to last and performs well for years to come.

    Ready to see these steps in action on your own property? Maisano Brothers Inc. has been installing asphalt driveways across Connecticut since 1967. Request a free estimate for your new driveway installation.

    Frequently Asked Questions

    How many steps are in the asphalt paving process?

    There are typically 9 main steps, including site prep, grading, base installation, paving, and compaction.

    What is the most important step in asphalt paving?

    Base preparation and compaction are the most critical for long-term performance.

    How long does asphalt take to cure?

    Asphalt can be driven on within 24–72 hours but continues curing for several months.

    What is the binder layer in asphalt?

    It’s the structural layer between the base and surface course that adds strength.

    Why is grading important before paving?

    Proper grading ensures water drains correctly and prevents premature damage.

    How thick should asphalt be for a driveway?

    Typically 2–3 inches for residential use, depending on base conditions.

    Can asphalt be installed over old pavement?

    Yes, in some cases resurfacing is possible if the base is still stable.

  • Asphalt vs Concrete Driveways: What’s the Difference and Which One Is Right for You?

    Asphalt vs Concrete Driveways: What’s the Difference and Which One Is Right for You?

    Key Takeaways
    • Asphalt usually costs less up front than concrete, while concrete often costs more initially but may last longer.
    • Asphalt typically lasts about 15 to 20 years with maintenance, while concrete can last 30 years or more with proper care.
    • Asphalt is generally better suited to colder freeze-thaw climates because it is more flexible, while concrete is more rigid and more sensitive to movement and cracking.
    • Asphalt needs more routine maintenance such as sealcoating and crack repair, but repairs are usually easier and less expensive than concrete repairs.
    • Concrete offers more color, texture, and pattern options, making it a stronger choice for homeowners who want a more customized look.

    Choosing between an asphalt driveway and a concrete driveway is one of the biggest decisions homeowners make when planning a new installation. Both materials can create a durable, attractive surface, but they perform differently when it comes to cost, maintenance, appearance, climate resistance, and long-term repair needs.

    If you are trying to decide between the two, the right answer usually comes down to your budget, your property, your local conditions, and how you plan to use the driveway.

    What Is the Main Difference Between Asphalt and Concrete?

    The biggest difference is how the material behaves over time. Asphalt is more flexible, which helps it handle freeze-thaw conditions and minor movement in the base. Concrete is more rigid, which can make it very durable in the right conditions but also more prone to cracking when movement occurs.

    Asphalt is made with aggregates and asphalt binder, while concrete is made with cement, sand, stone, and water. Because of these differences, the two materials cure, age, and perform differently over time.

    Cost Comparison: Asphalt vs Concrete

    For many homeowners, budget is where the decision starts. In general, asphalt tends to have a lower upfront cost than concrete.

    Understanding the true cost of an asphalt driveway helps put this into perspective. While asphalt is typically more affordable initially, long-term costs depend on maintenance, repairs, and lifespan.

    Concrete usually costs more upfront but may last longer under the right conditions. The better value depends on how long you plan to stay in your home and how you maintain the surface.

    Lifespan and Durability

    Asphalt Driveway Lifespan

    Asphalt driveways typically last 15–20 years with proper maintenance. Their flexibility makes them well-suited for areas with temperature fluctuations and seasonal movement.

    Over time, asphalt can oxidize, fade, and develop cracks if not maintained properly, but it can often be repaired or resurfaced effectively.

    Concrete Driveway Lifespan

    Concrete driveway installations can last 30 years or more when properly installed and maintained. However, because concrete is rigid, it can crack when the base shifts or when exposed to harsh freeze-thaw conditions.

    Repairs to concrete are often more visible and more difficult to blend compared to asphalt.

    [elementor-template id=”4630″]

    Maintenance Differences

    Asphalt Maintenance

    Asphalt requires more routine maintenance, including sealcoating and crack filling. The benefit is that repairs are typically easier, faster, and more affordable.

    • Sealcoating every 2–3 years
    • Crack filling to prevent water intrusion
    • Patching and resurfacing options

    Concrete Maintenance

    Concrete requires less frequent maintenance but can be more difficult to repair when issues occur.

    • Occasional sealing
    • Joint maintenance
    • More complex repairs if cracking occurs

    Appearance and Design Options

    Concrete offers more customization options, including stamped patterns, colors, and decorative finishes. This makes it a popular choice for homeowners focused on design and aesthetics.

    Asphalt provides a clean, smooth, and uniform appearance that works well for most residential properties. It is more limited in design but offers a classic and practical look.

    Climate Considerations

    Your location plays a major role in choosing the right material. In regions like the Connecticut climate, asphalt often performs better due to its flexibility and ability to handle freeze-thaw cycles.

    Concrete can still perform well but requires proper installation techniques to minimize cracking caused by temperature changes.

    Installation Time and Usability

    Asphalt can typically be installed faster and used sooner than concrete. In many cases, an asphalt driveway can be completed in one to two days.

    Concrete requires a longer curing time, which means you may need to wait several days before using the surface.

    Repair and Long-Term Flexibility

    Asphalt offers more flexibility when it comes to repairs. It can often be patched, resurfaced, or restored without replacing the entire driveway.

    Concrete repairs, while possible, are often more noticeable and may require more extensive work.

    Which Is the Better Choice?

    Choose Asphalt If You Want:

    • Lower upfront cost
    • Better performance in colder climates
    • Faster installation
    • Easier repairs and maintenance

    Choose Concrete If You Want:

    • Longer potential lifespan
    • More decorative options
    • Less frequent maintenance

    Final Thoughts

    Choosing between asphalt and concrete comes down to your priorities. Asphalt is often the best choice for homeowners looking for a cost-effective, durable solution that performs well in colder climates. Concrete is a strong option for those prioritizing aesthetics and long-term durability.

    The right decision depends on your budget, maintenance expectations, and how your driveway will be used over time.

    Whether you choose asphalt or concrete, Maisano Brothers Inc. delivers expert installation built for Connecticut weather. Get a free estimate and let us help you pick the right material for your residential driveway.

    [elementor-template id=”4630″]

    Frequently Asked Questions

    Is asphalt cheaper than concrete for a driveway?

    Usually yes. Asphalt at roughly $3 to $7 per square foot and concrete at roughly $4 to $10 per square foot, though actual pricing varies by site and project scope.

    Does asphalt last as long as concrete?

    Usually no. The current article says asphalt typically lasts 15 to 20 years with maintenance, while concrete can last 30 years or more with proper care.

    Which driveway is better in cold weather?

    Asphalt is often the better choice in cold climates because its flexibility helps it handle freeze-thaw movement better than concrete.

    Which driveway needs more maintenance?

    Asphalt typically needs more routine maintenance, including periodic sealcoating and crack repair, while concrete usually needs less frequent maintenance but can be harder to repair when problems develop.

    Can oil stains damage an asphalt driveway?

    Yes. Petroleum products can soften asphalt and contribute to surface deterioration over time. If you’re dealing with stubborn stains, explore the best commercial degreasers for removing oil stains from asphalt to properly clean and protect your surface.

    Is concrete more decorative than asphalt?

    Yes. Concrete offers more options for color, texture, pattern, and stamped finishes, while asphalt is more limited aesthetically.

    Which driveway can be used sooner after installation?

    Asphalt is typically installed faster and can often be used sooner, while concrete takes longer to cure and requires more patience before regular use.

  • The History and Pronunciation of the Word “Asphalt”

    The History and Pronunciation of the Word “Asphalt”

    The word “asphalt” is instantly recognizable to anyone who’s driven a car, walked down a city street, or had a driveway paved. Its roots stretch back thousands of years—and even its pronunciation varies by region. This article explores the origins of the name, how its meaning evolved, and why people say it differently around the world.

    Ancient Origins of the Word “Asphalt”

    The term traces to ancient Greek, where ἄσφαλτος (ásphaltos) meant “secure” or “immovable” (Oxford English Dictionary). Greeks used the word for a naturally occurring, tar‑like substance that waterproofed and bonded materials. Archaeological evidence shows intensive use across Mesopotamia more than 5,000 years ago to seal boats, construct ziggurats, and even in Egyptian mummification. Through trade and translation, the term entered Latin as asphaltus, then Old French as asphalte, and eventually Middle and Modern English, carrying forward its association with a durable, binding material.

    The Evolution of Its Meaning

    In antiquity, “asphalt” referred to natural deposits—petroleum‑based bitumen seeping from the earth (the famous La Brea “Tar” Pits are actually asphalt seeps). During the 19th‑century Industrial Revolution, the meaning broadened to include refined products from crude oil. Engineers discovered that blending asphalt binder with mineral aggregate produced a strong, durable surface—what we now call asphalt concrete—and it became foundational to modern road building. This shift mirrors humanity’s move from found materials to engineered, performance‑optimized construction products.

    Regional Differences in Pronunciation

    Pronunciation varies widely across English‑speaking regions. In the United States, the most common form is AS‑falt, simplifying the “ph” sound. In the United Kingdom, ASH‑falt is common, retaining a softer middle consonant. Other local variants—such as az‑FALT or as‑PHALT—reflect regional phonetics and the path by which the word entered local usage. These differences underscore the word’s long linguistic journey.

    Misconceptions and Clarifications

    Asphalt is often confused with tar, but the two are chemically distinct: asphalt is petroleum‑derived, while tar is typically coal‑derived (Asphalt Institute). In the U.S., “blacktop” is a casual synonym for asphalt pavement, though it can refer to certain mix types. In the UK, “asphalt” may also mean mastic asphalt, a dense, waterproof surfacing that differs from the flexible asphalt concrete common in the U.S. Understanding these naming differences helps avoid confusion in international contexts.

    Historical Name Variations of Asphalt

    Language / Region Historical Term Approximate Period Notes on Usage
    Ancient Greek ἄσφαλτος (ásphaltos) ~5th century BCE “Secure; immovable”; used for natural bitumen.
    Latin Asphaltus Roman Empire Appears in engineering and waterproofing texts.
    Old French Asphalte Middle Ages Entered via Latin through trade and scholarship.
    Medieval English Asphalte / Aspalt 13th–15th c. Used in early English trade and building records.
    Modern English Asphalt 17th c.–present Global use; regional pronunciation differences.

    Fun Facts About the Name “Asphalt”

    Classical sources reference asphalt in early construction and seafaring; the Dead Sea was once called the “Lake of Asphalt” for its floating chunks of bitumen. Modern scientific sites like the La Brea pits—despite the name—are asphalt, not tar, and have preserved prehistoric fauna for millennia. These examples highlight how the material (and the word) spans culture, science, and time.

    Final Thoughts

    From the ancient Greek ásphaltos to today’s engineered pavements, the word “asphalt” reflects a durable idea: strong, reliable, and built to last. However you pronounce it—AS‑falt, ASH‑falt, or otherwise—the history behind the name mirrors the resilience of the material itself.

    Ready to speak with seasoned asphalt experts? Contact Maisano Bros. Inc. for professional paving, sealcoating, and repair.

    Glossary Keyword: Binder — the asphalt component that binds aggregate to form asphalt concrete.

  • Why Is Asphalt So Expensive Right Now? Tariffs Might Be to Blame

    Why Is Asphalt So Expensive Right Now? Tariffs Might Be to Blame

    Key Takeaways

    • Tariffs are taxes on imported goods that can raise the cost of materials used in asphalt paving.
    • Asphalt binder is made from crude oil, so tariffs on oil or petroleum products increase asphalt production costs.
    • Steel and aluminum tariffs drive up the cost of paving equipment and infrastructure.
    • Imported additives and polymers used in advanced asphalt mixes are affected by trade policies.
    • Supply chain disruptions from tariffs can lead to material shortages and project delays.
    • Contractors may pass these rising costs onto homeowners and businesses in the form of higher paving estimates.
    • Smart planning and clear communication with contractors can help manage these fluctuating costs.

    If you’ve been planning a driveway repaving or managing a commercial parking lot project, you might be wondering why asphalt costs seem higher than they used to be. One of the reasons? Tariffs.

    Tariffs are taxes placed on imported goods, and they can impact industries in ways most people don’t think about, including asphalt paving. While the paving process itself is local, many of the materials, equipment, and products involved are tied to global trade. Here’s how it all connects—and why it matters to you.

    What Is a Tariff, and Why Does It Matter?

    A tariff is essentially a tax on products brought into the country from elsewhere. Governments use tariffs for different reasons, like protecting local businesses or responding to international trade policies. However, those taxes can make imported goods more expensive. And when materials cost more, contractors often have no choice but to raise their prices to keep up.

    How Do Tariffs Affect Asphalt Costs?

    You might not think asphalt and global trade go hand in hand, but they do, and here’s why:

    1. Asphalt Comes from Oil

    Asphalt binder (the sticky black stuff that holds your pavement together) is made from crude oil. If the U.S. places tariffs on imported oil or certain refined petroleum products, those costs trickle down. That means the base material for asphalt gets more expensive, which drives up the cost of your paving project.

    2. Tariffs on Steel and Equipment

    Paving requires heavy machinery like pavers, rollers, and trucks. These machines are made with a lot of steel and aluminum. When tariffs are placed on those metals, like we saw in recent years, it drives up manufacturing costs. That makes buying and maintaining paving equipment more expensive for contractors, and yes, some of that cost gets passed along.

    3. Specialty Products and Additives

    Modern asphalt often includes polymers and additives for better durability, especially in commercial or high-traffic areas. Some of these materials are imported, and tariffs on them can cause prices to jump overnight.

    4. Supply Chain Disruption

    Even if your contractor uses American-made products, tariffs can shift global supply chains. That means delays, product shortages, and price hikes that ripple across the industry.

    Real-World Example: Roofing Prices and Canadian Oil

    A good example comes from the roofing industry, which also uses oil-based materials. Asphalt shingles are often made with Canadian oil, and when tariffs or import restrictions are placed on it, prices rise across the board. It’s a clear example of how even products labeled “Made in the USA” can be affected by international trade policies.

    What Does This Mean for You?

    Whether you’re a homeowner looking to replace your driveway or a business planning a parking lot resurfacing, tariffs could be part of the reason quotes are higher than expected. Contractors don’t like raising prices, but sometimes, higher costs for materials and equipment leave them no choice.

    You might notice:

    • Larger project quotes than in previous years
    • More variability in pricing depending on material availability
    • Longer wait times as contractors navigate supply chain delays

    What Can You Do About It?

    While you can’t control tariffs or global trade, you can make smart decisions about your paving project:

    • Plan Ahead: Schedule your project early, especially during peak paving season.
    • Get Multiple Estimates: Compare bids to understand current pricing.
    • Ask Questions: A good contractor will be transparent about what’s driving costs.
    • Consider Timing: If costs are spiking due to temporary tariffs or shortages, you might benefit from waiting or locking in a price before increases.

    Final Thoughts

    Tariffs might seem like a distant political issue, but they affect everyday things, like the cost of paving your driveway or parking lot. Understanding how these hidden costs work can help you plan better and avoid sticker shock.

    If you’re planning a paving project and want honest answers about what goes into the cost, get an estimate today. We’re here to help you understand your options and make the most of your investment.

  • Best Commercial Degreasers to Remove Stubborn Oil Stains from Asphalt

    Best Commercial Degreasers to Remove Stubborn Oil Stains from Asphalt

    Oil stains on asphalt driveways are more than just an eyesore—they can compromise the surface integrity of the pavement, accelerate deterioration, and make it harder for future maintenance applications like sealcoating to adhere properly. Whether you’re dealing with fresh drips from your car or old, baked-in blotches, using a commercial-grade degreaser can be one of the most effective ways to restore your driveway.

    ⚠️
    Old oil stains may be damaging your driveway from the inside
    Oil doesn’t just stain asphalt — over time it breaks down the petroleum binder that holds the surface together, causing softening, cracking, and accelerated deterioration. If your stain is more than 6 months old or the surface around it feels soft or crumbly, cleaning alone won’t solve the problem.
    Get a Free Driveway Assessment →

    In this guide, we’ll explore what commercial-grade degreasers are, how they work, where to buy them, and how to use them properly. We’ll also share popular tips and tricks for getting your asphalt looking as good as new.

    Why Oil Stains Are a Problem for Asphalt Driveways

    Asphalt is a petroleum-based material, which means oil stains can soften and break down its surface over time. When oil penetrates the surface, it disrupts the binder that holds the aggregate together, leading to premature cracking, raveling, and pothole formation. This also interferes with routine maintenance. For example, applying sealcoating over oil-contaminated pavement can result in peeling or poor adhesion.

    That’s why it’s crucial to clean oil stains thoroughly and as soon as possible.

    What Are Commercial-Grade Degreasers?

    Commercial-grade degreasers are heavy-duty cleaners formulated to break down and remove tough grease, oil, and grime from hard surfaces. Unlike household cleaners, these degreasers are designed to penetrate porous materials like asphalt and emulsify the oil so it can be washed away.

    Common ingredients include:

    • Surfactants: to lift oil from the surface
    • Emulsifiers: to break the oil into smaller droplets
    • Solvents (citrus-based or chemical): to dissolve hydrocarbons
    • Alkaline agents (like sodium hydroxide): for deep cleaning

    Some degreasers are biodegradable and safe for the environment, while others may require careful handling due to their strength.

    💡 Pro tip from 60 years of Connecticut paving
    After removing an oil stain, the single best thing you can do for your Connecticut driveway is professional sealcoating. Sealcoating fills surface pores, blocks future oil penetration, and restores a clean uniform black finish — protecting the asphalt binder from further breakdown. Maisano Brothers provides sealcoating across Connecticut with free on-site estimates.
    Learn about professional driveway sealcoating in Connecticut →

    Top Commercial-Grade Degreasers for Asphalt Oil Stains

    Here are several reliable options you can find at major retailers:

    Oil Eater Cleaner & Degreaser

    • Where to buy: Home Depot, Walmart
    • Biodegradable and non-toxic
    • Highly concentrated; can be diluted
    • Excellent for both fresh and older stains

    Zep Industrial Purple Degreaser

    • Where to buy: Home Depot
    • High-alkaline formula
    • Strong enough for auto shops and garages
    • Use with caution; gloves and eye protection recommended

    Simple Green Pro HD Heavy-Duty Cleaner

    • Where to buy: Walmart, Home Depot
    • Non-corrosive, non-acidic
    • Safe for asphalt and sealed surfaces
    • Good all-around cleaner for garage and outdoor use

    Purple Power Industrial Cleaner/Degreaser

    • Where to buy: Walmart
    • Very affordable
    • Fast-acting and highly effective
    • Requires proper disposal to avoid environmental damage
    Professional crew powerwashing and removing oil stains from asphalt
    Professional crew powerwashing and removing oil stains from asphalt

    How to Use a Commercial Degreaser on Asphalt Oil Stains

    Step-by-step Instructions:

    1. Remove surface debris. Sweep the area clean of dirt, leaves, and gravel.
    2. Apply the degreaser. Follow label instructions for dilution. Spray or pour directly onto the oil stain.
    3. Let it soak. Allow the degreaser to sit for 5 to 15 minutes, depending on the product. This dwell time helps penetrate and loosen the oil.
    4. Scrub with a stiff-bristled brush. Work the product into the stain using circular motions.
    5. Rinse thoroughly. Use a hose or, preferably, a power washer to remove the degreaser and emulsified oil. Repeat if needed.
    6. Let dry. Allow the area to dry fully before considering sealcoating or other treatments.
    Serving Connecticut Since 1967
    Ready to protect your driveway
    from future oil damage?
    Professional sealcoating is the best long-term defense against oil stains, UV damage, and Connecticut’s harsh freeze-thaw winters. Maisano Brothers provides free on-site estimates for sealcoating, driveway repair, and new driveway installation throughout Connecticut. Licensed, insured, in-house crews only.
    ✓ Licensed & Insured ✓ Free Estimates ✓ Financing Available ✓ CT HIC.0517988

    Tips and Tricks from the Pros

    • Act quickly: The sooner you treat a stain, the easier it is to remove.
    • Avoid pressure washing before applying degreaser: Doing so can push the oil deeper into the asphalt.
    • Don’t use kitty litter alone: While it can absorb surface oil, it won’t clean the residue left behind.
    • Use hot water if safe: Warm water can improve the degreaser’s effectiveness but check product instructions first.
    • Reapply if needed: Stubborn stains might require 2-3 applications for complete removal.

    What If the Stains Won’t Come Out?

    If oil has soaked deep into the asphalt or has been sitting for years, even the best degreasers might not fully remove the discoloration. In these cases, you have two options:

    1. Sealcoating the surface
      If the stain is only cosmetic, consider sealcoating to restore a uniform black finish. Just make sure the oil has been cleaned thoroughly and the surface is dry and oil-free first.
    2. Replacing the affected area
      For severe damage or long-term softening of the asphalt, installing new asphalt in the damaged section may be the best long-term solution.

    Final Thoughts

    Oil stains are common, but they don’t have to ruin the look or longevity of your asphalt driveway. Commercial-grade degreasers, when used correctly, are powerful tools that can restore your pavement’s appearance and protect its structural integrity. For best results, act quickly, use the right product, and don’t hesitate to call a professional if the damage is too severe.

    If you’re in need of long-term driveway maintenance, consider investing in sealcoating services or, for more serious cases, a complete asphalt installation to restore the surface to pristine condition.

  • Should You Salt Your Asphalt Driveway? (What Contractors Won’t Tell You)

    Should You Salt Your Asphalt Driveway? (What Contractors Won’t Tell You)

    Key Takeaways
    • Salting works by lowering the freezing point of water, but different de-icing materials perform best at different temperatures and have varying environmental impacts.
    • Excessive salt use can accelerate asphalt wear primarily by increasing freeze–thaw stress, where melted water enters existing cracks, refreezes, and expands, leading to cracking and surface deterioration over time.
    • Proper salting practices, including pre-treating before storms, applying controlled amounts, and focusing on high-risk areas, improve safety while minimizing unnecessary pavement wear.
    • Alternative de-icing options such as calcium magnesium acetate (CMA), blended chlorides, or organic additives can help reduce overall chloride use while maintaining effective ice control under appropriate conditions.
    • Routine maintenance, including sealcoating, timely crack repair, and proper drainage, significantly extends the life of asphalt driveways and reduces reliance on heavy salt application during winter.

    In winter, maintaining a safe driveway becomes a top priority. Ice and snow accumulation create hazards for both pedestrians and vehicles, making salting a commonly relied-upon solution. However, salting is not as simple as it may seem. Improper use can contribute to unnecessary asphalt wear, increased costs, and environmental concerns. This guide explains how de-icers work, how they affect asphalt driveways, and how to use them responsibly while protecting your pavement.

    The Chemistry of De-Icers

    The Role of Freezing Point Depression

    De-icing salts work through a process known as freezing point depression. When salt dissolves in water, it separates into ions that disrupt the formation of ice crystals, allowing water to remain in a liquid state at lower temperatures. This prevents ice from bonding to the pavement and helps existing ice melt.

    Comparing Common De-Icing Materials

    • Sodium Chloride (Rock Salt): The most affordable and widely used option. Most effective at temperatures around 20°F (-6°C) and above. Performance declines in colder conditions, and excessive use can increase runoff concerns.
    • Calcium Chloride: Effective at temperatures as low as -25°F (-32°C). It attracts moisture and works quickly, but it is more expensive and should be handled carefully.
    • Magnesium Chloride: Effective down to approximately -13°F (-25°C). Often used in blends and generally less harsh than rock salt.
    • Potassium Chloride: Effective in milder winter conditions around 20°F (-7°C). Safer for plants but less commonly used due to cost and reduced cold-weather performance.
    • Calcium Magnesium Acetate (CMA): A biodegradable, non-corrosive option suitable for environmentally sensitive areas.
    • Urea and Beet-Based Alternatives: Organic or agricultural byproducts that reduce chloride use. These products are often blended with traditional salts to improve performance.

    Eutectic vs. Working Temperatures

    The eutectic temperature represents the lowest temperature at which a de-icer can theoretically melt ice. In practice, most de-icers become far less effective before reaching that point. Understanding realistic working temperatures helps homeowners choose the right product for their climate and avoid unnecessary application.

    Salted asphalt sidewalk cleaned path with salt
    Salted asphalt sidewalk cleaned path with salt

    Physical and Environmental Impacts of Salting

    How Salt Affects Asphalt Driveways

    Salt does not chemically dissolve or break down properly installed asphalt. Modern asphalt surfaces are designed to withstand exposure to common de-icing materials. However, salt can indirectly contribute to wear when combined with moisture and freeze-thaw cycles.

    • Freeze-Thaw Stress: When salt melts ice, water can seep into existing cracks or surface imperfections. As temperatures drop, this water refreezes and expands, gradually widening cracks and accelerating normal pavement aging.
    • Surface Wear: Over time, repeated freeze-thaw cycles may lead to surface deterioration if cracks are not properly sealed.

    There is no strong evidence that sodium or chloride ions chemically react with asphalt binder or aggregates under normal driveway conditions. Damage is primarily physical, not chemical.

    Environmental Considerations

    • Soil Impact: Excessive salt use can stress nearby vegetation and alter soil conditions, particularly in areas with poor drainage.
    • Water Quality: Chloride runoff can accumulate in waterways. A responsible application significantly reduces this risk.
    • Wildlife Exposure: Concentrated salt runoff may affect wildlife in certain environments, emphasizing the importance of controlled use.

    Best Practices for Salting Your Driveway

    When to Salt

    • Pre-Treatment: Applying liquid brine before a storm helps prevent ice from bonding to the pavement.
    • After Snow Removal: Clear snow first, then apply salt lightly to remaining icy areas.
    • Before Sudden Freezes: Early application can help prevent overnight ice formation.

    How Much Salt to Apply

    Over-application is one of the most common mistakes. A general rule of thumb is approximately 1–2 pounds of rock salt per 100 square feet. Using a spreader helps ensure even coverage and reduces waste.

    Targeting High-Risk Areas

    Focus salting efforts on shaded areas, low spots, and locations near downspouts where ice forms more quickly, rather than uniformly treating the entire surface.

    Rock salt scattered across an asphalt driveway during winter to melt ice and improve traction.
    Rock salt spread across an asphalt driveway helps melt ice.

    Maintenance and Prevention Strategies

    Regular Sealcoating

    Sealcoating asphalt every 2–3 years creates a protective barrier that limits water infiltration and helps asphalt withstand winter conditions.

    Crack and Pothole Repairs

    Filling asphalt cracks before winter prevents moisture from entering the pavement and reduces freeze-thaw damage.

    Improving Drainage

    Proper asphalt grading and drainage reduce standing water, ice formation, and the need for excessive de-icing.

    Alternative De-Icing Solutions

    Blended De-Icers

    Blends combining sodium chloride with calcium or magnesium chloride improve low-temperature performance while reducing overall chloride use.

    Organic and Biodegradable Options

    • Calcium Magnesium Acetate (CMA): Non-corrosive and environmentally friendly.
    • Beet Juice Blends: Often mixed with traditional salts to improve effectiveness and reduce chloride reliance.

    Non-Chemical Methods

    • Sand and Gravel: Provide traction without melting ice.
    • Heated Driveways: Electric or hydronic systems eliminate the need for salt entirely, though installation costs are higher.

    The Economics of Salting

    Balancing Cost and Performance

    Rock salt (Sodium Chloride) is inexpensive but limited in extreme cold. Higher-performance de-icers may reduce labor and reapplication costs during severe weather.

    Long-Term Savings Through Maintenance

    Routine maintenance, such as sealing, repairs, and drainage improvements, reduces long-term repair costs and extends the driveway’s lifespan.

    Professional Assistance and Advanced Technologies

    When to Call a Professional

    If your driveway shows signs of significant wear, or if you’re uncertain about the most effective de-icing strategy, a professional asphalt contractor can assess the situation. They can recommend appropriate treatments, suggest alternative products, and perform necessary repairs to prolong the life of your asphalt surface.

    Emerging Ice Management Technologies

    Frequently Asked Questions

    Does salt damage asphalt driveways?

    Salt doesn’t chemically break down asphalt, but it accelerates freeze–thaw cycles by allowing water to penetrate small cracks and refreeze, which leads to potholes, cracking, and long-term surface wear.

    What type of salt is best for asphalt?

    Rock salt (sodium chloride) is the most common, but calcium chloride and magnesium chloride work better in colder temperatures and require smaller amounts, making them gentler on asphalt and the environment.

    How much salt should I apply to my driveway?

    A general guideline is 1–2 pounds of rock salt per 100 square feet. Using more doesn’t melt ice any faster and can increase environmental damage and asphalt deterioration.

    Is pre-treating my driveway with brine effective?

    Yes. Applying a brine solution before a storm prevents ice from bonding to the pavement, reduces the amount of salt needed, and makes post-storm clearing easier.

    What environmentally friendly alternatives to salt can I use?

    Options like calcium magnesium acetate (CMA), beet-based de-icers, or blended products reduce chloride runoff and are safer for plants, soil, and waterways.

    How does salt affect nearby landscaping?

    Salt runoff can burn grass, alter soil pH, and stress shrubs or trees. Using less salt, switching to safer alternatives, or installing protective edging can reduce the impact.

    Should I sealcoat my driveway before winter?

    Yes. Sealcoating every 2–3 years provides a protective barrier that helps prevent moisture and salt penetration, reducing freeze–thaw damage.

    Can improving drainage help reduce salt usage?

    Definitely. Good drainage prevents water from pooling and freezing, lowering the need for repeated salting throughout winter.

    Are heated driveways a better option than salting?

    Heated driveways eliminate salt altogether by keeping pavement above freezing, but they require a higher upfront investment and may not fit every budget.

    When should I contact a professional?

    If your driveway has significant cracking, frequent ice buildup, drainage problems, or recurring potholes, an asphalt professional can recommend repairs and winter protection strategies.

    Conclusion

    Salting an asphalt driveway is more than a routine winter chore; it’s a process that involves chemistry, environmental stewardship, and thoughtful planning. By selecting the right de-icing materials, applying them at the proper time, maintaining your driveway regularly, and considering innovative alternatives, you can ensure safety, and protect your investment.

  • How to Fix a Sunken Apron? Protect Your Your Investment from Costly Damage

    How to Fix a Sunken Apron? Protect Your Your Investment from Costly Damage

    A sunken apron is the section of a driveway, typically the part closest to the street or garage entrance, that has settled or sunk below its original level. This sinking often occurs due to issues like poor soil compaction, water erosion, or the natural settling of the ground over time. A sunken apron can create uneven surfaces, leading to water pooling, cracks, and potential damage to both the driveway and adjacent structures like a garage. It can also make driving in and out of the driveway more difficult and can be a tripping hazard. Promptly addressing a sunken apron is crucial to safeguarding your driveway from further problems.

    Identifying the Problem

    When the apron sinks, it creates a gap. This gap, between the driveway and the road, allows water to seep in. Water is the main culprit here. It erodes the base material beneath the apron. Over time, this erosion makes the problem worse.

    Sunken aprons also create bumps. These bumps are annoying when driving in and out. For pedestrians, they become a tripping hazard. Early detection is key. Look for signs of water pooling, cracks, or visible gaps in the apron.

    Causes of a Sunken Apron

    Inadequate compaction of the base material is a frequent culprit behind the gradual sinking of a driveway apron, particularly close to a garage. This can have implications for both the overall driveway and the entrance to the garage. Additionally, the consistent movement of heavy vehicles, such as cars entering and exiting the garage, can further exacerbate this issue, leading to accelerated deterioration of the apron’s condition.

    Water damage also contributes to a sunken apron. Water weakens the base material, especially near your garage if drainage is poor. Freeze-thaw cycles can aggravate the problem, as water freezes, expands, and creates voids under the apron and near the garage.

    Steps to Repair a Sunken Apron

    1. Assessment: First, determine the extent of the damage, especially near the garage entrance or road. Measure the depth of the sinking and check for cracks in the surrounding area, including where the driveway meets the car garage.
    2. Preparation: Begin by removing the damaged section of the apron, focusing on the area leading to your garage. Clear out the old material to reach the base.
    3. Rebuild the Base: Use proper material to rebuild the base. Make sure to compact it thoroughly. A well-compacted base prevents future sinking, protecting both your driveway and garage foundation.
    4. Pour New Concrete: Mix and pour new concrete into the apron, ensuring it’s level with both the driveway and the garage entrance. Smoothing the surface helps with water runoff and ensures a seamless transition.
    5. Curing: Allow the concrete to cure properly. This process takes several days. Keep the area free from traffic, including vehicles entering the car garage, during this time.

    Preventing Future Problems

    Proper base material compaction is essential, especially near the residential garage. Regular inspections of the driveway and apron can help catch early signs of sinking, particularly where the driveway meets the car garage.

    Good drainage is equally important. Ensure water flows away from the apron and the garage entrance to prevent water from weakening the base.

    By following these steps, you can restore the integrity of your driveway. A well-maintained apron enhances the appearance and provides a smooth transition between the driveway, road, and car garage, extending the life of your driveway.

    Reach out to Maisano Bros. Inc. today for a free estimate on all your asphalt paving needs.