Blog

  • Asphalt Driveway Repair or Replacement: How to Choose the Right Fix

    Asphalt Driveway Repair or Replacement: How to Choose the Right Fix

    If your driveway is cracked, rough, or starting to sink, the real question is not whether it looks bad — it is whether the damage is still fixable. Some pavement problems can be handled with targeted repairs. Others point to deeper base failure and a full replacement. For a residential driveway, the condition of the base matters more than the age alone. In this guide, you’ll learn how to tell the difference, what warning signs matter most, and how to think through the choice without guessing. By the end, you’ll know when a repair buys time, when replacement protects the property, and what to ask before you move forward.

    Key Takeaways

    If the damage is isolated and the base is still sound, repair is often enough. If you see widespread alligator cracking, sinking, drainage problems, or repeated patch failures, replacement is usually the better long-term fix.

    Quick answer

    • Repair works best for small, localized surface issues
    • Replacement is better for structural failure and recurring damage
    • A site visit is the safest way to confirm the right option
    • Cracks alone do not tell the full story; the base and drainage matter more.
    • Isolated damage can often be repaired, but widespread alligator cracking usually points to replacement.
    • Repeated patching is a warning sign that the pavement is failing as a system.
    • A contractor should inspect the surface, slope, water flow, and subgrade before recommending a fix.

    When asphalt driveway repair makes sense

    Repair is the better call when the damage is limited and the structure underneath is still doing its job.

    Small cracks and isolated trouble spots

    A few narrow cracks, a small pothole, or a single soft area can often be handled without rebuilding the whole driveway. In those cases, a focused repair may be enough to slow further damage and restore a cleaner surface.

    If the issue is localized, our driveway repair service is usually the first place to start.

    Surface wear without base failure

    Fading, minor roughness, and light surface raveling do not always mean the driveway is failing structurally. Those issues can look worse than they are, especially if the base is still stable and water is draining properly.

    The key question is whether the problem stays on the surface or keeps coming back after patching.

    Repair is usually the right move when:

    • cracks are narrow and isolated
    • the surface is mostly level
    • water is not pooling in multiple areas
    • the driveway is otherwise holding up well
    • prior repairs have lasted

    When replacement is the smarter choice

    Replacement becomes the better option when the driveway is failing as a system, not just showing a few bad spots.

    Alligator cracking points to structural trouble

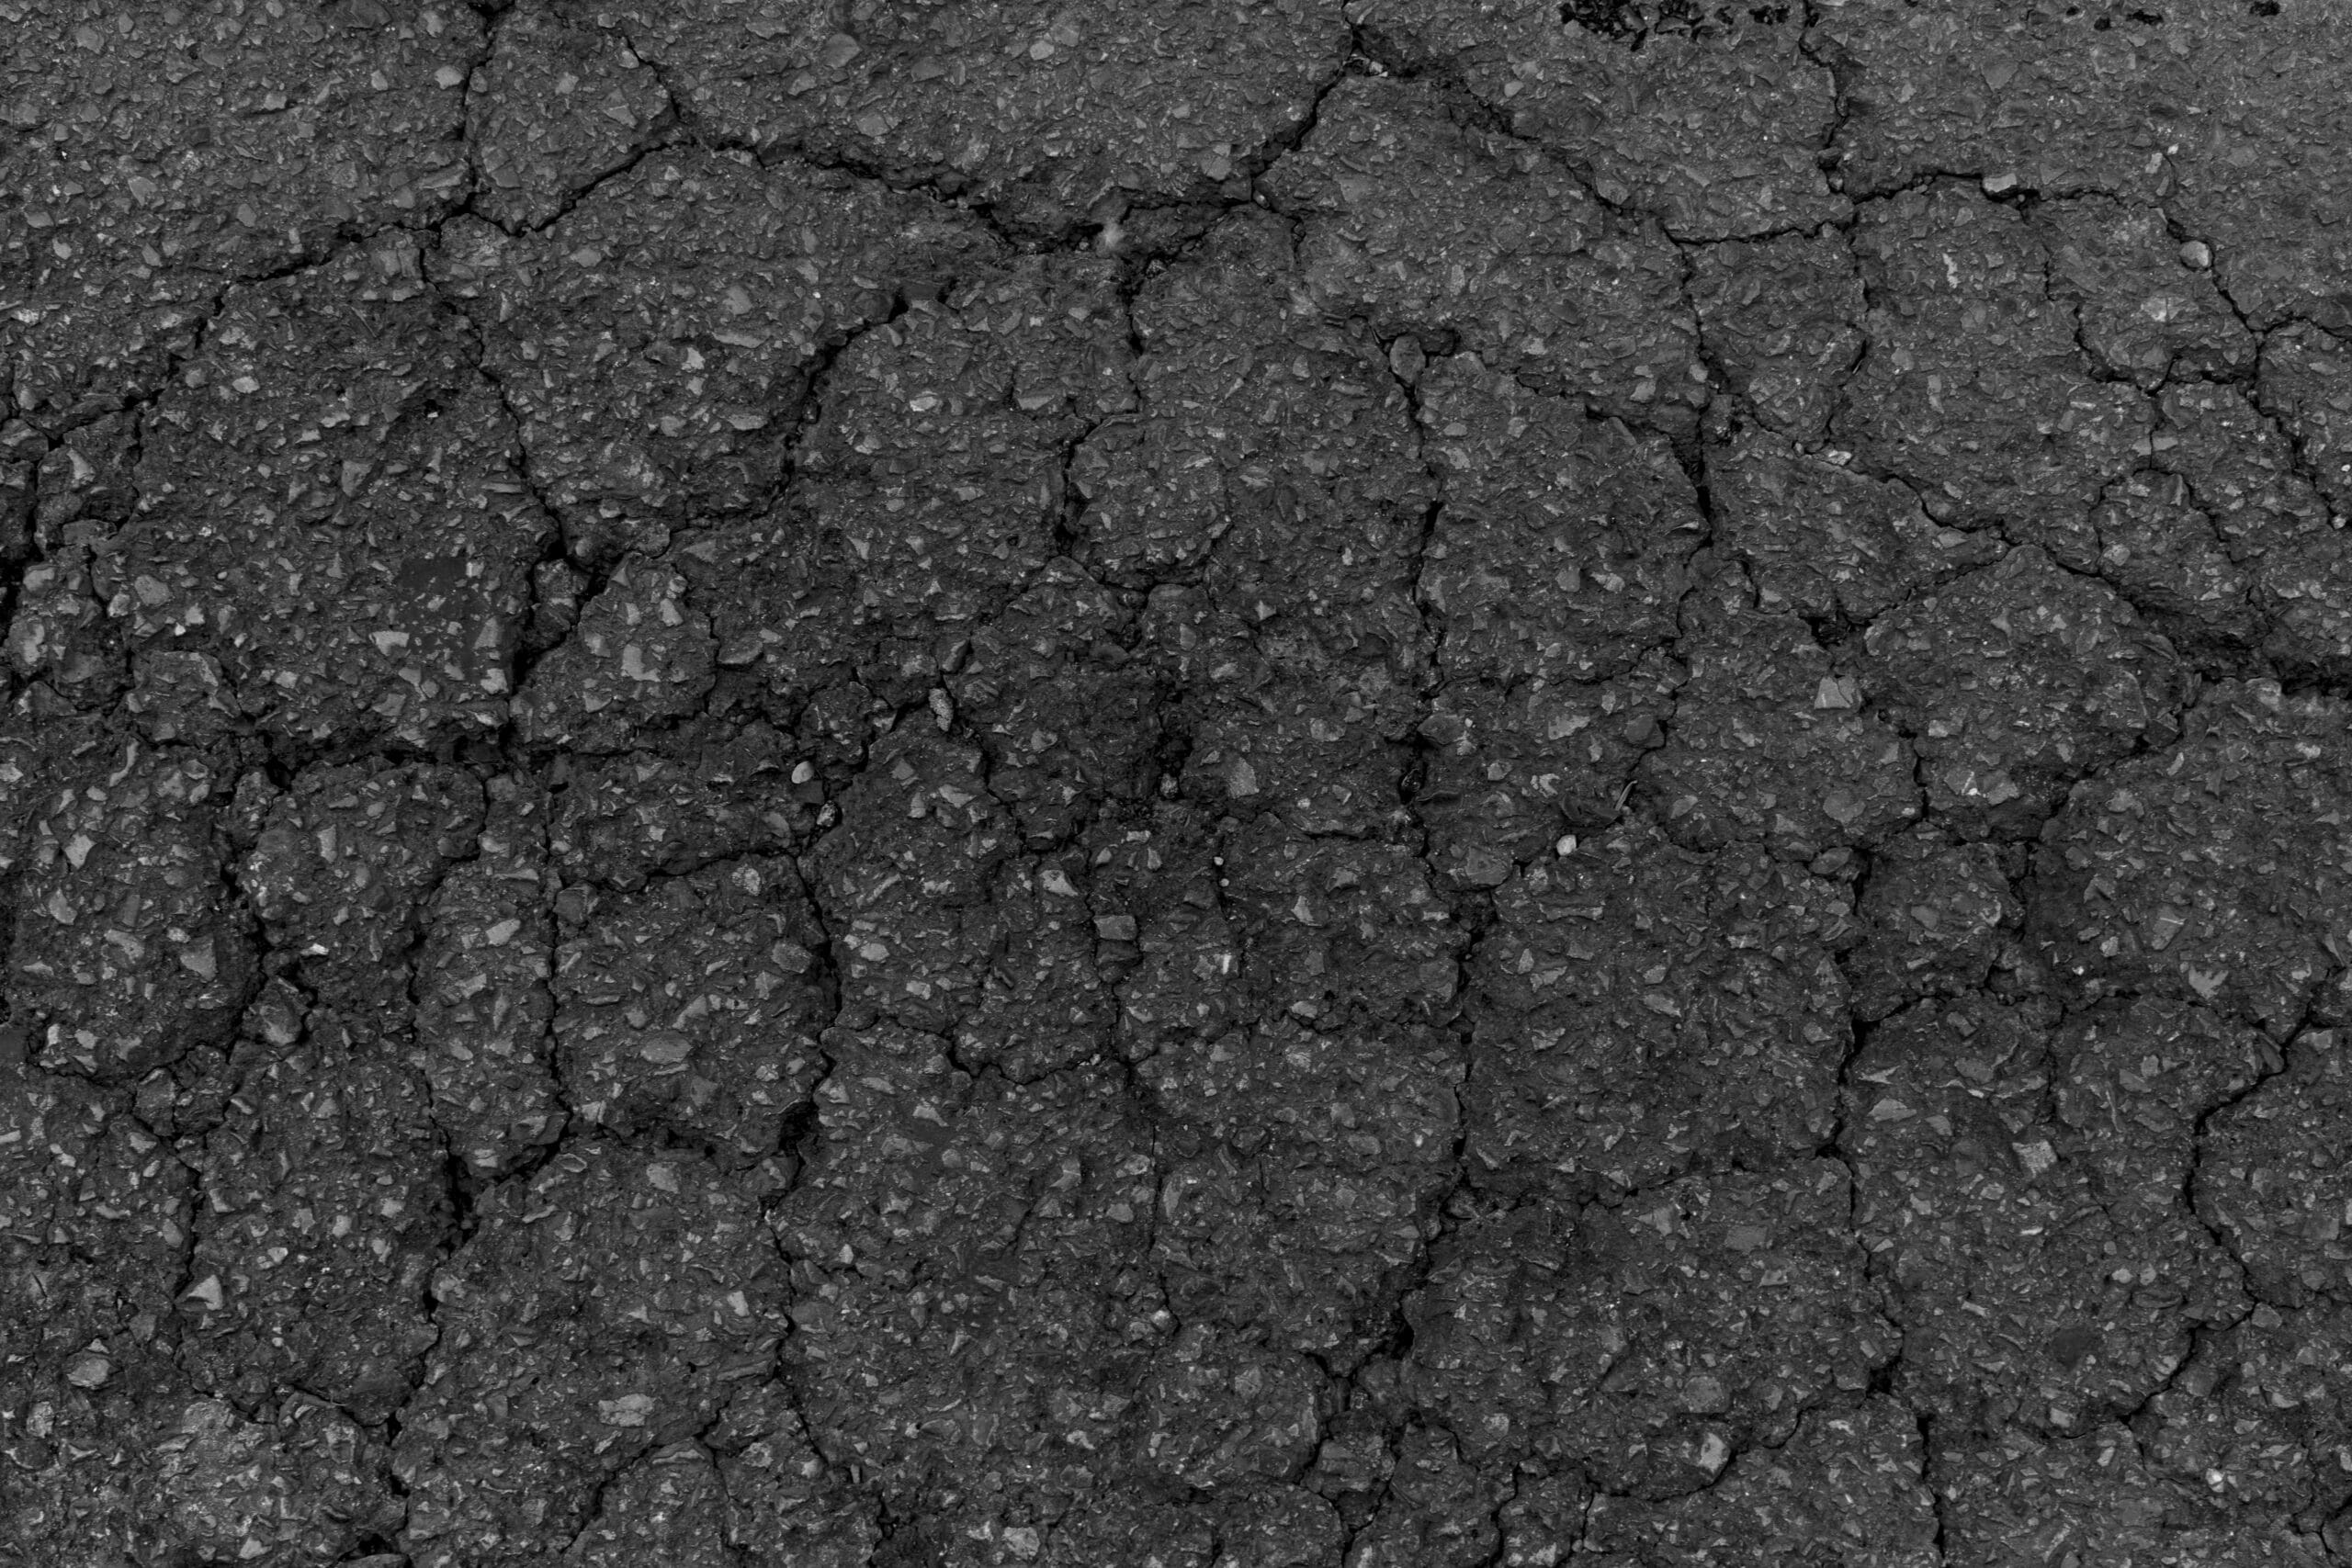
    If you see interconnected cracking that looks like a web or fish scales, the base is often compromised. That kind of damage usually means patching will not solve the underlying problem.

    That is where new asphalt driveway installation makes more sense than more surface fixes.

    Sinking, rutting, and drainage issues

    A driveway that dips, holds water, or develops repeated soft spots is telling you the problem goes deeper than the top layer. Drainage and grade problems can keep feeding damage back into the pavement.

    Replacement is usually the better move when:

    • alligator cracking is widespread
    • potholes keep returning
    • the driveway has settled or sunk in spots
    • drainage problems keep coming back
    • repairs are no longer lasting
    • large areas are breaking down at once
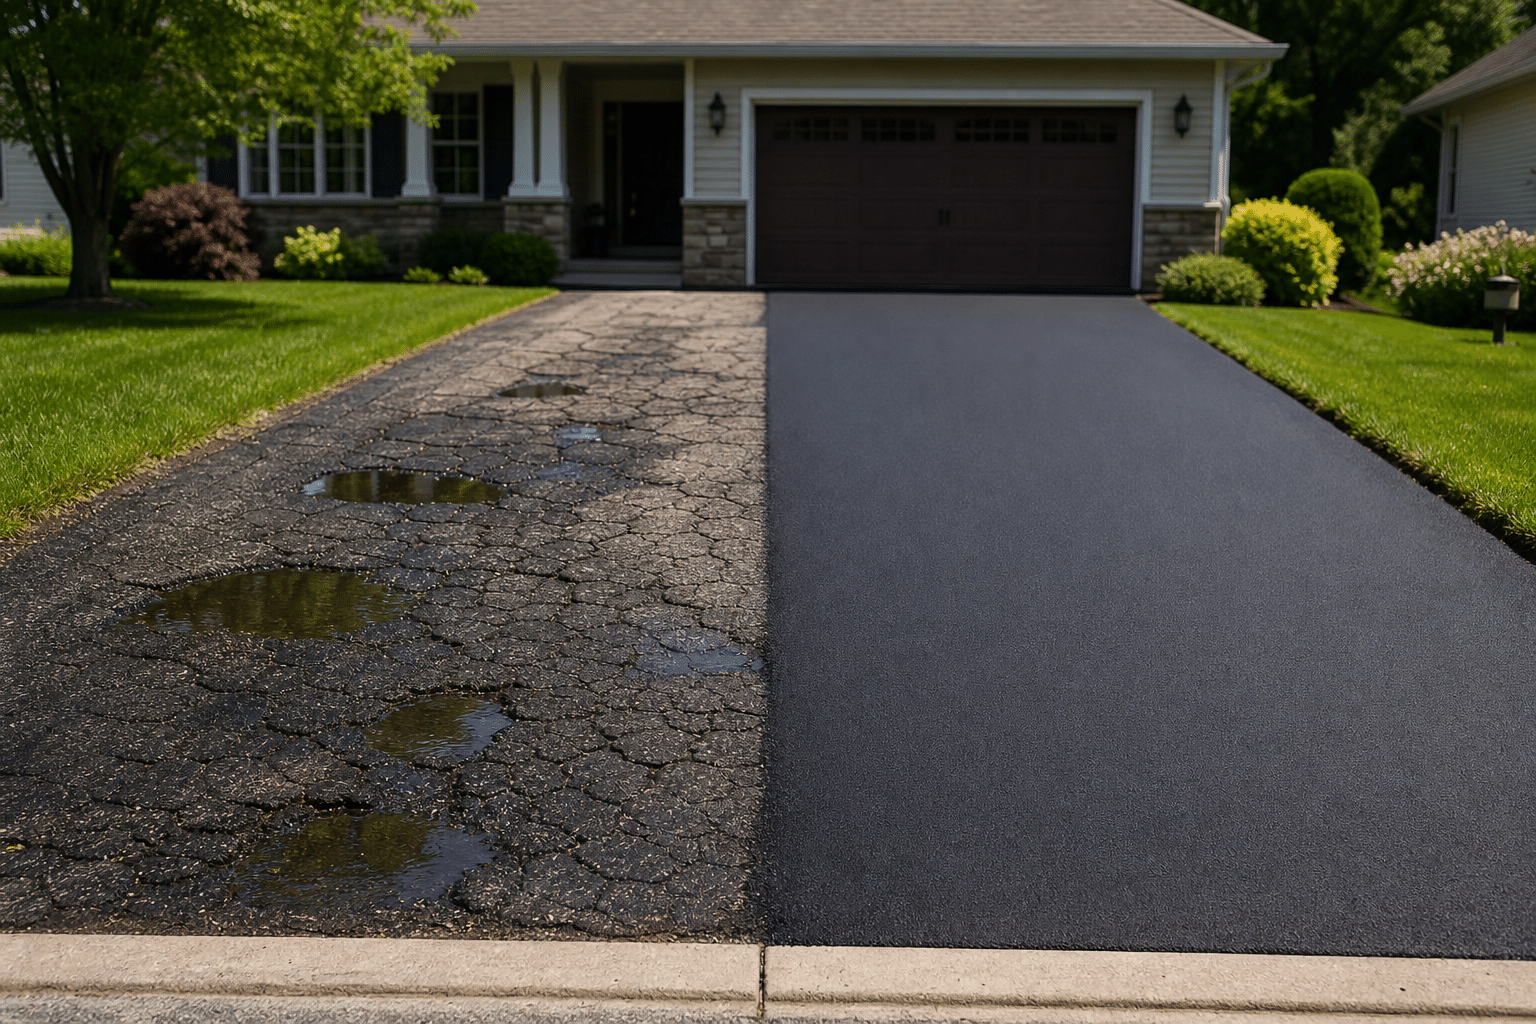
    Cracked and repaired asphalt driveway
    Cracks can point to either surface wear or deeper structural failure.

    A simple way to decide

    Step 1: Look at how widespread the damage is

    If the problem covers one corner, one edge, or one isolated section, repair may be enough. If the damage is scattered across the driveway, the odds of replacement go up fast.

    Step 2: Ask whether the base is still sound

    The base is the part you do not see, but it controls most of the driveway’s life. If the base is weak, no surface patch will hold up for long.

    Step 3: Think about how often you’ve already fixed it

    If you are patching the same area over and over, the driveway may be telling you it has reached the end of its useful life.

    Step 4: Compare short-term savings with long-term value

    Repair costs less up front. Replacement costs more now, but it can reset the whole system and save you from chasing the same problems year after year.

    If you want a clear recommendation, request an estimate and have the site looked at before you spend money twice.

    What can make repair look cheaper than it is

    A repair quote can look appealing when you only compare the number on the estimate. But if the driveway keeps failing, the same area may need to be reopened, patched again, or monitored after every storm. That can make a lower upfront price less attractive over time.

    Replacement costs more because it does more work: it removes failed material, resets the structure, and gives the contractor a chance to correct drainage and base issues together. If the driveway is still young and mostly intact, repair usually wins. If the pavement is old and the failures are spreading, replacement tends to be the better value.

    What repair can actually involve

    Not every repair is the same. The right fix depends on how far the damage has spread and what caused it in the first place.

    Crack filling and sealing

    For narrow cracks, filling helps keep water out and slow further damage. This is useful when the asphalt is still structurally sound.

    Patching isolated failures

    If one section has broken down, a patch can remove the failed material and restore that area without disturbing the rest of the driveway.

    Resurfacing worn pavement

    When the surface is worn but the base is still stable, resurfacing can give the driveway a fresh riding surface without a full rebuild.

    Partial or full replacement

    If the damage is tied to base failure, soft spots, or repeated settlement, repair stops being cost-effective. At that point, replacement is the cleaner long-term fix.

    What a contractor should inspect on site

    A good contractor is not just looking at the surface. They should check the whole performance picture.

    1. Cracking pattern

    Linear cracks, edge cracks, and alligator cracking all mean different things. The pattern helps show whether the issue is cosmetic or structural.

    2. Drainage and slope

    Standing water is a warning sign. If water cannot leave the surface, the driveway will keep breaking down faster than it should.

    3. Base condition

    Soft subgrade, settling, and repeated failures usually mean the foundation needs attention before any new asphalt goes down.

    4. Age and maintenance history

    A well-maintained driveway can last much longer than a neglected one. Age matters, but only when you combine it with the condition of the base and surface.

    For a broader look at how preservation works, the Asphalt Institute’s engineering FAQs reinforce that good construction practices and compaction are central to pavement performance: Asphalt Institute technical FAQs.

    Repair vs replacement in real life

    If the problem is cosmetic

    You may be able to repair the surface and keep the driveway in service.

    If the problem is structural

    Replacement is usually the safer investment because it addresses the base, drainage, and surface together.

    If you are somewhere in the middle

    A contractor can sometimes recommend a partial repair, but only if the damaged area is truly isolated.

    A city pavement preservation program makes the same point: treatments work best before cracking becomes extensive, which is why timing matters so much: Pavement Preservation Program.

    What not to do when you are trying to decide

    Do not keep sealing over structural failures and hope they disappear. Sealcoat helps protect the surface, but it does not rebuild a weak base.

    Do not judge the driveway by appearance alone, either. A surface that looks rough may still be repairable, while a surface that looks okay on top can hide deeper problems underneath.

    Do not wait until the driveway is breaking apart in multiple places. The earlier you get an evaluation, the more options you usually have.

    FAQs

    Is resurfacing the same as repair?

    Not exactly. Resurfacing adds a new layer over the existing pavement, while repair usually means fixing a specific damaged area. Which one makes sense depends on the driveway’s overall condition.

    How do I know if cracks are bad enough to replace the driveway?

    If the cracks are widespread, connected, or tied to sinking and water issues, replacement is more likely than repair.

    Can a bad-looking driveway still be repairable?

    Yes. Some driveways look rough but still have a solid structure underneath. A site visit is the best way to tell.

    Should I keep patching a driveway that keeps failing?

    Usually not. Repeated patching can turn into a short-term habit that costs more than rebuilding the driveway the right way.

    What should I ask before I decide?

    Ask whether the problem is surface-level or structural, whether the base is sound, and whether repair will last long enough to be worth the cost.

    Choose the fix that protects the whole driveway

    The best choice is not the cheapest one today — it is the one that keeps the driveway from failing again next season. If you want help deciding whether repair or replacement is the right move, reach out to Maisano Brothers Inc. and request an estimate before the damage spreads.

    Image credits: featured image and in-body image generated with OpenAI.
  • Signs Your Asphalt Driveway Was Not Compacted Properly

    Signs Your Asphalt Driveway Was Not Compacted Properly

    Key Takeaways

    • Poor compaction often shows up as weak texture, early cracking, or soft spots.
    • Some surface issues are normal during curing, but compaction problems usually get worse over time.
    • The sooner you document the issue, the easier it is to get it corrected.

    A new asphalt driveway should feel solid, look uniform, and hold up to daily use without showing weakness right away. When compaction is done correctly, the surface locks together, sheds water better, and resists early wear. When it is not, the driveway can start showing problems much sooner than it should.

    If you are comparing a fresh driveway to other paving projects you have seen, it helps to know what poor compaction looks like and what it does not. Some minor surface changes are part of normal curing. Others are signs the mat was not compacted well enough during installation.

    If you are still planning a driveway project, our homeowner guide is a better place to start. If the driveway is already showing visible problems, our driveway repair guide covers the next step.

    Why compaction matters

    Compaction is one of the most important parts of asphalt installation. It helps the mix lock together, reduce air voids, and create a surface that can support traffic and weather.

    The Sakai compaction guide explains how temperature, density, and rolling technique affect pavement durability.

    The Certified MTP testing guide shows why verification matters when compaction is in question.

    Common signs the driveway was not compacted properly

    1. The surface looks loose or open

    A poorly compacted driveway can look rough, sandy, or uneven in texture. Instead of a tight, consistent finish, the surface may appear open and weak.

    That does not always mean failure on day one, but it is worth watching closely.

    2. The edges break down early

    Edges are often the first place weak compaction shows up. If the sides of the driveway crumble, chip, or start unraveling soon after installation, the pavement may not have been compacted strongly enough near the perimeter.

    3. Small cracks appear too soon

    All asphalt can develop cracks eventually, but cracking soon after installation is a warning sign. When the mat was not compacted properly, it can move more, dry out faster, and fail sooner under traffic.

    4. Soft spots or shallow depressions form

    A driveway that feels soft underfoot or shows slight dips in the wheel path may have a compaction problem. This can be especially noticeable in warm weather or after the driveway has carried a few vehicles.

    5. Water lingers longer than it should

    If puddles are forming in areas that should drain cleanly, the surface may not be tight enough or the base may not have been prepared correctly. Water that stays on top for too long usually shortens the life of the pavement.

    6. The surface starts raveling

    Raveling is when small pieces of aggregate start loosening from the surface. That often points to poor bonding, weak compaction, or a surface that was not finished correctly.

    What is normal and what is not

    A fresh driveway may look slightly different during the curing period. Color can fade, and the surface can stiffen as it cools.

    That is normal.

    What is not normal is a surface that is already breaking down, holding water, or showing depressions very soon after installation. If the issue appears quickly, it is worth treating it as a construction problem rather than simple aging.

    If you want to understand curing better, this guide on freshly laid asphalt curing time is a useful reference.

    What homeowners should do next

    If you think the driveway was not compacted properly:

    • take photos of the problem areas
    • note when the issues first appeared
    • avoid heavy patching before the contractor reviews it
    • contact the paving company as soon as possible
    • ask whether the issue is related to compaction, base prep, or drainage

    Early documentation matters. The longer you wait, the harder it can be to show that the problem came from the original installation.

    How poor compaction usually gets missed

    Poor compaction is not always obvious right away. Sometimes it blends in with a normal new surface until traffic, heat, or weather exposes the weak points.

    A few common causes include:

    • rolling the mat too lightly
    • compacting outside the proper temperature window
    • working with a mix that is difficult to densify
    • not giving enough attention to edges, joints, or transitions
    • rushing the paving sequence

    That is why experienced installers pay close attention to the whole process, not just the final appearance.

    FAQs

    How soon will poor compaction show up?

    Sometimes within days or weeks, but other times not until the driveway starts carrying regular traffic.

    Can a badly compacted driveway be fixed?

    Sometimes, yes. Small areas may be repaired, but more serious failure can require partial or full replacement.

    Is soft asphalt always a compaction problem?

    No. Heat can temporarily soften asphalt, but repeated softness or visible depressions point to a larger issue.

    Should I wait before calling the contractor?

    No. If the driveway looks wrong soon after installation, contact them as soon as possible.

    Can drainage problems look like compaction problems?

    Yes. Water management and compaction often overlap, which is why a full site review matters.

    What should a good installation look like?

    A good driveway should feel firm, drain properly, and develop a consistent surface as it cures.

    Sources

    Do the signs point to a compaction problem?

    If your new driveway is already showing signs of trouble, do not wait for it to get worse. Maisano Brothers Inc. can review the surface, explain what is happening, and help determine whether repair or replacement makes the most sense.

  • How to Prepare Your Property Before Asphalt Paving

    How to Prepare Your Property Before Asphalt Paving

    If you’re planning a new driveway, resurfacing an older surface, or paving a parking area, the work starts before the asphalt truck arrives. In this guide, you’ll learn the seven prep steps that make a paving job go smoother: clearing access, confirming scope, handling drainage, marking utilities, protecting nearby surfaces, coordinating timing, and checking the site one last time before work begins.

    Good prep does more than save time. It helps the crew set the right elevations, avoid conflicts with buried or fragile fixtures, and finish a cleaner, more durable surface.

    Why prep matters before the first load arrives

    Asphalt paving is a construction project, not just a material drop. The better the site is prepared, the easier it is for the contractor to grade the surface correctly, complete any needed base repair, and place a smooth overlay when that is the right solution.

    Preparation also helps reduce delays, vehicle conflicts, utility problems, cleanup issues, and confusion about what is included in the job. A few hours of planning can save a lot of backtracking later.

    1. Clear the work area

    Remove anything that could block equipment or slow the crew down.

    That usually includes:

    • cars and trucks
    • basketball hoops
    • planters
    • patio furniture
    • trailers
    • storage items
    • trash cans

    If the crew cannot reach the paving area cleanly, the project can stall before it starts. Clearing the site also gives the contractor room to work edges, transitions, and corners without damage.

    2. Confirm the scope before paving day

    The most common project problems start with assumptions. Before the crew arrives, make sure everyone agrees on what is being done and what is not.

    Ask:

    • Is this a new install, an overlay, or a repair?
    • Are base repairs included?
    • Will old material be removed?
    • Is cleanup included?
    • Who handles striping or markings on a commercial site?

    This conversation matters because the right prep depends on the project type. A simple residential driveway needs a different setup than a commercial lot with traffic control, multiple users, or phased work.

    3. Pay attention to grading and drainage

    Water is one of asphalt’s biggest enemies, so the site needs to shed it correctly. When the surface holds water, the pavement wears faster and weak spots show up sooner.

    Walk the property and point out:

    • low spots
    • soft spots
    • areas that already collect water
    • edge breakdown
    • runoff paths
    • places where a slope feels wrong

    If you’re dealing with a problem area, ask whether grading or additional base repair should be included before paving. Even a great asphalt surface will struggle if the water has nowhere to go.

    4. Mark utilities and protect fixtures

    If the work involves digging, edge work, or any kind of deeper prep, utility markings matter.

    Before paving day:

    • call 811 if digging is part of the job
    • identify sprinkler heads, drain covers, or landscape lighting
    • point out buried service lines if you know their location
    • mark anything fragile or hidden near the work zone

    The official 811 Before You Dig guidance exists for a reason: buried lines are easy to miss and expensive to hit. If the site also has drains, lights, or decorative edges, flag those too so the crew can protect them.

    5. Make access and staging easy

    The crew needs a clear path for trucks, rollers, and handwork.

    Check for:

    • locked gates
    • low branches
    • narrow entrances
    • parked vehicles nearby
    • obstacles along the route in and out
    • areas where material or equipment can be staged

    If access is tight, tell the contractor ahead of time so they can plan for truck position, equipment layout, and turning room. Small access problems can slow a job down fast.

    6. Coordinate people, timing, and weather

    If the property is shared or busy, timing matters almost as much as the paving itself.

    For example:

    • tell tenants when vehicles must be moved
    • notify employees or customers about closure windows
    • keep deliveries away from paving time
    • make sure someone is available onsite to answer questions
    • watch the forecast and build in flexibility for weather delays

    The best paving crews can work efficiently, but they still need the site to be ready. Coordination keeps the job from turning into a stop-and-start mess.

    7. Protect landscaping and nearby surfaces

    If the paving area sits near grass, beds, fencing, or finished concrete, protect those areas before work starts.

    Good paving crews are careful, but it helps to point out:

    • fresh landscaping
    • fragile edging
    • sprinkler heads
    • decorative stone
    • garage aprons
    • walkways

    A quick walk-through before work starts is usually enough to catch trouble spots. For a public utility-focused reference, 811 Before You Dig explains why buried-line marking matters before excavation starts.

    Residential vs. commercial prep

    Residential prep is usually simpler: clear the driveway, move vehicles, and give the crew access. If this is a home project, residential paving is a good place to see how that work fits into the bigger project.

    Commercial prep usually needs more coordination:

    • traffic control
    • tenant notices
    • staging areas
    • reopening plans
    • after-hours scheduling
    • signage or striping coordination

    For larger sites, commercial paving is the better fit.

    The bigger the site, the more important the prep plan becomes.

    Common mistakes to avoid

    • leaving vehicles in the work area
    • assuming the contractor knows where everything is buried
    • forgetting to plan for rain or weather delays
    • not telling occupants when the site will be unavailable
    • failing to ask what prep work is included in the estimate
    • skipping a final walk-through before the crew starts

    FAQs

    How far in advance should I prepare my property?

    For most residential projects, a day or two is enough. Larger commercial jobs may need more lead time because of traffic control, tenant coordination, or phased access.

    Do I need to remove everything from the driveway or parking area?

    Yes. Anything inside the work zone should be moved before the crew arrives so equipment, material, and handwork can move without interruption.

    Should I warn my neighbors?

    If access, noise, or temporary parking changes may affect them, yes. A quick heads-up can prevent complaints and confusion, especially in tight neighborhoods or shared lots.

    What if I find a drainage issue before paving?

    Bring it up before the job starts. Drainage problems are much easier to correct during prep than after asphalt is already in place, and the contractor can decide whether grading or repair is needed.

    Does prep differ for resurfacing and new paving?

    Yes. New paving usually needs more site preparation than a simple overlay because the crew may need to adjust elevations, fix the base, or correct drainage before the new surface goes down.

    What should I ask the contractor before paving day?

    Ask what prep work they expect from you, what they will handle, and whether any site issues could change the scope. That short conversation often prevents the biggest surprises.

    Sources

    Are you ready for paving day?

    If you want a paving project to go smoothly, the prep matters. Maisano Brothers Inc. can review the site, confirm the scope, and help you plan the work the right way. If you’re ready to move forward, contact us and we’ll take it from there.

  • How to Find a Reputable Asphalt Paving Contractor

    How to Find a Reputable Asphalt Paving Contractor

    Key Takeaways
    • A reputable asphalt paving contractor should have a strong local reputation, clear communication, written estimates, and proof of insurance.
    • Online reviews are helpful when you look beyond the star rating and evaluate repeated patterns in workmanship, professionalism, and problem resolution. This is an inference based on the review guidance in the current article.
    • Detailed estimates matter because two paving proposals with similar prices may include very different levels of preparation, drainage work, and repair scope. This expands on the article’s emphasis on comprehensive quotes.
    • Large upfront deposits, rushed decisions, and vague explanations are common warning signs when hiring a paving contractor.
    • The best contractor for the job is not always the cheapest one. Experience, preparation, and honesty about the condition of the pavement often matter more than the lowest number.

    Hiring the right Connecticut asphalt paving contractor can make the difference between a driveway or parking lot that performs for years and one that starts failing far too soon. A good contractor does more than provide a low number on paper. They help you understand the scope of the work, prepare the site correctly, install the pavement properly, and stand behind the finished product.

    Unfortunately, not every paving contractor operates the same way. Some companies offer quality workmanship, clear communication, and honest recommendations. Others rely on vague estimates, rushed installations, poor materials, or high-pressure sales tactics. That is why it is so important to know what to look for before signing anything.

    If you are planning a new driveway, resurfacing an older surface, repairing problem areas, or exploring full paving services, this guide will help you evaluate contractors with more confidence and avoid common mistakes.

    Start With Local Reputation

    One of the best ways to begin your search is by looking for contractors with a proven local presence. A company that has been serving the same region for years usually has more at stake than a fly-by-night operator passing through town.

    Ask neighbors, family members, local business owners, or property managers who they have used and whether they would hire that contractor again.

    Check Reviews, But Read Them Carefully

    Online reviews can be helpful, but they need to be read with context.

    • Do customers mention professionalism and communication?
    • Do they describe long-lasting work?
    • Are there repeated complaints about cracking or drainage?
    • Does the contractor respond professionally to feedback?

    Verify Licensing and Insurance

    A reputable contractor should be able to provide proof of licensing (if required), general liability insurance, and workers’ compensation coverage.

    If a company cannot provide documentation, that is a major red flag.

    Look for Experience With Your Type of Project

    Not all contractors specialize in the same type of work. Some focus on residential driveways, while others handle commercial lots or municipal projects.

    Make sure the contractor has experience with projects similar to yours.

    Ask About the Full Scope of Work

    A reputable contractor should clearly explain the job from start to finish.

    • Will the old pavement be removed or resurfaced?
    • Is the base stable or does it need repair?
    • How will drainage be handled?
    • What thickness of asphalt is being installed?

    If they can’t explain it clearly, that’s a warning sign.

    [elementor-template id=”4630″]

    Get Detailed Written Estimates

    Always get everything in writing. This helps you compare contractors fairly.

    It’s also smart to get multiple estimates so you can evaluate pricing, scope, and professionalism side by side.

    A strong estimate should include:

    • Scope of work
    • Preparation details
    • Materials and application
    • Cleanup and finishing
    • Payment terms

    The lowest price is not always the best value. Missing steps like base prep or drainage can lead to expensive problems later.

    Be Wary of High-Pressure Sales Tactics

    Be cautious of contractors who push you to sign immediately or claim they have “extra asphalt” available at a discount.

    Reputable contractors give you time to make an informed decision.

    Watch the Payment Terms

    Payment structure matters. Avoid large upfront payments before work begins.

    A professional contractor typically uses a clear schedule tied to project progress.

    Evaluate Communication and Professionalism

    Pay attention to how the contractor communicates from the beginning.

    • Do they show up on time?
    • Do they answer questions clearly?
    • Do they follow through?

    Good communication early usually leads to a smoother project.

    Ask to See Previous Work

    A reputable contractor should provide examples of past projects or references.

    Seeing completed work helps you evaluate quality, finish, and durability.

    Understand Surface vs Structural Repairs

    Not all problems are surface-level. Some require deeper repairs or full replacement.

    A trustworthy contractor will explain whether your project needs maintenance, resurfacing, or reconstruction.

    Red Flags to Watch For

    • No written estimate
    • No proof of insurance
    • Unusually low pricing
    • Pressure to sign immediately
    • No references or past work

    Questions to Ask Before You Hire

    • How long have you been in business?
    • Are you licensed and insured?
    • What preparation work is included?
    • How will drainage be handled?
    • What happens if base issues are found?
    • What does your estimate include?

    Final Thoughts

    Finding a reputable asphalt paving contractor is about more than price. It’s about choosing a company that communicates clearly, prepares properly, and stands behind their work.

    Taking the time to evaluate contractors carefully helps you avoid costly mistakes and ensures long-term performance.

    Looking for a contractor you can trust? Maisano Brothers has served Connecticut homeowners since 1967 with fully licensed, insured paving services. Request your free estimate and see why our reputation speaks for itself.

    Frequently Asked Questions

    How do I know if an asphalt paving contractor is reputable?

    Look for a strong local reputation, verifiable insurance, clear written estimates, experience with projects like yours, and professional communication from the first interaction onward.

    Should an asphalt contractor be licensed and insured?

    Yes. The current article specifically recommends confirming licensing where required and verifying liability and workers’ compensation coverage.

    Why should I get more than one estimate?

    Comparing multiple written estimates helps you understand the scope of work, identify missing items, and avoid choosing a low number that leaves out critical preparation or repairs. This expands on the article’s guidance to obtain detailed written estimates from several contractors.

    Is the cheapest paving estimate usually the best option?

    Not necessarily. A much lower estimate can signal thinner asphalt, poor base work, limited drainage planning, or other shortcuts that may lead to early failure.

    What are red flags when hiring a paving contractor?

    Major red flags include vague quotes, no written proposal, no proof of insurance, pressure to sign immediately, and large upfront payment demands.

    Should I trust a contractor who says they have extra asphalt left over?

    That kind of pitch should be treated cautiously. While not every last-minute offer is illegitimate, rushed “extra material” deals are often associated with pressure tactics and lower-quality work. This is a practical warning based on the broader red-flag guidance in the article.

    What should be included in a paving estimate?

    A good estimate should clearly describe the project scope, materials, labor, and any additional charges so you can compare contractors fairly.

  • How Much Does It Cost to Pave a Driveway in 2026?

    How Much Does It Cost to Pave a Driveway in 2026?

    Key Takeaways
    • Average asphalt driveway cost in 2026: $4–$10 per sq ft
    • Total cost depends heavily on site prep and base condition
    • Asphalt is more cost-effective than concrete upfront
    • Repairs and resurfacing can reduce costs if the base is stable
    • Proper installation matters more than choosing the lowest price

    The cost to pave a driveway in 2026 depends on several factors, including size, site conditions, materials, and the amount of preparation required. While many homeowners look for a quick price per square foot, the reality is that no two driveways are exactly the same.

    Understanding what goes into driveway pricing can help you budget accurately and avoid costly surprises during your project. If you’re planning a new installation, explore our full range of asphalt paving services.

    Average Cost to Pave a Driveway in 2026

    In 2026, the average cost to pave an asphalt driveway typically ranges between $4 to $10 per square foot, depending on the complexity of the job.

    Driveway Cost Breakdown (2026)

    Project Type Cost Per Sq Ft Typical Total Cost
    Basic Installation $4 – $6 $3,000 – $5,000
    Standard Residential $6 – $8 $4,000 – $7,000
    Premium / Complex $8 – $10+ $6,000 – $10,000+

    For an approximate estimate based on your property, use our asphalt cost calculator.

    What Affects the Cost of Paving a Driveway?

    1. Site Preparation and Excavation

    Removing old pavement, grading, and preparing the base are some of the biggest cost drivers. Proper asphalt grading ensures long-term durability.

    2. Drainage and Base Condition

    Poor drainage leads to early failure. Many issues stem from improper installation, which is a leading cause of asphalt deterioration.

    3. Asphalt Thickness

    Thicker asphalt increases durability but also cost. This is especially important for high-use driveways.

    4. Accessibility and Layout

    Steep slopes, tight access, or complex layouts can increase labor and equipment costs.

    5. Climate and Location

    Regional conditions like the Connecticut climate affect both installation methods and long-term performance.

    Asphalt vs Concrete Driveway Costs

    Asphalt is generally more affordable upfront, while concrete offers different long-term benefits. Learn more in our guide to asphalt vs concrete driveways.

    Asphalt vs Concrete Comparison

    Feature Asphalt Concrete
    Cost $4 – $10 / sq ft $8 – $15+ / sq ft
    Lifespan 15–25 years 25–40 years
    Maintenance Moderate Low
    Best Climate Cold climates Warm climates
    [elementor-template id=”4630″]

    Repair vs Replacement Costs

    Not every driveway needs full replacement. Some can be repaired or resurfaced depending on the condition. Learn more about resurfacing vs replacement.

    Repair vs Replacement Cost Comparison

    Service Cost Best For
    Crack Filling $1 – $3 / linear ft Minor damage
    Pothole Repair $150 – $600+ Localized damage
    Resurfacing $3 – $7 / sq ft Solid base
    Full Replacement $4 – $10+ / sq ft Severe damage

    If you’re dealing with damage, check out our guide on pothole repair and patching.

    How Maintenance Impacts Cost

    Preventative maintenance is the easiest way to reduce long-term costs. Regular sealcoating protects your investment and delays replacement.

    Winter conditions also play a major role. Learn how to protect your driveway with proper snow removal techniques and safe salting practices.

    Choosing the Right Contractor

    The contractor you hire has a major impact on cost and longevity. Learn how to choose a reputable asphalt paving contractor before starting your project.

    Conclusion

    The cost to pave a driveway in 2026 typically ranges from $4 to $10 per square foot, but the final price depends on preparation, materials, and site conditions.

    Getting the right estimate is the best way to plan your project. Request a free estimate or use our asphalt cost calculator to get started.

    [elementor-template id=”4630″]

    Frequently Asked Questions

    How much does a driveway cost in 2026?

    Most asphalt driveways cost between $4 and $10 per square foot depending on site conditions and scope.

    What is the cheapest way to pave a driveway?

    Resurfacing is typically cheaper than full replacement if the base is still stable.

    How long does an asphalt driveway last?

    20–30 years with proper maintenance like sealcoating and crack repair.

    Is asphalt cheaper than concrete?

    Yes, asphalt typically costs less upfront but may require more maintenance.

    What increases driveway paving cost the most?

    Excavation, poor soil conditions, drainage issues, and base repair are the biggest cost drivers.

  • What Causes Asphalt Driveways And Parking Lots To Deteriorate and How To Save Them?

    What Causes Asphalt Driveways And Parking Lots To Deteriorate and How To Save Them?

    Key Takeaways
    • Oxidation from sunlight and air makes asphalt more brittle over time, which increases the risk of cracking and raveling.
    • Water infiltration is one of the most damaging forces in asphalt pavement because it weakens the pavement structure and reduces support in the underlying layers.
    • Freeze-thaw cycles, repeated traffic loading, and poor drainage can accelerate potholes, rutting, and structural failure.
    • Some pavement problems are surface-level, but recurring potholes, alligator cracking, and settlement often point to deeper base issues.
    • Early maintenance such as inspections, crack sealing, drainage correction, and sealcoating can extend service life and delay more expensive repairs.

    Asphalt driveways and parking lots are built to handle daily use, but they are not maintenance-free. Over time, even a well-installed asphalt surface will begin to show signs of wear. The key is understanding what causes deterioration, what warning signs to watch for, and what steps can help you protect the pavement before minor issues become major repairs.

    For homeowners and property managers, understanding parking lot deterioration and driveway wear is critical. Asphalt distress usually does not begin with a dramatic failure—it often starts with oxidation, small cracks, drainage issues, or repeated stress from traffic.

    If you want to save your driveway and extend its lifespan, the best approach is early maintenance, not reactive repairs.

    Why Asphalt Deteriorates Over Time

    Asphalt pavement is designed to be flexible, but that flexibility decreases over time. Exposure to sunlight, oxygen, water, traffic loads, and chemicals all contribute to deterioration. When these elements combine, the pavement begins to weaken both at the surface and below.

    In many cases, deterioration starts slowly but accelerates once structural integrity is compromised. That’s why early detection and maintenance are critical.

    UV Damage and Oxidation

    One of the most common causes of asphalt deterioration is UV damage and oxidation. Over time, sunlight and air break down the asphalt binder, causing the pavement to lose flexibility.

    This process leads to fading, brittleness, and surface cracking. Once the surface becomes dry and rigid, it is far more vulnerable to damage from traffic and weather.

    Water Infiltration: The Leading Cause of Failure

    Water is the number one enemy of asphalt pavement. It enters through cracks and surface voids, eventually reaching the base and subgrade layers.

    Once water infiltrates these layers, it weakens the structural support of the pavement. This can lead to potholes, soft spots, and widespread cracking.

    In colder climates, freeze-thaw cycles make this problem worse. Water expands when frozen, creating pressure within the pavement and accelerating deterioration.

    Drainage and Grading Issues

    Standing water is never a good sign. Poor drainage is one of the fastest ways to shorten the life of asphalt.

    Ensuring proper drainage and grading allows water to flow away from the surface instead of pooling and seeping into the pavement structure.

    Without proper drainage, even a newly paved driveway or parking lot can begin to fail prematurely.

    Traffic Load and Repeated Stress

    Every asphalt surface is designed for a specific load capacity. Repeated stress from heavy vehicles or consistent traffic patterns can cause the pavement to break down over time.

    This is especially common in drive lanes, parking areas, and locations where vehicles frequently stop or turn. Over time, this stress can lead to rutting, depressions, and cracking.

    Chemical Damage and Surface Breakdown

    Oil, gasoline, and other chemicals can weaken asphalt by breaking down the binder. What starts as a stain can eventually become a soft spot that fails under pressure.

    This type of damage is often seen in parking areas and driveways where vehicles regularly leak fluids.

    [elementor-template id=”4630″]

    Poor Installation or Weak Base

    Sometimes deterioration begins below the surface due to improper installation. A poorly prepared base, inadequate compaction, or insufficient thickness can lead to early failure.

    Even if the surface looks good initially, underlying issues can cause the pavement to deteriorate much faster than expected.

    Warning Signs of Asphalt Deterioration

    Recognizing early warning signs can help prevent costly repairs.

    • Fading and discoloration
    • Surface cracks
    • Raveling or loose aggregate
    • Potholes or recurring patches
    • Standing water
    • Soft spots or sinking areas
    • Alligator cracking

    Addressing these issues early can significantly extend the life of your asphalt surface.

    How to Prevent Asphalt Deterioration

    Preventive maintenance is the most effective way to protect asphalt.

    Sealcoating

    Sealcoating protects against UV exposure, water, and chemicals. It helps preserve flexibility and extends pavement life.

    Crack Filling

    Sealing cracks early prevents water from entering the base layers.

    Drainage Maintenance

    Ensuring proper grading and water flow reduces the risk of structural damage.

    Routine Inspections

    Regular inspections help catch problems early before they escalate.

    Conclusion

    Asphalt deterioration is a natural process, but it can be slowed significantly with the right maintenance strategy. Understanding the causes—UV exposure, water infiltration, drainage issues, traffic stress, and base failure—allows property owners to take proactive steps.

    By addressing small issues early and maintaining your pavement properly, you can extend its lifespan and avoid costly repairs.

    Don’t wait until small cracks become costly repairs. Maisano Brothers Inc. offers professional sealcoating and maintenance services throughout Connecticut. Schedule your free estimate and protect your investment.

    Frequently Asked Questions

    What is the main cause of asphalt deterioration?

    There is not just one cause, but water infiltration is one of the most damaging because it weakens the pavement structure below the surface. Oxidation, UV exposure, traffic loading, and freeze-thaw cycles also play major roles.

    Does sunlight really damage asphalt?

    Yes. UV exposure and oxidation gradually dry out the asphalt binder, making the pavement less flexible and more likely to crack.

    Why is standing water bad for asphalt?

    Standing water increases moisture exposure and makes it easier for water to enter cracks and weak spots. Over time, that can contribute to potholes, base weakening, and premature failure.

    Can oil or gasoline damage a driveway?

    Yes. Petroleum products can soften asphalt in localized areas, which can lead to soft spots and surface breakdown under traffic.

    What is alligator cracking?

    Alligator cracking is a network of interconnected cracks that usually signals structural failure in the pavement system rather than a simple surface problem.

    How do I know if my asphalt needs repair or replacement?

    Surface aging, small cracks, and oxidation may be handled with maintenance or resurfacing, but recurring potholes, rutting, soft areas, drainage issues, and widespread cracking often require more substantial repair or replacement.

    Does sealcoating fix damaged asphalt?

    No. Sealcoating is a preventive treatment, not a structural repair. It helps protect sound or moderately aged pavement from oxidation, moisture, and chemical exposure.

    How often should asphalt be inspected?

    A yearly review is a smart baseline, and inspections are especially helpful after winter, after long periods of heavy rain, or when new cracking, ponding, or soft spots appear. This recommendation is a practical maintenance inference based on preservation guidance and the deterioration mechanisms above.

  • Pothole Repair for Residential Driveways: A Complete Guide to Patching Asphalt the Right Way

    Pothole Repair for Residential Driveways: A Complete Guide to Patching Asphalt the Right Way

    Key Takeaways
    • Potholes are caused by water infiltration, freeze-thaw cycles, and base failure beneath the asphalt
    • Cold patch repairs are temporary, while hot mix and full-depth patching provide longer-lasting solutions
    • Proper preparation and compaction are critical to prevent early failure
    • Recurring potholes often indicate deeper structural or drainage issues
    • Preventive maintenance like sealcoating and crack filling significantly extends driveway lifespan

    Potholes don’t appear overnight. What starts as a small crack or weak spot in your asphalt can quickly develop into a larger structural issue if left untreated. For homeowners, potholes in a driveway are more than just an eyesore—they can create safety hazards, damage vehicles, and lead to costly repairs if ignored.

    If you’re dealing with surface damage, learning how to properly driveway repair issues early can save you time and money. This guide explains what causes potholes, how to fix them correctly, and when it’s time to call in a professional.

    What Causes Potholes in Asphalt Driveways?

    Potholes are typically the result of water infiltration combined with structural failure beneath the asphalt surface. While they may look like surface-level damage, the real problem often starts below.

    Water Infiltration

    Water enters through small cracks in the asphalt surface. Once it penetrates the pavement, it weakens the underlying base layers.

    Freeze-Thaw Cycles

    In climates like Connecticut, water freezes and expands during colder months. This expansion creates pressure within the pavement, leading to cracks and voids beneath the surface.

    Traffic Stress

    As vehicles drive over weakened areas, the asphalt begins to break apart. Over time, this repeated stress causes the surface to collapse.

    Base Failure

    When the subgrade or base layer becomes unstable, the asphalt above it can no longer support weight. This is one of the most common reasons potholes continue to return after being patched.

    Why Prompt Pothole Repair Matters

    Delaying pothole repairs can lead to more serious and expensive issues. What may start as a small patch job can quickly turn into a full driveway replacement if ignored.

    Improved Safety

    Potholes create uneven surfaces that increase the risk of trips and falls, especially for children and older adults.

    Vehicle Protection

    Driving over potholes can damage tires, wheels, suspension systems, and vehicle alignment.

    Preventing Further Damage

    Once water enters the pavement, deterioration accelerates. Addressing potholes early stops the damage from spreading.

    Lower Long-Term Costs

    Understanding the cost of pothole repair helps homeowners see why early maintenance is significantly more affordable than major reconstruction.

    Types of Pothole Repairs

    Choosing the right repair method depends on the size, depth, and severity of the pothole.

    Cold Patch Asphalt

    This is a quick and convenient option for small potholes. Cold patch can be applied without specialized equipment and works well for temporary fixes, especially in colder weather.

    Hot Mix Asphalt

    Hot mix asphalt provides a stronger, longer-lasting repair. It requires proper installation and compaction but delivers better durability and performance.

    Full-Depth Patching

    This method involves removing both the damaged asphalt and the compromised base beneath it. The area is rebuilt from the ground up, making it the most effective solution for recurring potholes.

    Step-by-Step Guide to Repairing a Pothole

    1. Assess the Damage

    Determine the size and depth of the pothole. Look for loose edges, cracks, and signs of base failure.

    2. Prepare the Area

    Remove loose asphalt, debris, and dirt. For longer-lasting repairs, square off the edges of the pothole to create a clean working area.

    3. Clean Thoroughly

    A clean surface is critical for proper adhesion. Remove dust, moisture, and any remaining debris.

    4. Apply Patch Material

    Fill the pothole with cold patch or hot mix asphalt, depending on the repair type. Slightly overfill the area to allow for compaction.

    5. Compact the Material

    Use a tamper, plate compactor, or heavy object to compress the material. Proper compaction ensures a strong bond and prevents premature failure.

    6. Seal the Surface

    Applying a sealcoat over the repair helps protect against water infiltration and extends the life of the patch.

    When a Patch Isn’t Enough

    Not all potholes can be fixed with a simple patch. In some cases, the issue runs deeper than the surface.

    • Potholes that repeatedly return
    • Soft or sinking areas in the driveway
    • Multiple damaged sections
    • Poor drainage or standing water

    In these situations, it’s best to get a free estimate and have the driveway evaluated for more permanent solutions like resurfacing or full-depth repair.

    Preventing Future Potholes

    Maintaining your residential driveway paving is the best way to prevent potholes from forming in the first place.

    Sealcoating

    Sealcoating every 2–3 years helps protect asphalt from water, UV rays, and chemical damage.

    Crack Filling

    Addressing cracks early prevents water from penetrating into the base layers.

    Proper Drainage

    Ensuring water flows away from your driveway reduces the risk of subbase erosion.

    Even Load Distribution

    Avoid parking in the same exact spot repeatedly, which can weaken asphalt over time.

    DIY vs Professional Pothole Repair

    When DIY Makes Sense

    Small potholes with stable bases can often be repaired using cold patch materials as a temporary solution.

    When to Hire a Professional

    Larger potholes, recurring damage, or signs of base failure require professional equipment and expertise to ensure a long-lasting repair.

    Conclusion

    Pothole repair is an essential part of maintaining a safe, durable, and visually appealing driveway. Addressing issues early helps prevent more extensive damage and costly repairs down the line. Whether you handle minor repairs yourself or bring in a professional for more complex work, taking action now will extend the life of your asphalt surface.

    If potholes keep coming back or the damage runs deeper than the surface, it may be time for a professional assessment. Request a free estimate from Maisano Brothers — Connecticut’s trusted driveway repair experts since 1967.

    What is the best method for pothole repair?

    Hot mix asphalt provides the most durable repair, while full-depth patching is best for structural failures.

    How long does pothole repair last?

    Cold patch may last a few months to a year, while properly installed hot mix repairs can last several years.

    Can I repair a pothole myself?

    Yes, small potholes can be repaired using cold patch, but larger or recurring issues require professional repair.

    Why do potholes keep coming back?

    Recurring potholes are usually caused by base failure or poor drainage beneath the surface.

    Does sealcoating fix potholes?

    No, sealcoating protects the surface but does not repair structural damage.

    When is the best time to repair potholes?

    Spring through fall is ideal for permanent repairs using hot mix asphalt.

    What causes potholes in driveways?

    Water infiltration, freeze-thaw cycles, traffic stress, and weak base layers are the primary causes.

    How can I prevent potholes from forming?

    Regular maintenance, crack sealing, proper drainage, and sealcoating help prevent potholes.

  • Do You Need to Resurface or Fully Replace Your Asphalt Driveway?

    Do You Need to Resurface or Fully Replace Your Asphalt Driveway?

    Key Takeaways
    • Resurfacing adds a new asphalt layer but does not fix structural issues
    • Full replacement rebuilds the driveway from the base up
    • Surface cracks and minor wear can often be resurfaced
    • Potholes, sinking, and alligator cracking require replacement
    • The condition of the base layer determines the correct solution

    If your asphalt driveway is starting to crack, fade, or break apart, you’re probably asking the big question: should you resurface it or replace it completely?

    The answer depends on what’s happening beneath the surface. Some driveways only need a new surface layer, while others require full reconstruction due to structural failure.

    Understanding whether to resurface your asphalt or move forward with a full rebuild can save you thousands—and help you make the right long-term investment for your property.

    Resurfacing vs Replacement: What’s the Difference?

    Asphalt Resurfacing (Overlay)

    Resurfacing involves installing a new layer of asphalt over the existing driveway. This process restores the appearance and performance of the surface without removing the entire structure.

    • Adds a new surface layer (typically 1.5”–2” of hot mix asphalt)
    • Improves appearance and smoothness
    • Extends the life of your driveway
    • More cost-effective than full replacement

    Resurfacing works best when the base layer is still stable and the damage is limited to the surface.

    Full Asphalt Replacement

    Full replacement involves removing the existing asphalt and rebuilding the driveway from the ground up. This includes addressing the subgrade and base layers.

    • Removes all existing asphalt
    • Repairs or replaces the base course
    • Installs new asphalt from the foundation up
    • Provides a completely new, long-lasting driveway

    This approach is necessary when there is base failure, widespread cracking, or structural instability.

    Signs You Only Need Asphalt Resurfacing

    Not every damaged driveway needs to be replaced. In many cases, resurfacing is the right solution.

    • Surface cracks (not deep or widespread)
    • Fading or oxidation
    • Minor surface wear
    • No major drainage issues
    • Driveway feels solid underfoot

    If the structure is still intact, resurfacing can restore your driveway at a lower cost while extending its usable life.

    Signs You Need Full Asphalt Replacement

    Some issues go deeper than the surface—and resurfacing won’t fix them.

    • Multiple or recurring potholes
    • Large cracks and alligator cracking
    • Soft spots or sinking areas
    • Poor drainage or standing water
    • Driveway is over 20–25 years old

    These are clear indicators of structural failure beneath the asphalt, meaning replacement is the only long-term solution.

    Resurfacing vs Replacement Cost Comparison

    A proper cost comparison between resurfacing and replacement helps homeowners understand the real investment involved.

    While resurfacing has a lower upfront cost, it may not last if underlying issues exist. Replacement costs more initially but provides a longer lifespan and fewer repairs over time.

    Choosing the wrong option can lead to repeat repairs, making resurfacing more expensive in the long run if the base is already compromised.

    The Role of the Base Layer

    Your driveway is only as strong as what’s underneath it.

    The base course supports the asphalt surface and distributes weight. If it becomes unstable due to water infiltration or poor compaction, the surface will fail regardless of how many times it is resurfaced.

    This is why professional evaluations focus on structural integrity—not just surface appearance.

    How Professionals Evaluate Your Driveway

    A professional contractor will assess several key factors before recommending resurfacing or replacement:

    • Depth and severity of cracks
    • Presence of potholes
    • Drainage conditions
    • Structural stability of the base
    • Age of the driveway

    If you’re unsure which option is right, it’s best to get a professional opinion before investing in the wrong solution.

    Resurfacing vs Replacement: Quick Comparison

    Factor Resurfacing Replacement
    Cost Lower upfront Higher upfront
    Durability 8–15 years 20+ years
    Fixes Base Issues No Yes
    Best For Surface-level damage Structural failure

    How to Extend the Lifespan of Your Asphalt Driveway

    Proper maintenance plays a major role in extending the lifespan of your asphalt driveway.

    • Sealcoat every 2–3 years
    • Fill cracks early to prevent water intrusion
    • Maintain proper drainage
    • Avoid repeated heavy loads in the same location

    Taking these steps helps protect your investment and delay the need for major repairs or replacement.

    Conclusion

    Choosing between resurfacing and replacement comes down to one key factor: the condition of your driveway’s foundation.

    If the base is stable, resurfacing can be a cost-effective way to restore your driveway. If the base is failing, replacement is the only solution that will provide long-term results.

    Making the right decision now can prevent future headaches and unnecessary expenses.

    Not sure which route is right for your driveway? Maisano Brothers can inspect your asphalt and recommend the most cost-effective solution. Get your free estimate today, or explore our full range of asphalt paving services for Connecticut homeowners.

    Frequently Asked Questions

    Is resurfacing cheaper than replacement?

    Yes upfront, but it can cost more long-term if the base is failing.

    How long does asphalt resurfacing last?

    Typically 8–15 years depending on conditions and maintenance.

    When should I replace my asphalt driveway?

    When there are structural issues like base failure, widespread cracking, or sinking.

    Can resurfacing fix potholes?

    Only if the base is still stable. Otherwise, potholes will return. If you’re dealing with recurring surface damage, learn more about proper pothole repair and patching methods to address the root of the issue.

    What is alligator cracking?

    A pattern of interconnected cracks that indicates structural failure in the pavement.

    How do I know if my driveway base is failing?

    Signs include soft spots, sinking areas, recurring potholes, and drainage issues.

    What’s the lifespan of a new asphalt driveway?

    A properly installed driveway can last 20–30 years with maintenance.

  • How to Plan a Commercial Asphalt Paving Project Without Disrupting Your Business

    How to Plan a Commercial Asphalt Paving Project Without Disrupting Your Business

    Key Takeaways
    • A commercial asphalt paving project starts with a site evaluation to assess pavement condition, drainage, traffic flow, and areas that need repair or replacement.
    • Hiring an experienced commercial paving contractor helps you manage logistics, safety, access, striping, and compliance requirements more effectively.
    • Phasing the work in sections allows businesses to stay open while minimizing disruptions to customers, employees, deliveries, and daily operations.
    • Clear communication before and during the project helps reduce confusion by outlining closures, parking changes, timelines, and access routes.
    • A successful paving project includes more than new asphalt, since striping, signage, access points, and long-term maintenance all affect performance and usability.

    Optimize Your Paving Schedule, Stay Open, and Keep Customers Happy

    Planning a commercial asphalt paving project can feel overwhelming, especially if your property needs to stay open during construction. Whether you’re paving a retail plaza, office park, medical center, or industrial facility, minimizing disruption is key to maintaining operations and avoiding lost revenue.

    In this article, we’ll walk you through how to plan your commercial paving project efficiently, stay on schedule, and create a smooth experience for employees, tenants, and visitors alike.

    Start with a Site Evaluation and Traffic Flow Review

    Before any asphalt paving begins, request a detailed on-site consultation from a licensed commercial paving contractor. A proper evaluation will include:

    • Current pavement condition
    • Drainage and grading issues
    • Entry and exit points
    • Traffic flow patterns and bottlenecks
    • Heavy-duty zones like loading docks or drive lanes

    This step is essential to understanding what needs to be repaired, replaced, or improved—and how to stage the work to avoid major disruption.

    Choose a Contractor with Commercial Experience

    Not all paving companies are equipped to handle commercial asphalt projects. You’ll want a team that understands:

    • OSHA compliance and safety protocols
    • Commercial equipment access and logistics
    • Communication with multiple stakeholders (tenants, property managers, etc.)
    • Striping, signage, ADA compliance, and fire lane markings

    Ask for references or a portfolio of previous commercial paving work—especially on properties similar to yours, such as shopping centers, medical campuses, or national brand parking lots.

    Schedule Paving in Phases

    To keep your business running, plan your paving in phases. A professional contractor will help divide the project into manageable zones, allowing traffic, deliveries, and parking to continue with minimal interruption.

    Common staging examples include:

    • Paving one half of the parking lot at a time
    • Keeping drive lanes or entry points open at all times
    • Completing work during off-hours, weekends, or holidays

    This approach allows ongoing access for employees, tenants, and customers while the work is completed safely and efficiently.

    Communicate Clearly with Tenants and Visitors

    Once your paving schedule is set, notify all relevant parties well in advance. Send emails, hang signs, and post online updates to let customers and tenants know:

    • Where to park
    • When each section will be closed
    • How long the project is expected to last
    • Who to contact with questions or concerns

    Keeping everyone in the loop will reduce confusion and build trust during the process.

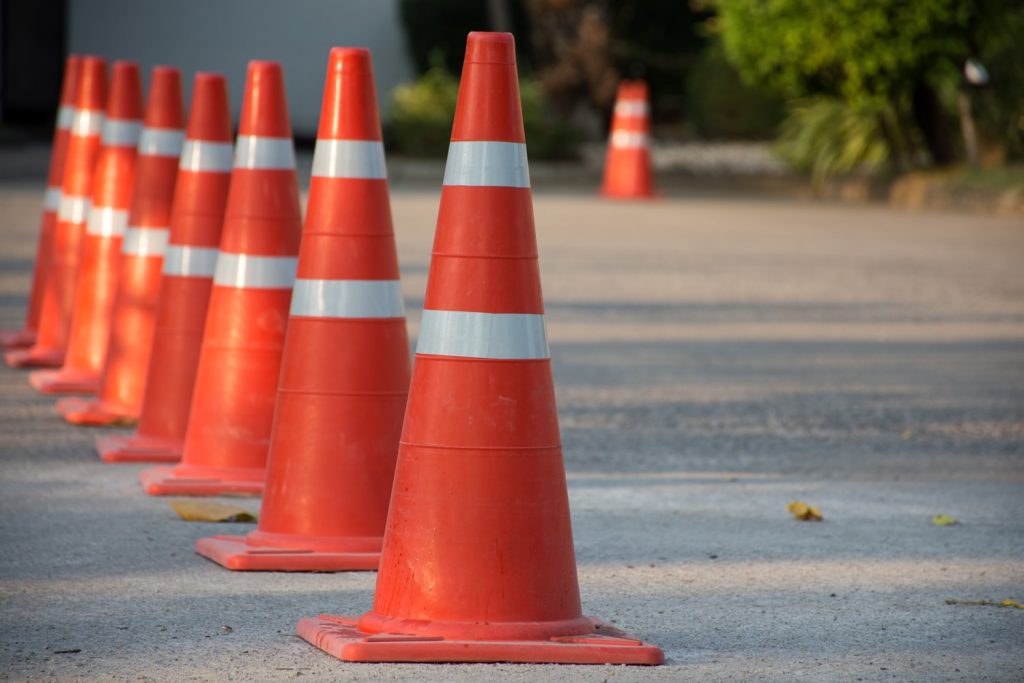
    Traffic cones placed on a commercial parking lot to guide traffic during an asphalt paving project
    Traffic cones help direct vehicles and pedestrians safely during a commercial asphalt paving project.

    Consider Temporary Signage and Traffic Control

    During paving, your commercial site may need temporary signage or cones to redirect traffic or footpaths. Your contractor should supply and install:

    • Safety cones or barriers
    • Temporary directional signs
    • ADA access reroutes if needed
    • Pedestrian guidance signs for walkways

    This keeps everyone safe while maintaining accessibility and business continuity.

    Plan for Final Touches: Line Striping, ADA Compliance & Finishes

    After the asphalt paving is complete, your lot will still need:

    • Fresh parking lot striping
    • ADA-compliant markings and access points
    • Crosswalks, arrows, and fire lane paint
    • Signage, curbing, and bump stops if needed

    Ensure these finishing elements are scheduled and completed promptly so your commercial property is fully functional and compliant.

    Schedule Preventative Maintenance Going Forward

    After investing in new asphalt, protect it. Ask your contractor about:

    • Sealcoating schedules (every 2–3 years)
    • Crack sealing and joint repair
    • Drainage monitoring and surface cleaning
    • Long-term maintenance contracts

    Proactive planning will extend the life of your asphalt and reduce future repair costs.

    Partner with the Right Commercial Paving Contractor

    With the right contractor and a thoughtful plan, your commercial paving project can be completed with minimal disruption, and maximum return on investment. At Maisano Brothers Inc., we specialize in commercial asphalt paving in Connecticut, Massachusetts, Rhode Island and properties nationwide providing phased scheduling, clear communication, and exceptional results.

    Frequently Asked Questions

    What is the first step in planning a commercial asphalt paving project?

    The first step is a site evaluation to review the condition of the pavement, drainage patterns, grading, traffic flow, and access points.

    How can I pave a parking lot without closing my business?

    Most commercial paving projects can be completed in phases so certain sections remain open while work is being done in other areas.

    Why is phasing important in commercial asphalt paving?

    Phasing helps maintain access for customers, employees, tenants, and delivery vehicles while improving safety and keeping operations moving.

    When is the best time to schedule commercial paving?

    The best time depends on your property’s traffic patterns, but many businesses choose off-hours, weekends, or slower periods to reduce disruption.

    What should I communicate before paving begins?

    You should let people know where to park, which areas will be closed, how long the project should take, and who to contact with questions.

    Do I need temporary signage during a paving project?

    Yes, temporary cones, barriers, and directional signs can help guide traffic, improve safety, and maintain pedestrian access during construction.

    What happens after the new asphalt is installed?

    After paving, the site may still need striping, directional arrows, accessible parking markings, curb work, signage, and other finishing details.

    How long should I wait before allowing traffic on new asphalt?

    The exact timing depends on weather, mix conditions, and site use, but your contractor should provide clear guidance before reopening the area.

    How do I protect a newly paved commercial lot?

    Routine maintenance such as crack sealing, drainage monitoring, cleaning, and sealcoating at appropriate intervals can help extend pavement life.

    What should I look for in a commercial paving contractor?

    Look for a contractor with commercial project experience, strong communication, proper equipment, a clear phasing plan, and a track record of quality work.

  • The Asphalt Paving Process: 9 Steps to Proper Asphalt Installation

    The Asphalt Paving Process: 9 Steps to Proper Asphalt Installation

    Key Takeaways
    • The asphalt paving process includes 9 critical steps from evaluation to final inspection
    • Proper grading, base preparation, and compaction are essential for long-term durability
    • The base and subgrade determine how well the pavement performs over time
    • Skipping steps or cutting corners leads to early failure and costly repairs
    • Regular maintenance after installation extends the life of asphalt significantly

    Installing asphalt is more than just laying down blacktop. A properly paved driveway or parking lot depends on preparation, grading, base construction, and precise installation techniques. When done correctly, asphalt pavement can last 20 years or more. When shortcuts are taken, problems like cracking, potholes, and drainage issues can appear much sooner.

    Whether you’re planning a new asphalt driveway or a commercial paving project, understanding the process helps you recognize quality workmanship and make informed decisions.

    Why the Asphalt Paving Process Matters

    Every step in the paving process plays a role in the long-term performance of your pavement. The surface layer may look smooth and finished, but what’s underneath determines how well it holds up over time.

    Proper asphalt installation ensures strength, drainage, durability, and resistance to wear from traffic and weather conditions.

    Step 1: Site Evaluation and Planning

    Before any work begins, the area is evaluated to determine soil conditions, drainage needs, and the scope of the project. This step identifies potential issues such as poor drainage, unstable subgrade, or grading challenges.

    Step 2: Demolition and Removal

    If replacing an existing driveway or parking lot, the old asphalt is removed. This may involve milling or full excavation depending on the condition of the pavement and base.

    Step 3: Grading and Slope Preparation

    Proper grading and slope preparation is critical to ensure water drains away from the surface. Without correct elevation and pitch, water can pool and lead to premature deterioration.

    This step sets the foundation for long-term performance and prevents future structural issues.

    Step 4: Subgrade Preparation

    The subgrade is the native soil beneath the pavement. It must be properly compacted and stabilized to support the layers above. Weak or soft subgrade conditions can lead to failure regardless of how well the asphalt is installed.

    Step 5: Installing the Base Course

    The base layer provides structural support for the asphalt surface. Typically made of crushed stone or aggregate, it is spread and compacted to create a stable foundation.

    A properly installed base ensures load distribution and prevents shifting or settling over time.

    Step 6: Binder Layer Installation

    The binder layer is a strong asphalt layer that adds structural integrity. It contains larger aggregate and acts as a bridge between the base and the surface layer.

    This layer is especially important in areas with heavier traffic loads.

    Step 7: Surface Course Installation

    The surface course is the top layer of asphalt. It provides a smooth, finished appearance and protects the underlying structure from water and environmental exposure.

    This layer is designed for durability, flexibility, and long-term performance.

    Step 8: Compaction

    Compaction is one of the most critical steps in the entire process. Rollers are used to compress the asphalt, eliminate air voids, and ensure proper density.

    Without proper compaction, the pavement may fail prematurely, leading to cracking and deformation.

    Step 9: Final Inspection and Finishing

    After installation, the surface is inspected to ensure proper grading, smoothness, and compaction. Edges are finished, transitions are cleaned up, and the pavement is prepared for use.

    Once cooled and cured, the asphalt is ready for traffic.

    How Long Does Asphalt Installation Take?

    Most residential driveways can be completed within one to two days, depending on size and site conditions. Larger commercial paving projects may take longer due to additional preparation and structural requirements.

    Common Mistakes That Lead to Early Failure

    • Poor base preparation
    • Improper grading or drainage
    • Insufficient compaction
    • Thin asphalt layers
    • Skipping critical steps in the process

    These issues can lead to cracking, potholes, rutting, and costly repairs.

    How to Extend the Life of Your Asphalt

    After installation, proper maintenance is essential to maximize lifespan.

    • Sealcoat every 2–3 years
    • Fill cracks early
    • Keep water draining away from the surface
    • Avoid heavy loads during early curing

    Routine maintenance protects your investment and delays the need for repairs or replacement.

    Conclusion

    The asphalt paving process is a step-by-step system designed to create a durable, long-lasting surface. Each phase—from site preparation to final compaction—plays a critical role in performance.

    Understanding these steps helps ensure your driveway or parking lot is built to last and performs well for years to come.

    Ready to see these steps in action on your own property? Maisano Brothers Inc. has been installing asphalt driveways across Connecticut since 1967. Request a free estimate for your new driveway installation.

    Frequently Asked Questions

    How many steps are in the asphalt paving process?

    There are typically 9 main steps, including site prep, grading, base installation, paving, and compaction.

    What is the most important step in asphalt paving?

    Base preparation and compaction are the most critical for long-term performance.

    How long does asphalt take to cure?

    Asphalt can be driven on within 24–72 hours but continues curing for several months.

    What is the binder layer in asphalt?

    It’s the structural layer between the base and surface course that adds strength.

    Why is grading important before paving?

    Proper grading ensures water drains correctly and prevents premature damage.

    How thick should asphalt be for a driveway?

    Typically 2–3 inches for residential use, depending on base conditions.

    Can asphalt be installed over old pavement?

    Yes, in some cases resurfacing is possible if the base is still stable.