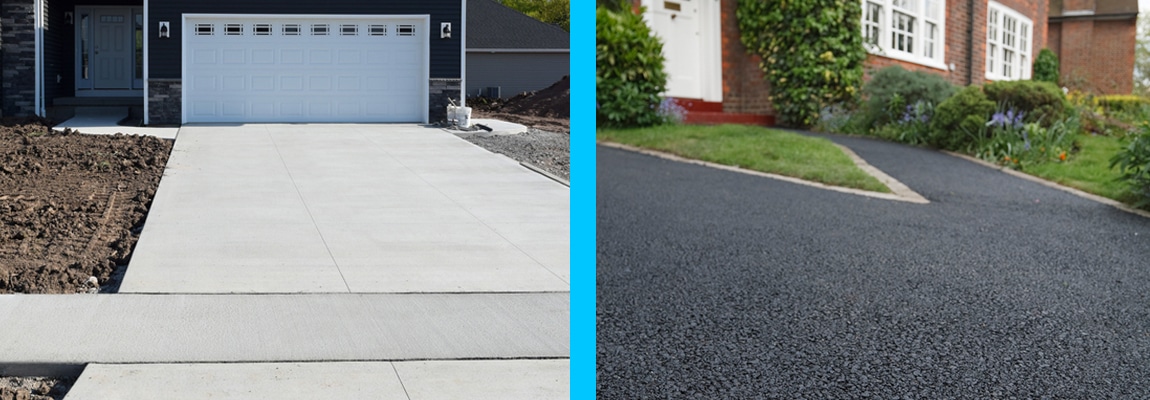
Asphalt usually costs less up front than concrete, while concrete often costs more initially but may last longer.
Asphalt typically lasts about 15 to 20 years with maintenance, while concrete can last 30 years or more with proper care.
Asphalt is generally better suited to colder freeze-thaw climates because it is more flexible, while concrete is more rigid and more sensitive to movement and cracking.
Asphalt needs more routine maintenance such as sealcoating and crack repair, but repairs are usually easier and less expensive than concrete repairs.
Concrete offers more color, texture, and pattern options, making it a stronger choice for homeowners who want a more customized look.
Choosing between an asphalt driveway and a concrete driveway is one of the biggest decisions homeowners make when planning a new installation. Both materials can create a durable, attractive surface, but they perform differently when it comes to cost, maintenance, appearance, climate resistance, and long-term repair needs.
If you are trying to decide between the two, the right answer usually comes down to your budget, your property, your local conditions, and how you plan to use the driveway.
What Is the Main Difference Between Asphalt and Concrete?
The biggest difference is how the material behaves over time. Asphalt is more flexible, which helps it handle freeze-thaw conditions and minor movement in the base. Concrete is more rigid, which can make it very durable in the right conditions but also more prone to cracking when movement occurs.
Asphalt is made with aggregates and asphalt binder, while concrete is made with cement, sand, stone, and water. Because of these differences, the two materials cure, age, and perform differently over time.
Cost Comparison: Asphalt vs Concrete
For many homeowners, budget is where the decision starts. In general, asphalt tends to have a lower upfront cost than concrete.
Understanding the true cost of an asphalt driveway helps put this into perspective. While asphalt is typically more affordable initially, long-term costs depend on maintenance, repairs, and lifespan.
Concrete usually costs more upfront but may last longer under the right conditions. The better value depends on how long you plan to stay in your home and how you maintain the surface.
Lifespan and Durability
Asphalt Driveway Lifespan
Asphalt driveways typically last 15–20 years with proper maintenance. Their flexibility makes them well-suited for areas with temperature fluctuations and seasonal movement.
Over time, asphalt can oxidize, fade, and develop cracks if not maintained properly, but it can often be repaired or resurfaced effectively.
Concrete Driveway Lifespan
Concrete driveway installations can last 30 years or more when properly installed and maintained. However, because concrete is rigid, it can crack when the base shifts or when exposed to harsh freeze-thaw conditions.
Repairs to concrete are often more visible and more difficult to blend compared to asphalt.
[elementor-template id=”4630″]
Maintenance Differences
Asphalt Maintenance
Asphalt requires more routine maintenance, including sealcoating and crack filling. The benefit is that repairs are typically easier, faster, and more affordable.
Sealcoating every 2–3 years
Crack filling to prevent water intrusion
Patching and resurfacing options
Concrete Maintenance
Concrete requires less frequent maintenance but can be more difficult to repair when issues occur.
Occasional sealing
Joint maintenance
More complex repairs if cracking occurs
Appearance and Design Options
Concrete offers more customization options, including stamped patterns, colors, and decorative finishes. This makes it a popular choice for homeowners focused on design and aesthetics.
Asphalt provides a clean, smooth, and uniform appearance that works well for most residential properties. It is more limited in design but offers a classic and practical look.
Climate Considerations
Your location plays a major role in choosing the right material. In regions like the Connecticut climate, asphalt often performs better due to its flexibility and ability to handle freeze-thaw cycles.
Concrete can still perform well but requires proper installation techniques to minimize cracking caused by temperature changes.
Installation Time and Usability
Asphalt can typically be installed faster and used sooner than concrete. In many cases, an asphalt driveway can be completed in one to two days.
Concrete requires a longer curing time, which means you may need to wait several days before using the surface.
Repair and Long-Term Flexibility
Asphalt offers more flexibility when it comes to repairs. It can often be patched, resurfaced, or restored without replacing the entire driveway.
Concrete repairs, while possible, are often more noticeable and may require more extensive work.
Which Is the Better Choice?
Choose Asphalt If You Want:
Lower upfront cost
Better performance in colder climates
Faster installation
Easier repairs and maintenance
Choose Concrete If You Want:
Longer potential lifespan
More decorative options
Less frequent maintenance
Final Thoughts
Choosing between asphalt and concrete comes down to your priorities. Asphalt is often the best choice for homeowners looking for a cost-effective, durable solution that performs well in colder climates. Concrete is a strong option for those prioritizing aesthetics and long-term durability.
The right decision depends on your budget, maintenance expectations, and how your driveway will be used over time.
Whether you choose asphalt or concrete, Maisano Brothers Inc. delivers expert installation built for Connecticut weather. Get a free estimate and let us help you pick the right material for your residential driveway.
[elementor-template id=”4630″]
Frequently Asked Questions
Is asphalt cheaper than concrete for a driveway?
Usually yes. Asphalt at roughly $3 to $7 per square foot and concrete at roughly $4 to $10 per square foot, though actual pricing varies by site and project scope.
Does asphalt last as long as concrete?
Usually no. The current article says asphalt typically lasts 15 to 20 years with maintenance, while concrete can last 30 years or more with proper care.
Which driveway is better in cold weather?
Asphalt is often the better choice in cold climates because its flexibility helps it handle freeze-thaw movement better than concrete.
Which driveway needs more maintenance?
Asphalt typically needs more routine maintenance, including periodic sealcoating and crack repair, while concrete usually needs less frequent maintenance but can be harder to repair when problems develop.
Can oil stains damage an asphalt driveway?
Yes. Petroleum products can soften asphalt and contribute to surface deterioration over time. If you’re dealing with stubborn stains, explore the best commercial degreasers for removing oil stains from asphalt to properly clean and protect your surface.
Is concrete more decorative than asphalt?
Yes. Concrete offers more options for color, texture, pattern, and stamped finishes, while asphalt is more limited aesthetically.
Which driveway can be used sooner after installation?
Asphalt is typically installed faster and can often be used sooner, while concrete takes longer to cure and requires more patience before regular use.
Improper snow removal can damage asphalt through scraping, pressure, and freeze-thaw cycles
Rubber-edged plows are safer than metal blades
Removing snow early prevents compaction and bonding
Deicing materials should be used carefully to avoid long-term damage
Preventative maintenance before winter significantly reduces damage
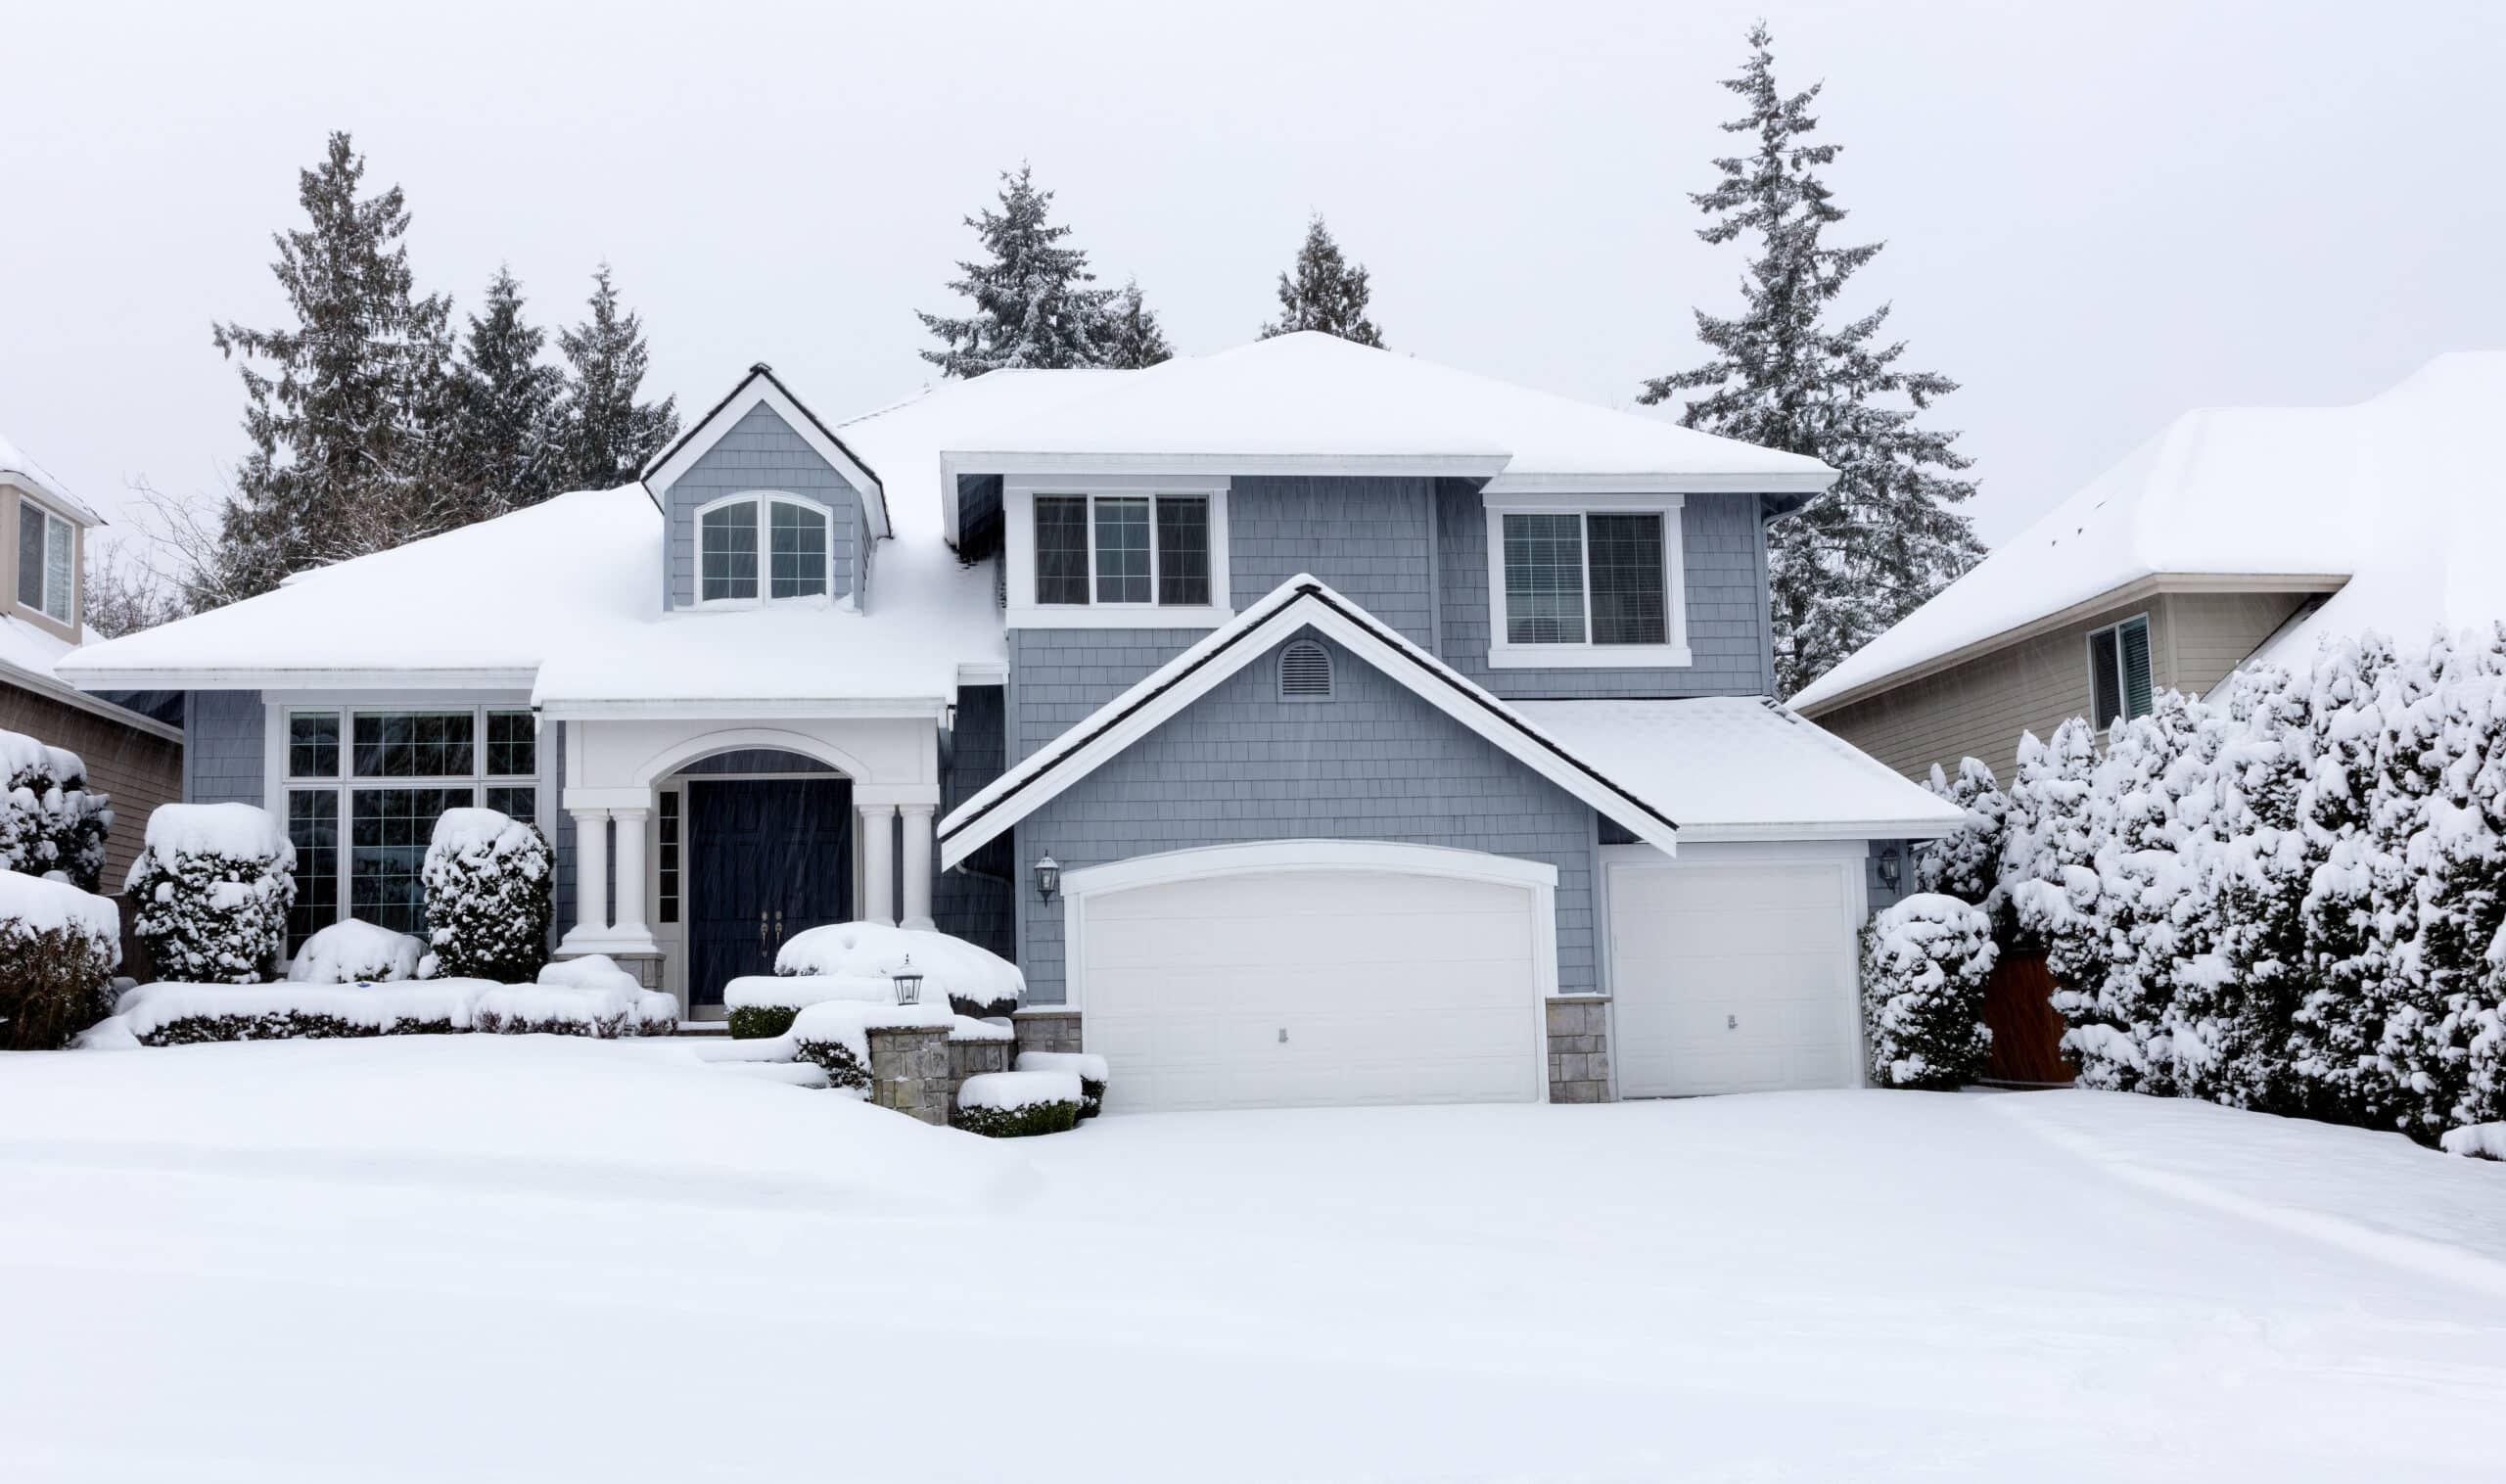
Snow and ice are part of Connecticut winters, but improper snow removal can cause serious damage to asphalt driveways and parking lots. What seems like routine maintenance can lead to scraping, cracking, and long-term deterioration if done incorrectly.
Understanding how to safely remove snow while you protect your asphalt is essential for maintaining the life of your pavement.
Why Snow Removal Can Damage Asphalt
Asphalt is a flexible material, but during colder temperatures it becomes more brittle. This makes it more vulnerable to damage from heavy equipment, sharp plow blades, and improper techniques.
In addition, freeze-thaw cycles allow water to enter cracks and expand, weakening the structure beneath the surface.
Use the Right Snow Removal Equipment
Avoid Metal Blades on Asphalt
Metal plow blades can scrape and gouge asphalt surfaces, especially if the driveway is already worn or cracked.
Instead, use plows with rubber or polyurethane edges to reduce the risk of surface damage.
Adjust Plow Height Properly
Setting the plow blade slightly above the surface helps prevent direct contact with the asphalt, minimizing wear and tear.
Don’t Wait Too Long to Remove Snow
Allowing snow to compact and freeze makes removal more difficult and increases the likelihood of damage. Packed snow can bond to the surface, requiring more aggressive removal methods.
Clearing snow early and consistently is the safest approach.
Be Careful with Deicing Materials
Deicing products can help improve safety, but some materials can impact asphalt over time. If you’re unsure what to use or how much to apply, check out our complete guide to salting asphalt driveways for safe and effective winter maintenance strategies.
Safer Options
Calcium chloride
Magnesium chloride
These are generally less aggressive than traditional rock salt and work effectively at lower temperatures.
Use Salt in Moderation
While salt does not directly destroy asphalt, excessive use can contribute to moisture penetration and accelerate deterioration when combined with freeze-thaw cycles.
Protect Edges and Weak Areas
The edges of asphalt driveways and parking lots are especially vulnerable during winter. Plows can catch edges and cause cracking or breakage.
Take extra care around:
Driveway edges
Transitions to sidewalks or aprons
Areas with existing damage
[elementor-template id=”4630″]
Avoid Heavy Equipment on Residential Driveways
Residential asphalt is typically not designed for heavy commercial plows or equipment. Using oversized machinery can cause stress, especially when the ground is frozen and less flexible.
Use appropriately sized equipment for the surface you’re clearing.
Watch for Freeze-Thaw Damage
Winter conditions create constant expansion and contraction within asphalt. Water enters small cracks, freezes, expands, and then melts, repeating the cycle and weakening the pavement.
Winter often reveals existing weaknesses in asphalt. Once the weather warms up, it’s important to inspect your surface for damage.
Look for:
New cracks
Potholes
Surface raveling
Drainage issues
Addressing these problems early prevents further deterioration.
Preventative Maintenance Before Winter
The best way to protect asphalt during winter is to prepare it ahead of time.
Sealcoating
Sealcoating helps protect asphalt from water infiltration, chemicals, and oxidation.
Crack Filling
Sealing cracks before winter prevents water from entering and freezing beneath the surface.
Drainage Improvements
Ensuring proper drainage reduces standing water and limits freeze-thaw damage.
Conclusion
Snow removal is necessary, but it should be done carefully to avoid damaging your asphalt. Using the right equipment, removing snow early, and maintaining your pavement properly can significantly extend its lifespan.
Winter conditions are tough on asphalt, but with the right approach, you can protect your driveway or parking lot and avoid costly repairs in the spring.
Connecticut winters are tough on asphalt. If your driveway has taken a beating this season, request a free spring inspection from Maisano Brothers. A timely sealcoating application can prevent costly repairs down the road.
Can snow plowing damage asphalt?
Yes. Improper plowing, especially with metal blades, can scrape and damage the surface.
What is the safest way to remove snow from asphalt?
Use rubber-edged plows, remove snow early, and avoid aggressive scraping.
Does salt damage asphalt driveways?
Salt does not directly damage asphalt, but it can contribute to moisture-related deterioration over time.
Should you shovel or plow an asphalt driveway?
Both are fine when done carefully, but avoid sharp tools that can gouge the surface.
When should I repair asphalt after winter?
Repairs should be done in spring once temperatures rise and damage is visible.
How do I protect my driveway before winter?
Sealcoating, crack filling, and proper drainage are the best preventative steps.
Parking structures require ongoing maintenance to remain safe and functional
Routine inspections every 2–3 years help catch problems early
Preventive maintenance is far less expensive than major structural repairs
Water intrusion is the leading cause of garage deterioration
Proactive planning extends the life of parking structures and protects users
Experienced professionals play a critical role in long-term performance
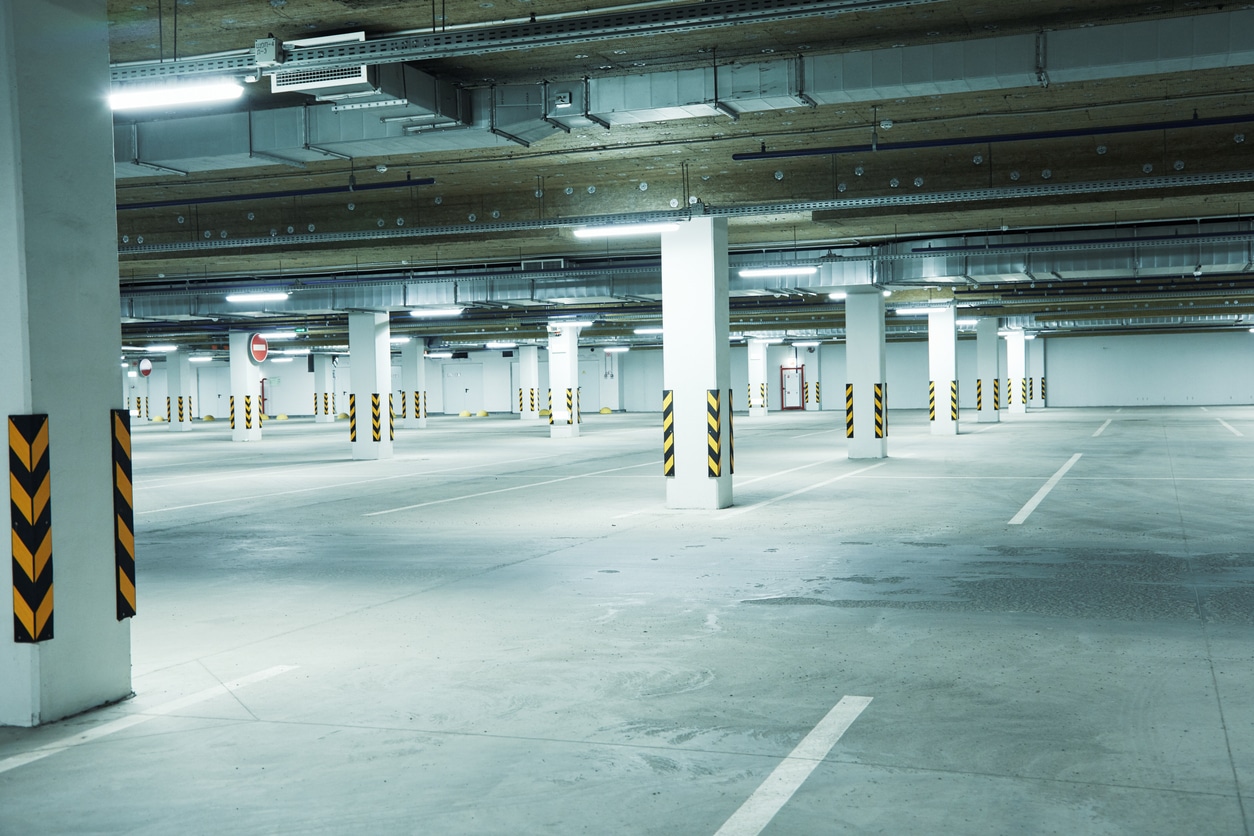
Parking structures are high-value assets for commercial properties, municipalities, and large facilities. They support daily operations, protect visitors and vehicles, and often serve as the first physical interaction someone has with your property. While parking garages are designed for strength and longevity, they are not maintenance-free. Continuous exposure to traffic loads, weather, water infiltration, and deicing chemicals causes gradual deterioration. Without a structured maintenance plan, minor issues can escalate into costly structural repairs or safety risks.
This guide explains why parking structure maintenance matters, how inspections and repairs are typically handled, and how proactive planning protects both your investment and the people who rely on it.
Why Parking Structure Maintenance Matters
Parking garages endure constant stress. Vehicles apply repeated loads. Water penetrates concrete surfaces. Freeze-thaw cycles expand cracks. Chlorides from road salt accelerate corrosion of reinforcing steel. Over time, these forces weaken both concrete and structural components.
Regular maintenance allows property owners to address deterioration early, before it becomes disruptive or expensive. Well-maintained parking structures offer improved safety for drivers and pedestrians, lower long-term repair costs, reduced risk of emergency closures, longer service life, better appearance and user confidence, and compliance with inspection and safety requirements. In most cases, preventive maintenance costs far less than delayed structural rehabilitation.
How Often Should Parking Structures Be Inspected?
Most commercial and municipal parking structures should be professionally inspected every two to three years. High-traffic garages, older facilities, or structures exposed to harsh winter conditions may require more frequent evaluations.
Routine inspections typically include visual reviews of decks, ramps, beams, and columns, identification of cracking, spalling, or exposed reinforcement, evaluation of expansion joints and waterproofing systems, drainage inspections to identify standing water or clogged outlets, and review of previous repair areas to confirm performance over time.
Regular inspections help property managers track deterioration trends and prioritize repairs before conditions worsen.
Common Parking Structure Problems and What They Mean
Concrete cracking allows water to penetrate the structure. When reinforcing steel corrodes, it expands and causes concrete to break away, known as spalling. Left untreated, this can compromise load-bearing elements. Expansion joint failure prevents proper movement and allows water infiltration, accelerating deterioration on lower levels. Deck surface wear caused by traffic, snowplows, and chemicals leads to delamination, potholes, and uneven driving conditions. Water leaks and poor drainage contribute to corrosion, surface damage, and long-term structural weakening. In post-tensioned garages, exposed or damaged tendons require immediate attention due to their role in structural stability.
Recognizing these issues early allows repairs to be completed before safety or structural integrity is affected.
Preventive Maintenance vs. Major Repairs
Preventive maintenance focuses on slowing deterioration and preserving structural integrity. Common preventive services include:
Crack sealing
Joint repair or replacement
Drain cleaning and water management
Waterproofing and traffic coating systems
Localized concrete patching
Surface improvements such as restriping
Major structural repairs are required when deterioration becomes advanced. These may include structural concrete restoration, beam or column reconstruction, parking lot resurfacing, post-tension cable repair, or large-scale waterproofing replacement. These projects typically require engineering review, careful phasing, and professional oversight to minimize operational disruption.
Planning a Parking Structure Maintenance Project
Effective maintenance begins with planning. Property owners should clearly define the scope of work, understand how repairs affect daily parking operations, phase work to keep portions of the garage open when possible, confirm timelines and budgets, and coordinate inspections, permits, and safety requirements. Proper planning reduces downtime, avoids surprises, and keeps projects on schedule.
The Value of Working With Experienced Professionals
Parking structures are complex systems. Repairs require an understanding of structural behavior, materials, and long-term performance. Experienced professionals help identify root causes rather than surface symptoms, recommend durable repair solutions, coordinate engineers and inspectors, manage schedules to minimize disruption, and ensure work meets safety and industry standards. A professional approach transforms maintenance from a reactive expense into a long-term asset strategy.
Frequently Asked Questions
How long do parking structures typically last?
With proper maintenance, many parking structures can remain in service for 40 to 50 years or longer. Neglected structures often require major rehabilitation much sooner.
What is the most common cause of parking garage deterioration?
Water intrusion combined with deicing salts is the leading cause of concrete damage and steel corrosion in parking structures.
Are parking structure inspections required by law?
Requirements vary by location. Some municipalities mandate periodic inspections for older or high-capacity garages. Even when not required, inspections are strongly recommended.
Can repairs be done without closing the entire garage?
Yes. Most maintenance projects can be phased so sections remain open, minimizing disruption to users.
How do I know if a crack is serious?
Surface cracks may be minor, but cracks accompanied by spalling, rust staining, or water leaks should be evaluated by a professional.
Is waterproofing really necessary?
Yes. Waterproofing systems protect concrete from moisture and chemicals, significantly slowing deterioration and extending the structure’s service life.
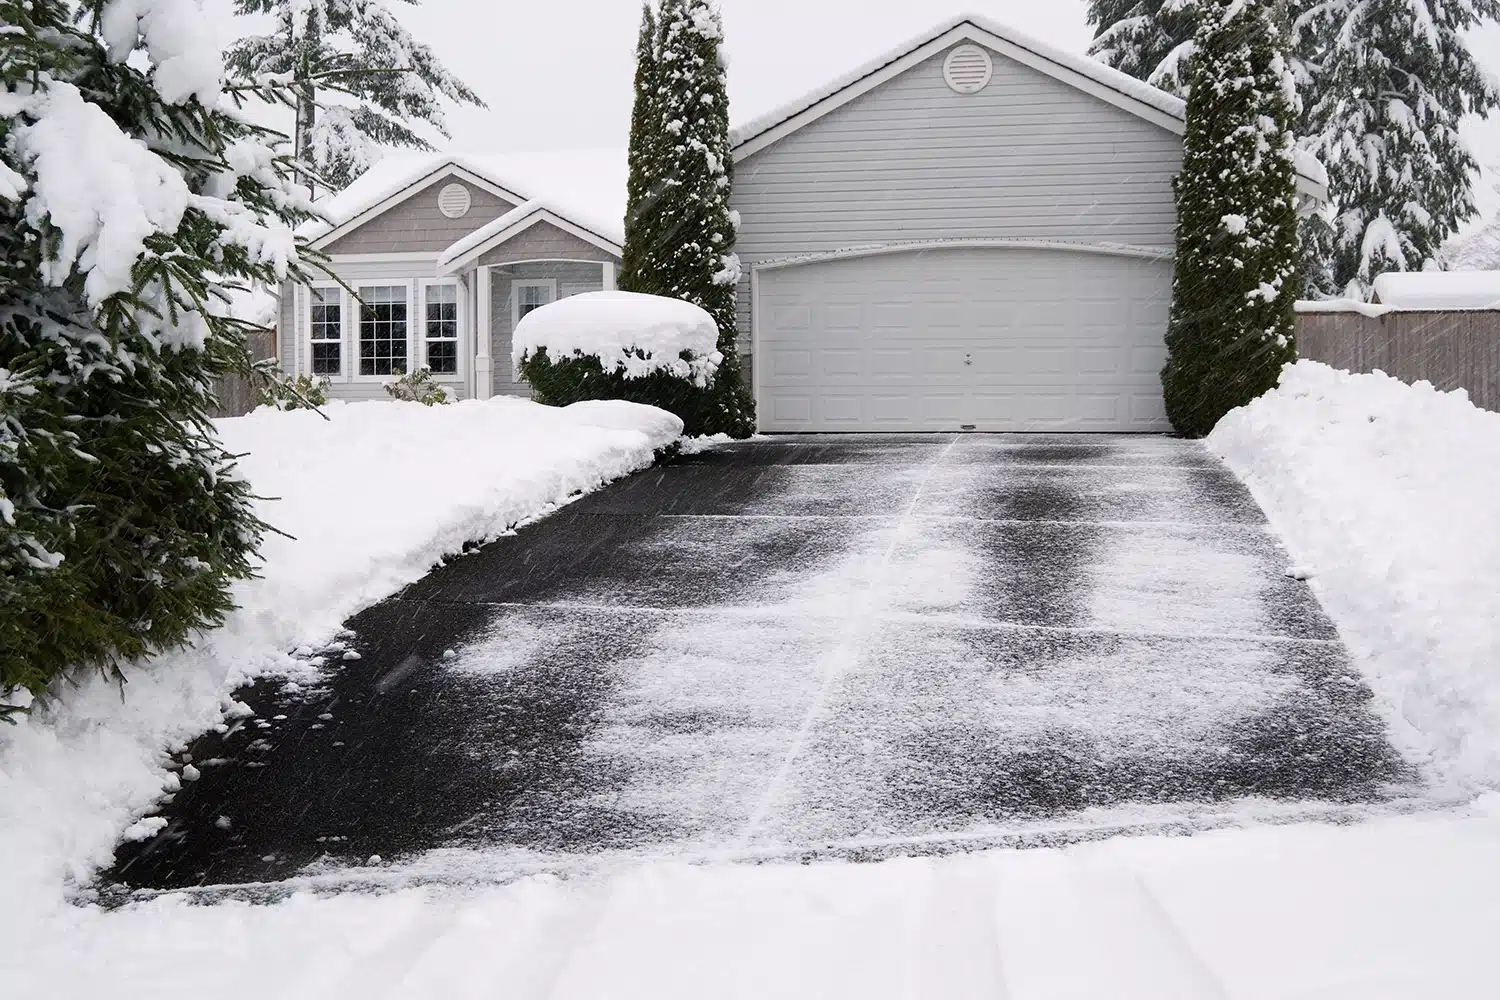
Heated driveways melt snow and ice automatically, improving safety and eliminating the need for shoveling or plowing.
Hydronic systems cost more to install but are typically cheaper to operate on large driveways or commercial sites.
Electric systems are easier to install but can significantly increase energy usage depending on local electricity rates.
Heated driveways reduce salt damage, plow abrasion, and freeze–thaw deterioration, helping protect pavement longevity.
The value of a heated driveway depends on climate, driveway size, energy costs, and whether you’re already planning a surface replacement.
When winter hits, and your driveway is buried under snow and ice, it’s easy to daydream about a heated driveway that clears itself. No more shoveling, no more snow-blower, and no more paying for a plow truck every time there’s a storm.
At Maisano Bros. Inc., we’ve worked with asphalt and concrete in the winter for decades, so we understand both the appeal and the realities of heated driveway systems. Below, we break down how heated asphalt and concrete driveways work, the different system types, pros and cons, electricity usage, and whether this upgrade makes sense for your home or commercial property.
What Is a Heated Driveway?
A heated driveway is a pavement system designed to melt snow and ice by warming the surface from below. Heating elements (either fluid-filled tubing or electric cables) are installed beneath the asphalt, concrete, or pavers. When the system is activated, heat radiates upward through the slab, keeping the surface above freezing and preventing accumulation.
They are commonly controlled by thermostats, snow sensors, or simple on/off switches, and can be used in both residential and commercial settings.
Types of Heated Driveway Systems
Hydronic Radiant Systems
Hydronic heated driveways use a network of flexible plastic tubing (typically PEX) embedded in the driveway slab. A boiler or dedicated water heater warms a mixture of water and antifreeze, which is pumped through these tubes in a closed loop.
Key characteristics:
Heat source: Boiler or water heater (natural gas, propane, oil, or other fuels).
Fluid: Water mixed with antifreeze (often propylene glycol) to protect the system from freezing.
Tubing layout: Tubes are usually spaced 6–8 inches apart in a serpentine or spiral pattern to promote even heat distribution.
Surface options: Can be used under asphalt, concrete, or pavers.
Hydronic systems have higher upfront installation costs because of the boiler, pumps, and piping. However, they can be more economical to operate for large driveways or commercial lots, especially when using lower-cost fuels.
Electric Radiant Cable Systems
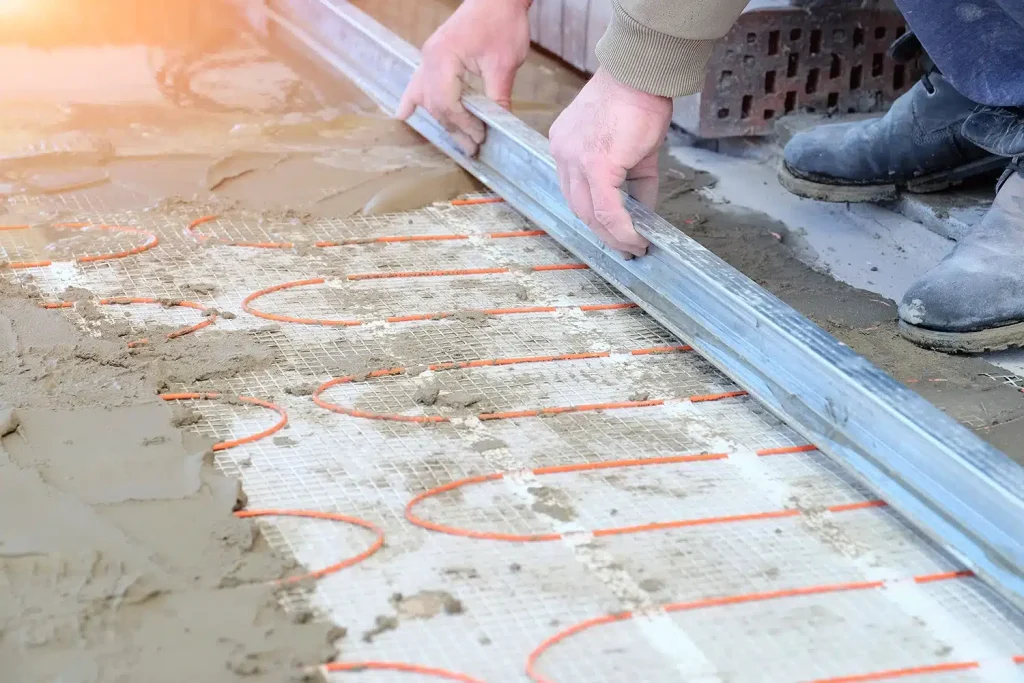
Electric systems use resistance heating cables or mats installed beneath the driveway surface. When electricity flows through the cables, they heat up and transfer warmth to the slab above.
Key characteristics:
Heat source: Electric resistance cables or pre-formed heating mats.
Power density: Often designed in the range of 30–50 watts per square foot, depending on climate and performance goals.
Controls: Wall-mounted control panel with thermostat, timer, and often snow/temperature sensors.
Installation: Typically quicker and simpler than hydronic, especially in new driveway construction.
Electric systems are popular for small to medium-sized residential driveways and walkways. The trade-off is that electricity is usually more expensive per BTU than gas, which can increase operating costs in heavy-snow climates.
Portable Heated Driveway Mats
Heated driveway mats are heavy-duty, slip-resistant rubber mats with embedded electric heating elements. They sit on top of the existing surface and are typically used in pairs to match your vehicle’s tire tracks.
Key characteristics:
No demolition: Lay the mats on the driveway; no need to tear up or repour the surface.
Seasonal use: Plug them in during winter storms and store them in the off-season.
Targeted melting: Usually only covers two narrow tracks rather than the entire driveway width.
Weight capacity: Designed to support vehicle weight while melting snow and ice.
Mats are an ideal “middle ground” for homeowners who want the benefits of a heated driveway without the cost and disruption of a full system.
Installing electric heating cables beneath a concrete slab to create a radiant snow-melt driveway system.
Benefits of Heated Asphalt and Concrete Driveways
Convenience and Time Savings
The biggest benefit is simple: no more shoveling. With a properly sized system, snow and ice melt automatically, often within minutes to a few hours after a storm starts. For busy homeowners and property managers, this is a major time saver.
Improved Safety
Snow shoveling can lead to slip-and-fall accidents, back strain, and even heart issues in extreme cold. A heated driveway significantly reduces the risk of:
Slips and falls on icy surfaces
Injuries from shovels or snowblowers
Exposure to dangerous wind chills
For commercial properties, reducing ice-related incidents can also help limit liability and insurance claims.
A heated driveway dramatically reduces or eliminates the need for salt and deicer products, helping to protect:
The surface course of the asphalt or concrete
The underlying base and subgrade from moisture intrusion
Nearby plants and lawn areas
Your vehicles and outdoor metal fixtures
Protects Your Pavement Investment
Repeated scraping by plow blades and metal shovels can gouge and chip the pavement surface. The combination of physical abuse, salt, and freeze–thaw cycles is a common cause of cracking, spalling, and potholes.
By melting snow and ice instead of scraping and salting, a heated driveway can help extend the useful life of the pavement and reduce long-term maintenance costs.
Low Day-to-Day Maintenance
Once installed and properly commissioned, most heated driveway systems require little routine maintenance. Simple steps might include:
Occasional visual checks of control panels and sensors
Annual boiler or system checks for hydronic setups
Keeping drains and edges clear so meltwater can run off
There is no ongoing “work” comparable to shoveling, plowing, or spreading salt after every storm.
Drawbacks and Limitations of Heated Driveways
High Upfront Installation Cost
Heated driveway systems are a significant investment. Costs vary widely by region and size, but it’s common for a residential heated driveway project to run into the thousands of dollars, especially if you’re:
Hydronic systems usually cost more to install than electric systems because of the boiler, manifolds, and piping. However, they can be more economical to operate for large areas.
Increased Energy Bills
Heating a driveway isn’t free. Depending on the system size, climate, and local energy rates, operating costs can range from modest to significant. Factors that drive energy use include:
Square footage being heated
Snowfall frequency and intensity
Desired performance (always bare vs. “faster melting”)
Electric or fuel costs in your area
We’ll break down electricity usage in more detail in the next section.
Electrical Capacity Requirements
Electric systems, in particular, can draw a lot of power. A system designed at 40–50 watts per square foot can add a large load to your service panel. In some cases, homeowners may need:
A panel upgrade (e.g., from 100A to 200A service)
Dedicated circuits and breakers for the snow-melt system
Careful zoning to avoid overloading the system
Hydronic systems still use electricity for pumps and controls, but the main heating energy comes from the fuel source, not your electrical panel.
Complex Repairs if Something Fails
If a heating cable burns out or a hydronic tube develops a leak, repairs are not as simple as patching a shovel gouge. Locating the problem may require thermal imaging or specialized tools, and accessing it often means cutting or breaking into the slab and repaving.
While modern systems are designed to be durable and failures are relatively rare when installed correctly, repair costs can be high if something does go wrong.
Not Always Ideal for Retrofits
The best time to install a heated driveway is when you’re already planning to install or replace the pavement. Retrofitting an existing driveway can be:
More expensive (extra demolition and disposal)
Disruptive to your property and schedule
Limited by existing grades and drainage
If your current asphalt or concrete is otherwise in good condition, you’ll need to weigh carefully whether the added benefit of heating justifies replacing a functional driveway.
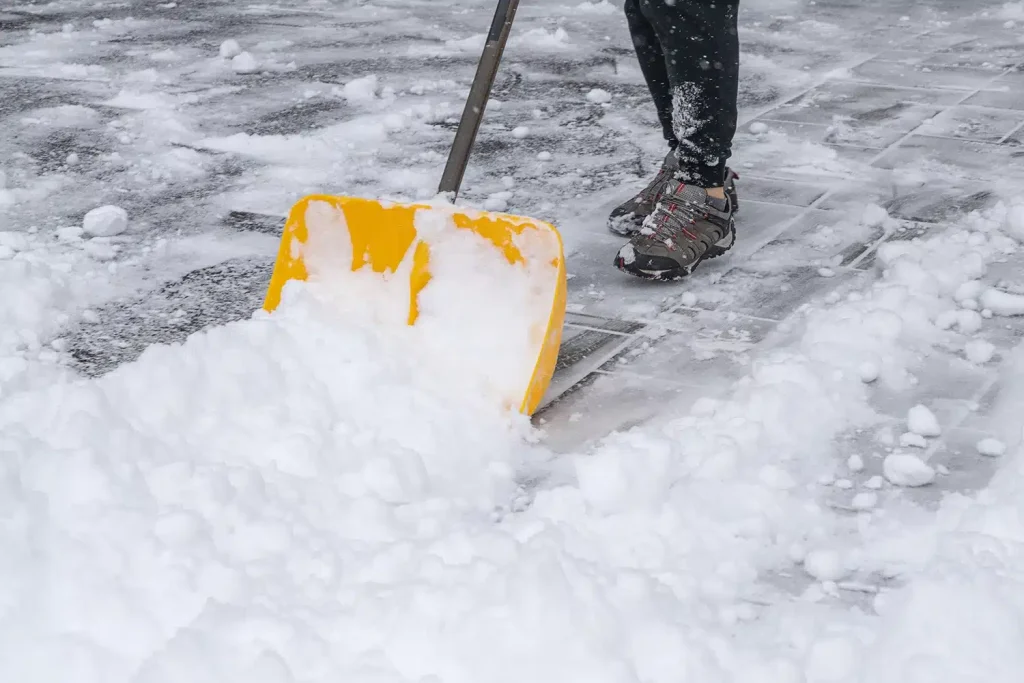
Manual snow removal is labor-intensive—one reason many homeowners upgrade to heated driveway systems.
Electricity Use and Operating Costs
Electric heated driveways are typically designed in the range of 30–50 watts per square foot. To visualize this, consider a 300 square foot driveway section at 40 watts per square foot:
300 sq ft × 40 W/sq ft = 12,000 watts, or 12 kW
If that system runs for 4 hours during a snow event:
12 kW × 4 hours = 48 kWh
At an electric rate of $0.15 per kWh, that storm costs:
48 kWh × $0.15 = $7.20
In a moderate winter with many small storms, those costs add up. In heavy-snow regions, it can be much higher. Using automatic controls, snow sensors, and timers is essential to avoid unnecessary run time.
Managing Energy Use
You can control energy consumption in several ways:
Targeted coverage: Heat only tire tracks or problem areas instead of the full driveway.
Zoning: Split large areas into zones so you don’t run everything at once.
Automated controls: Use snow and temperature sensors to run the system only when necessary.
Idle mode: In hydronic systems, maintain a lower “idle” temperature during a storm to reduce the time needed for full melting.
Local energy rates play a huge role. In deregulated markets, shopping around for a better rate can significantly reduce the operating cost of an electric driveway. For example, homeowners in Texas can compare plans and look for cheap electricity in Houston options to keep winter energy bills more manageable if they opt for an electric system.
Hydronic Operating Costs
In hydronic systems, the primary cost driver is the fuel used by the boiler (natural gas, propane, oil, etc.). Gas-fired systems are often more economical to run than large electric systems, especially for:
Long driveways
Large parking areas
Commercial sites with significant snow-melt requirements
The trade-off is a more complex mechanical system up front, but potentially lower operating costs over the life of the system.
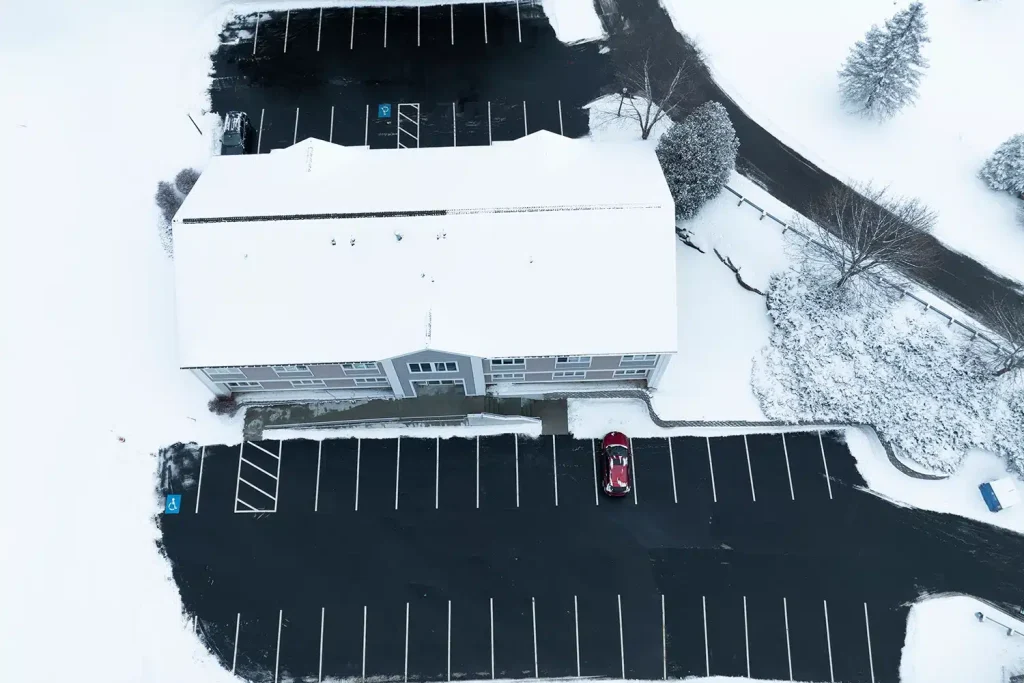
A well-maintained commercial parking lot remains safely accessible after snowfall, reducing hazards and winter maintenance costs.
Residential vs. Commercial Applications
Residential Properties
For homeowners, the primary benefits of a heated driveway are comfort, safety, and convenience. Typical residential use cases include:
Short driveways and walkways in snowy climates
Steep driveways where traction is a concern
Homes where the owner cannot safely shovel due to age or health
High-end custom homes where a snow-free driveway is a desired feature
Most residential systems focus on critical sections – tire tracks, the portion near the garage, the apron by the street, or front entry steps – rather than heating every square inch of pavement.
Commercial and Municipal Properties
On commercial sites, heated pavements are often installed to improve safety, minimize downtime, and reduce ongoing snow-removal costs. Common applications include:
Hospital and medical facility entrances
Hotel drop-offs and valet areas
Shopping centers and office entrances
Parking garage ramps and loading docks
Municipal walkways, steps, and transit platforms
Here, the goal is not just convenience but also reducing slip-and-fall incidents and keeping operations running smoothly during storms.
Is a Heated Driveway Right for You?
Whether a heated asphalt or concrete driveway makes sense depends on several factors:
Climate: How much snow and ice do you get in a typical winter?
Driveway size and layout: Is it short and sunny or long, shaded, and steep?
Budget: Can you justify the upfront investment and ongoing operating costs?
Health and lifestyle: Is shoveling a genuine challenge or risk for you?
Existing pavement condition: Are you already planning to replace your driveway?
For some properties, especially in harsh winter climates, a heated driveway becomes a true quality-of-life upgrade. For others, a combination of good snow removal practices, occasional plowing, and perhaps portable mats may be a more practical solution.
FAQs About Heated Asphalt and Concrete Driveways
Here are some common questions homeowners and property managers ask about heated driveways:
Do heated driveways really work in heavy snow?
Yes, when properly designed and installed, heated driveway systems can keep up with significant snowfall. The key is sizing the system correctly for your climate and performance expectations. Higher wattage or BTU output and tighter spacing between cables or tubes are used in heavy-snow regions to ensure effective melting.
Are heated driveways more suitable for asphalt or concrete?
Both asphalt and concrete can be used successfully with hydronic or electric systems. The choice usually comes down to budget, appearance, and the rest of your property. Concrete offers a clean, durable surface; asphalt provides a slightly more flexible surface and can be easier to repair. What matters most is proper design of the heating system and correct installation over a stable base and subgrade.
How much does it cost to install a heated driveway?
Costs vary widely by location, system type, and driveway size, but most homeowners can expect a project to run into the thousands of dollars. Hydronic systems typically cost more up front than electric due to the boiler and mechanical components. If you are already planning a full driveway replacement, adding heat at that time is usually more cost-effective than trying to retrofit later.
Will a heated driveway significantly increase my electric or gas bill?
There will be an increase in energy usage whenever the system operates. For electric systems, the cost is directly tied to the power density (watts per square foot), system run time, and your local electric rates. Hydronic systems add to your gas or fuel usage. Using snow sensors, timers, zoning, and targeted heating can help keep operating costs reasonable.
Can an existing driveway be converted into a heated driveway?
It’s possible, but not always practical. In many cases, the existing asphalt or concrete must be removed to install the heating system correctly. There are specialty methods like cutting channels in concrete for electric cables, but these approaches are limited. The most cost-effective time to add heat is when you are already replacing or rebuilding the driveway.
How long do heated driveway systems last?
With quality materials and professional installation, both hydronic and electric systems can last decades. The heating elements are protected within the slab. Boilers, pumps, and electronic controls may need replacement over the life of the system, similar to other mechanical equipment in a home or building.
Do heated driveways damage the pavement?
When properly designed, a heated driveway should not damage the pavement. In fact, reducing freeze–thaw cycles, salt use, and plow damage can help extend pavement life. Issues like cracking can occur if there are extreme temperature differences or poor installation practices, which is why design and installation should be done by experienced professionals.
Are heated driveway mats a good alternative to a built-in system?
For many homeowners, yes. Mats are less expensive, don’t require demolition, and can be used only when needed. They’re especially useful for short or occasional snow seasons. However, they typically only clear narrow tracks, not the entire driveway, and require manual setup and storage.
If you’d like to discuss whether a heated asphalt or concrete driveway makes sense for your property, a professional paving contractor can evaluate your site conditions, climate, and budget to help you decide on the right approach and the right system before your next winter season arrives.
Cold weather makes asphalt repair challenging, but proper materials and preparation can yield effective results until permanent fixes are possible in warmer months.
Winter Repair Challenges
Frozen surfaces and moisture prevent good adhesion.
Hot mix asphalt isn’t available in most regions during winter.
Poor compaction from cold materials reduces repair strength.
Cold-Weather Repair Solutions
Use cold patch asphalt designed for winter application.
Remove ice, debris, and standing water before filling potholes.
Compact the material firmly to reduce settling.
Plan to re-seal or resurface once temperatures rise.
Temporary cold patching keeps driveways safe and functional through winter until permanent repairs can be made in spring.
Rutting accelerates under heavy loads and high temperatures.
Strong, well-drained foundations and adequate base thickness are essential.
Use rut-resistant mixes, performance-graded/polymer-modified binders, and Balanced Mix Design.
Compaction quality and drainage management make or break performance.
Inspect and maintain routinely; intervene early to avoid reconstruction.
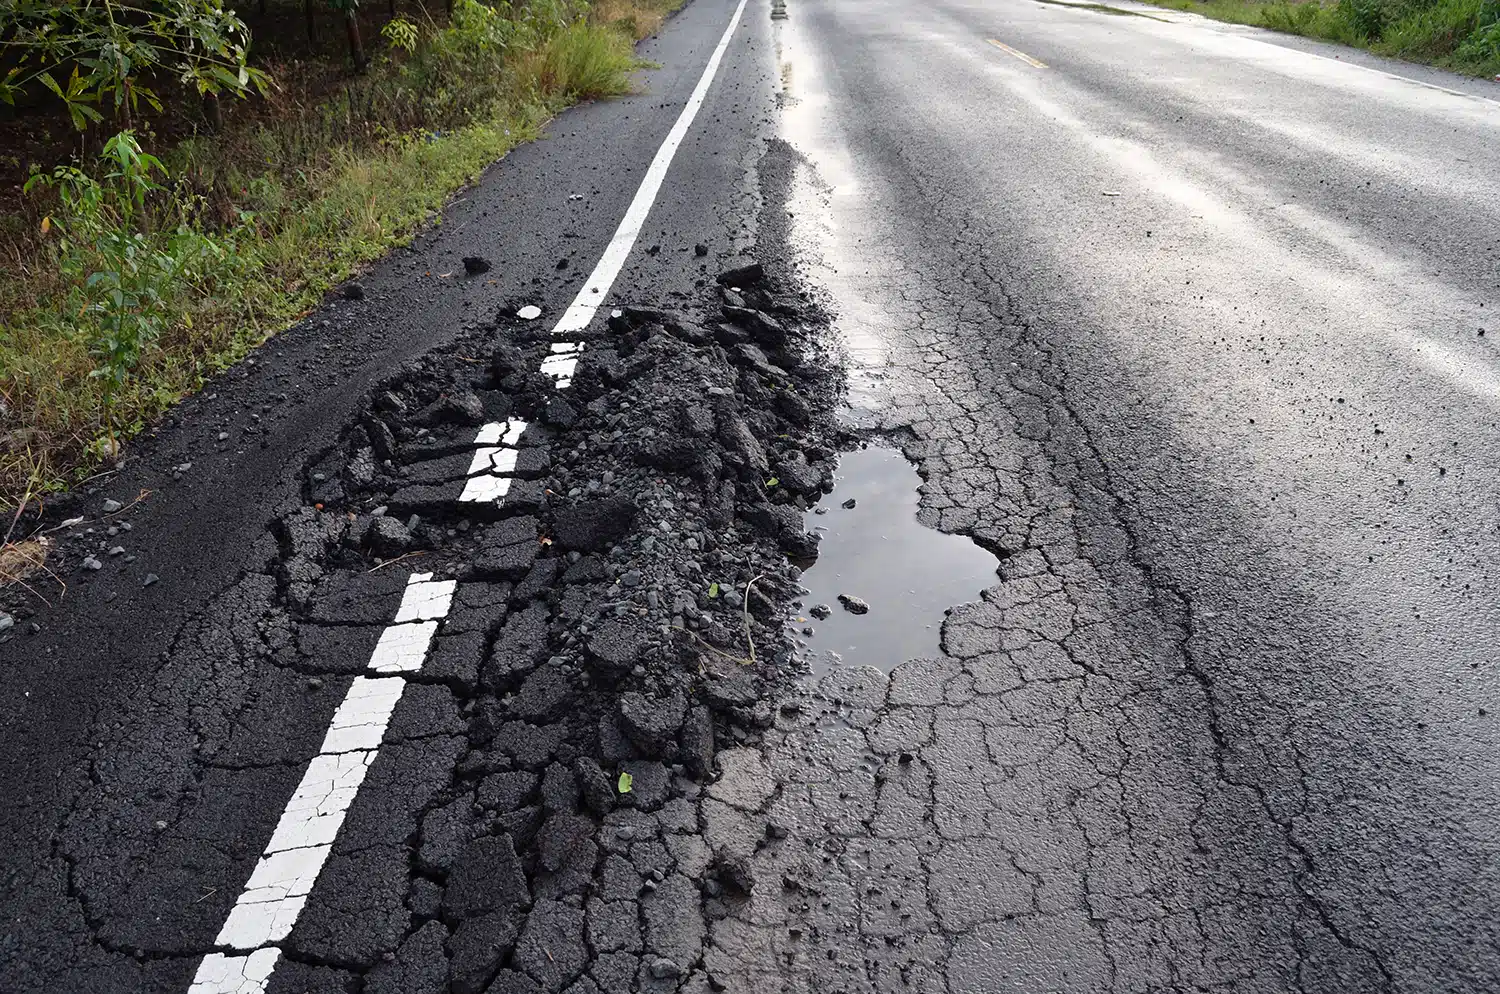
Asphalt rutting is a pavement distress characterized by longitudinal depressions in wheel paths. These grooves form when pavement layers or the underlying soil deform under repeated traffic loads. Rutting is most visible after rain as water collects in the depressions. Left untreated, it reduces ride quality, increases hydroplaning risk, and accelerates structural failure. Understanding causes and applying best-practice design and maintenance can significantly extend the life of driveways, parking lots, and roads.
What Causes Asphalt Rutting?
Traffic Loads and High Temperatures
Rutting is a load-related distress. Repeated wheel loads compact or laterally move asphalt, and the effect accelerates at higher pavement temperatures when the binder softens. Heavy axle loads (trucks, forklifts, delivery traffic) intensify rutting, especially during hot weather.
Subgrade Stability
The subgrade (supporting soil) must be uniform and well-compacted. Weak, poorly compacted, or saturated subgrade allows the pavement to deflect and settle, creating structural ruts often accompanied by cracking. Water intrusion and variable soils are common triggers.
Subbase Thickness & Load Distribution
The aggregate base distributes loads to the subgrade. If base layers are too thin or inadequately compacted, the asphalt above will rut. Typical ranges:
Residential driveways: 2–3 in asphalt over 4–6 in compacted aggregate base.
Light-duty commercial lots: 3 in asphalt over 6–8 in base.
Heavy-duty truck areas: 4–6 in asphalt over 8–12 in base.
Asphalt Mix Design
Unstable mixes (excess binder, poor gradation, rounded aggregates) are prone to rutting. Modern Superpave mix design, stone-matrix asphalt (SMA), and performance-graded binders improve rut resistance when paired with proper quality control and lab performance tests (e.g., Hamburg wheel tracking, IDEAL-RT).
Polymer-Modified Asphalt & Additives
Elastomeric polymers (e.g., SBS/SBR), plastomers (e.g., polyethylene), crumb rubber, and chemical modifiers increase high-temperature stiffness and elasticity, improving rut resistance while often enhancing fatigue and thermal cracking performance.
Balanced Mix Design (BMD) uses performance tests to verify rutting, cracking, and moisture resistance before a mix is approved. Rather than relying only on volumetrics, BMD adjusts binder content, polymer modification, and recycled content to meet performance thresholds.
Recycled materials (e.g., RAP, crumb rubber, some recycled plastics) can increase stiffness and rut resistance; blends with polymers or rubber can balance cracking performance. Performance testing is essential to ensure overall durability.
Compaction & Densification
Insufficient compaction during paving leads to post-construction densification under traffic, manifesting as ruts. Achieving target density at the proper mat temperature with appropriate rolling patterns is critical.
Drainage & Moisture
Water is the enemy of pavement. Positive surface cross-slope, functioning gutters/inlets, and subsurface drains (where needed) keep the base and subgrade dry. Saturated layers lose strength and rut more quickly.
Environmental Factors
Freeze-thaw cycles, extreme heat, and seasonal temperature swings influence rutting rates. Northern climates often benefit from thicker sections and robust drainage; hot climates from rut-resistant mixes and polymer-modified binders.
Effects on Safety & Pavement Performance
Safety: Water-filled ruts increase hydroplaning risk and vehicle tracking.
Serviceability: Ruts degrade ride quality and can lead to secondary cracking and potholes.
Drainage upkeep: Keep inlets, gutters, and underdrains clear; preserve cross-slope.
Timely intervention: Mill/overlay before ruts deepen; reconstruct where structural rutting is severe.
Case Studies
Polymer-modified overlay on a hot-weather corridor: A truck route prone to summer rutting received an SBS-modified surface mix. Post-construction monitoring showed notable reductions in rut depth and longer resurfacing intervals compared to the previous conventional mix.
Stabilized base for a delivery-intensive commercial lot: A distribution center addressed subgrade soft spots with undercut, geotextile, and a thicker base, then paved with an SMA surface. After multiple winters and heavy truck traffic, rutting remained minimal.
Frequently Asked Questions
What is asphalt rutting?
Longitudinal depressions in wheel paths are caused by permanent deformation of asphalt layers and/or supporting soils under repeated traffic.
What causes rutting in driveways and parking lots?
Heavy loads and high pavement temperatures
Weak or saturated subgrade
Insufficient base thickness
Poor/unstable mix design
Inadequate compaction
Poor surface/subsurface drainage
How can I prevent rutting on my driveway or parking lot?
Prepare and compact the subgrade; use geotextiles on weak soils
Install adequate base thickness for expected loads
Specify rut-resistant mixes (Superpave/SMA) and, where appropriate, polymer-modified binders
Ensure proper compaction at the correct temperatures
Maintain drainage and seal cracks regularly
Do recycled plastics or rubber help?
They can increase stiffness and rut resistance. Balanced Mix Design and performance testing are essential to ensure that crack resistance and overall durability are maintained.
Can rutting be fixed once it starts?
Yes. Shallow ruts may be addressed with thin overlays after leveling. Moderate ruts are typically milled and overlaid. Severe, structural rutting may require full-depth reclamation or reconstruction.
Asphalt overlays (resurfacing) add a new 1.5–2 inch layer of asphalt over existing pavement, restoring function and appearance.
Overlays work best when the base is stable, cracks are surface-level, and drainage is adequate.
A properly installed overlay can last 10–15 years with routine sealcoating and crack repairs.
Severe cracking, poor drainage, or weak subbase means replacement is the better long-term option.
Overlays are more cost-effective and faster than full replacement, making them ideal for driveways and parking lots in good structural condition.
You can only resurface asphalt up to two times before replacement becomes necessary.
When your driveway or parking lot starts showing cracks, potholes, or fading, the question arises: Do I need to replace it completely, or can new asphalt be laid over the old surface? The answer: sometimes you can overlay, sometimes you can’t. It depends on the condition of the existing pavement.
At Maisano Bros. Inc., we’ve helped homeowners and businesses across Connecticut and beyond make the right call for over 60 years. Below, we explain how overlays work, when they’re worth it, and when a full replacement is the smarter investment.
What Is an Asphalt Overlay?
An asphalt overlay—also called resurfacing—is the process of adding a new 1.5–2 inch layer of hot mix asphalt on top of existing pavement. Instead of removing the old driveway or parking lot entirely, we prepare the surface, correct problem areas, and then apply a fresh layer that bonds tightly to the base.
This approach restores function, improves curb appeal, and extends pavement life at a fraction of the cost of replacement. Curious about new installation budgets? Try our Asphalt Cost Calculator to explore approximate ranges.
When Is an Overlay a Good Option?
Overlaying is a smart solution when the pavement is worn but still structurally sound. Situations where resurfacing works best include:
Stable Base: The foundation (subbase) is solid and hasn’t shifted.
Surface-Level Damage Only: Small cracks or light wear without deep structural failure.
Limited Potholes: A few can be patched before overlaying, but widespread potholes are a red flag.
Proper Drainage: No standing water or low spots that will trap moisture.
Even Surface: No major sinking or uneven settlement.
When these conditions are met, an overlay can extend pavement life by 10–15 years, especially if paired with ongoing driveway sealcoating and maintenance.
When an Overlay Won’t Work
Overlaying isn’t always the right fix. Sometimes the old pavement is too damaged or unstable to support a new layer. Cases where full replacement is required include:
Severe Cracking: Alligator cracking or deep fractures signal base failure.
Widespread Potholes: Multiple potholes compromise the surface too heavily.
Drainage Problems: Poor grading or standing water will undermine overlays.
Multiple Past Overlays: Adding too many layers can raise the surface above curbs, garage floors, or drains.
Weak Subbase: If the foundation is unstable, overlaying will only mask the problem.
In these cases, a new driveway installation or full-depth reconstruction is the best long-term solution.
Benefits of Asphalt Overlays
Why do so many property owners choose overlays? Because they offer big advantages:
Cost-Effective: Less material and labor mean overlays are more affordable than replacement.
Quick Installation: Most projects are completed in just days, reducing downtime for homeowners and businesses.
Curb Appeal: A smooth, dark black finish boosts property value and makes a strong first impression.
Extended Lifespan: With proper upkeep, overlays add another decade or more of usability.
Eco-Friendly: By reusing the existing pavement, overlays conserve resources and minimize landfill waste—part of the same philosophy behind asphalt recycling.
Tips for a Successful Overlay
Choosing resurfacing doesn’t guarantee success—it needs to be done right. Here are expert tips:
Get a Professional Inspection: A trained contractor should assess your asphalt, subbase, and drainage before recommending an overlay.
Repair First: Potholes, cracks, and weak spots must be patched before resurfacing.
Fix Drainage: If water pools on your pavement now, it will only get worse after an overlay. Proper grading is key.
Limit to Two Overlays: Each overlay adds thickness. After two, replacement is the only way forward.
Maintain It: Sealcoat every 2–3 years and fix cracks promptly to get the most from your overlay.
Overlay vs. Replacement: Which Is Right for You?
Overlay = best for pavements that are worn but structurally sound. Replacement = best for pavements with base failure, drainage issues, or extensive damage.
Typically, 10–15 years with proper installation and maintenance.
2. How many times can you overlay asphalt?
No more than two overlays should be applied. Beyond that, pavement height and structural integrity become issues.
3. Is an overlay cheaper than a replacement?
Yes. Overlays save on material and labor, but if your base is failing, replacement is more cost-effective long term.
4. Will cracks show through a new overlay?
Small cracks can be sealed before resurfacing. Deep cracks will eventually reflect through unless the base is repaired.
5. Does an overlay fix drainage problems?
No. Drainage must be corrected before the overlay, or water damage will return.
6. Can asphalt overlays be done in winter?
No. Overlays need warm, dry conditions. The best time is spring through early fall.
Final Thoughts
Yes—you can put new asphalt over old asphalt, but only when conditions are right. Overlays are a cost-effective, fast solution that can add years of life to your pavement. But when the base is weak or drainage is poor, full replacement is the best investment.
At Maisano Bros. Inc., our team evaluates every project honestly to recommend the right path forward. Whether you need an overlay, a driveway repair, or a complete rebuild, we deliver results that last.
Contact us today for a free estimate and see why homeowners, businesses, and municipalities have trusted Maisano Bros. for over six decades.
Asphalt is 100% recyclable and is reused more than paper, plastic, or glass, making it one of the most sustainable building materials.
The recycling process involves milling, crushing, reheating, and mixing reclaimed asphalt pavement (RAP) into new surfaces.
Recycled asphalt saves money by reducing the need for new aggregates and asphalt binder, lowering both material and transportation costs.
Using RAP conserves natural resources, cuts landfill waste, and reduces energy consumption compared to producing all-new asphalt.
Asphalt recycling demonstrates how reusing materials can be both practical and sustainable — a lesson that applies to all types of recycling.
Asphalt is one of the most widely used construction materials in the world, covering everything from residential driveways to interstate highways. In the United States alone, millions of tons of asphalt pavement are produced each year to build and maintain critical infrastructure. What many people don’t realize, however, is that asphalt is also one of the most recycled materials on the planet. In fact, more asphalt is recycled annually in the U.S. than paper, plastic, aluminum, or glass combined.
This process, known as asphalt recycling, allows old pavement to be reclaimed and reused to build new roads, driveways, and parking lots. The result is a system that reduces waste, conserves resources, and saves money — all while delivering surfaces that are just as strong and durable as those made from entirely new materials.
What Is Asphalt Recycling?
Asphalt recycling is the practice of reusing old asphalt pavement by reclaiming the material, processing it, and blending it into new asphalt mixtures. In the paving industry, the material is referred to as RAP (Reclaimed Asphalt Pavement). RAP is produced when existing pavement is removed during resurfacing or reconstruction projects. Instead of hauling this material to a landfill, contractors recycle it and put it back into service.
One of the reasons asphalt is so easily recycled is that it is made of two main components: aggregates (stone, sand, and gravel) and an asphalt binder (a petroleum product that holds the aggregates together). When pavement is reclaimed, both the aggregates and the binder can be reused. This not only reduces the demand for virgin materials but also lowers the cost of production.
How the Asphalt Recycling Process Works
Depending on the project specifications, recycled asphalt content can range from 10% to 100%. For more information on recycling methods and standards, check out RecycleFind’s asphalt recycling resources
1. Milling or Removal
The first step is to remove the existing asphalt surface. This is often done with milling machines that grind the pavement into small, manageable pieces without disturbing the underlying base layers. Milling is highly efficient and allows contractors to recycle the material right on site.
2. Crushing and Screening
Once the old asphalt has been removed, it is processed in a crushing and screening plant. This ensures that oversized chunks, debris, and impurities are removed, and the material is ground to the correct size for reuse.
3. Reheating and Mixing
The processed RAP is then reheated and blended with fresh asphalt binder and new aggregates as needed. Depending on the project specifications, recycled asphalt content can range from 10% to 100%. Advances in technology now allow for higher percentages of RAP without compromising quality.
4. Repaving and Compaction
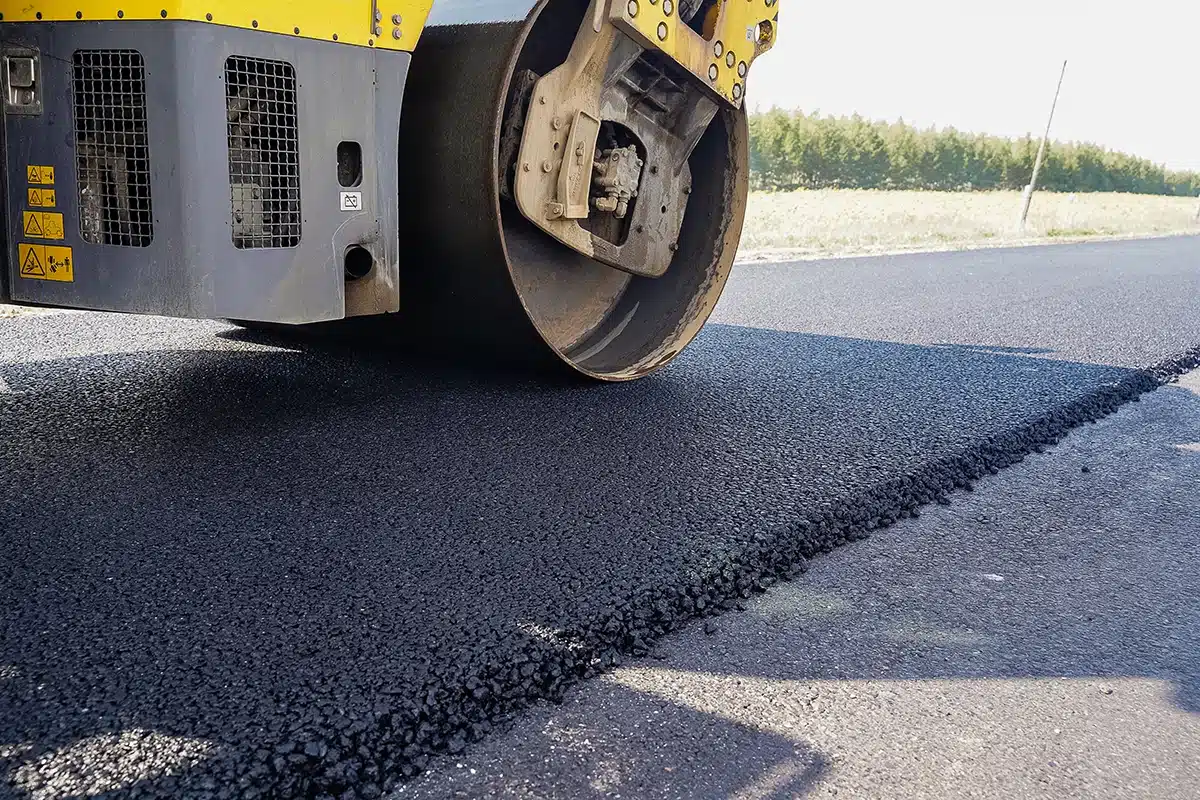
Finally, the recycled asphalt mix is laid down, compacted with rollers, and smoothed into a new driving surface. The result is a pavement that performs just as well — and in many cases better — than surfaces made with entirely new materials.
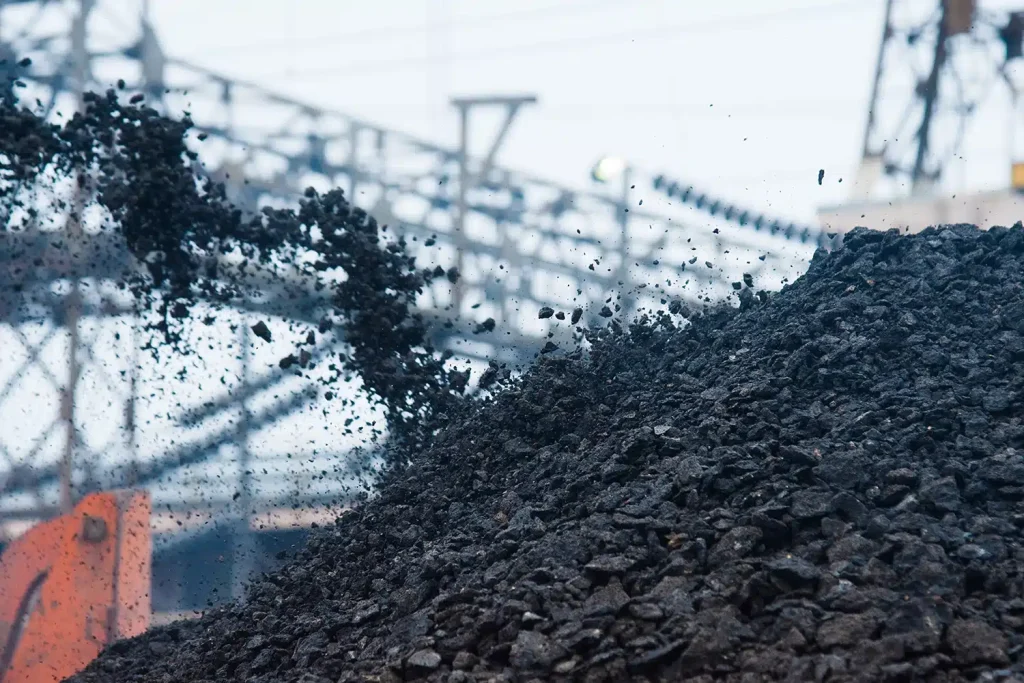
Reclaimed asphalt pavement (RAP) is crushed and screened before being reused in new projects.
Why Asphalt Recycling Is Used
The use of recycled asphalt isn’t just about being environmentally friendly — it’s also about practicality and efficiency. Contractors, municipalities, and property owners choose asphalt recycling for three main reasons:
It reduces project costs. Asphalt binder is one of the most expensive components of pavement, and recycling allows it to be reused.
It conserves natural resources. Aggregates such as stone and sand are finite materials. Reusing them helps preserve quarries and natural landscapes.
It supports sustainability initiatives. Many state and federal transportation agencies set requirements for recycled content in asphalt mixes, making recycling the industry standard rather than the exception.
Benefits of Asphalt Recycling
1. Environmental Benefits
Recycling asphalt keeps millions of tons of waste out of landfills every year. It also reduces the need for mining and quarrying, which lowers the environmental footprint of paving projects. Fewer raw materials mean fewer emissions, less water consumption, and less strain on natural ecosystems.
2. Cost Savings
Using RAP lowers material costs significantly. Since much of the aggregate and binder is already present in the recycled material, contractors don’t have to purchase as many new raw materials. This makes projects more affordable for municipalities, businesses, and homeowners alike.
3. Durability and Performance
Contrary to common assumptions, recycled asphalt is not weaker than new asphalt. In fact, when properly processed and mixed, recycled asphalt performs just as well. It resists cracking, rutting, and moisture damage — critical features in both high-traffic parking lots and residential driveways.
4. Energy Efficiency
Producing new asphalt requires high energy input, particularly in refining petroleum for binder. Recycling dramatically reduces that demand, leading to lower energy consumption and fewer greenhouse gas emissions.
5. Flexibility in Application
Recycled asphalt can be used in a wide range of applications, including:
New roadways and highways
Residential driveways
Parking lots
Base or subbase layers for construction projects
Cold mix asphalt for patching and repairs
This flexibility makes it one of the most versatile recycled materials available.
Industry Adoption and Growth
Today, asphalt recycling is a standard practice across the United States. According to the Federal Highway Administration, nearly 100 million tons of RAP are collected every year, with over 80% of it being reused. State Departments of Transportation often require contractors to incorporate recycled materials into paving projects, both to reduce costs and to meet environmental goals.
The growth of asphalt recycling is also driven by advances in technology. Modern asphalt plants can handle higher percentages of RAP while maintaining quality control. Warm-mix asphalt technology further improves the efficiency of the process by lowering the production temperatures required, which reduces fuel consumption and emissions.
Asphalt Recycling in Everyday Life
For property owners, asphalt recycling means that the new driveway or parking lot being installed may contain material from a road just down the street. For municipalities, it means budget dollars stretch further, allowing for more miles of roads to be resurfaced each year. For businesses, it means reduced downtime and cost savings on large-scale parking lot projects.
Recycled asphalt isn’t just a construction material — it’s a symbol of how infrastructure can be built more sustainably without sacrificing quality.
The Bigger Picture: Why All Recycling Matters
Asphalt recycling is one of the best examples of how industries can close the loop on waste, but it’s not the only one. Metals, plastics, paper, and even organic materials like wood and food scraps can be recycled or repurposed to reduce waste and conserve resources.
The lesson here is simple: when we recycle, we give materials a second life. For asphalt, that means smoother roads and safer driveways. For aluminum, it means fewer mining operations. For plastics, it means cleaner oceans. For paper, it means fewer trees are cut down.
Each act of recycling, whether large-scale in construction or small-scale at home, contributes to a more sustainable future. Asphalt shows us that recycling can be practical, cost-effective, and high-performing. The same principles apply when we recycle bottles, cans, electronics, or yard waste.
By rethinking what we throw away, we can reduce our environmental footprint, save money, and build a cleaner, more sustainable world for generations to come.
Final Thoughts
Asphalt recycling is proof that sustainability and practicality can go hand in hand. The process saves natural resources, lowers costs, reduces landfill waste, and delivers high-quality pavement that stands the test of time. It’s a success story that demonstrates the value of recycling — not only in construction but in every aspect of our lives.
When we choose to recycle, whether it’s asphalt from a highway or bottles from our kitchen, we make a positive impact. Asphalt may pave the way, but recycling in all its forms is what helps us build a stronger, greener, and more responsible future.